See? Who said summer treats had to be packed with refined sugar to be good? These seven recipes prove that nature provides all the sweetness we need. We’ve got hydrating watermelon, creamy tropical coconut, a sophisticated spiced peach, and yes, even hidden veggies.
Making your own popsicles is a total game-changer. They’re healthier, cheaper, and you can customize them endlessly. Plus, there’s just something so satisfying about pulling a homemade treat out of the freezer on a scorching hot day. They are simple, they use just a handful of fresh ingredients, and I can promise you—from one foodie to another—they are absolutely delicious.
So, ditch the sugar crash and embrace the freeze. You deserve a cooldown that actually makes you feel good. Now, if you’ll excuse me, I have a watermelon-lime popsicle calling my name. Happy summer, and happy freezing!
Let’s be honest: summer without popsicles is just… sweaty. Who has time for boring, single-flavor sticks when we could have a multi-layered masterpiece? Making your own layered popsicles sounds fancy, but IMO, it’s one of the easiest ways to totally impress people with basically zero cooking skills required. It’s all about patience and a little bit of freezer magic.
Forget spending a fortune on those trendy, artisanal pops. We’re going DIY, getting creative, and making eight vibrant, fun, and seriously refreshing treats that’ll make your taste buds (and your Instagram feed) very, very happy. Grab your popsicle molds, folks—let’s do this.
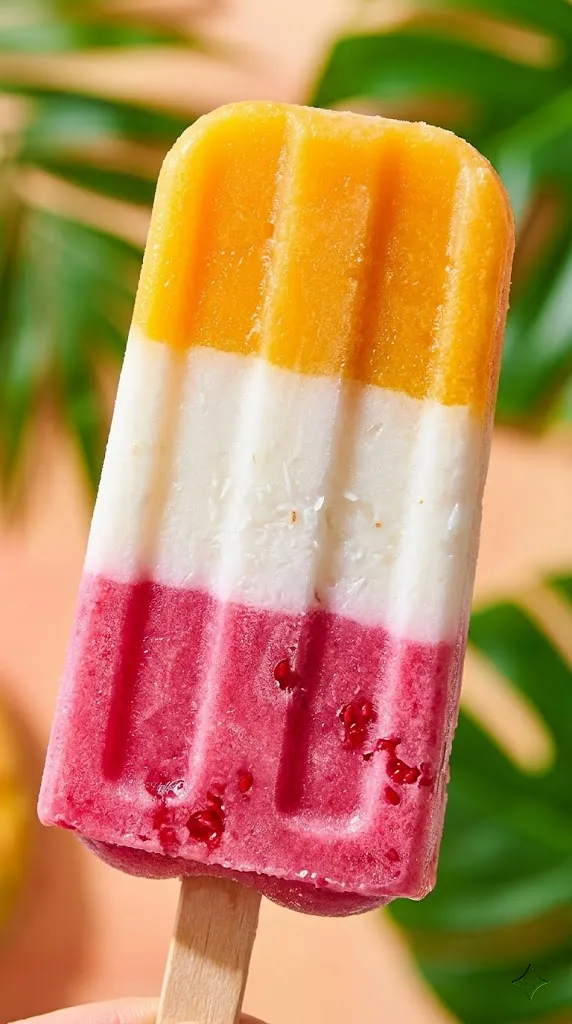
1. The Tropical Sunset Sensation
Think of this as summer in a stick. If you’ve ever wanted to freeze the feeling of a beach vacation, this is the layered recipe for you. It combines bright raspberry, tropical mango, and creamy coconut for a flavor profile that’s part smoothie, part cocktail, all delicious.
Ingredients
- Raspberry Layer: 1 cup fresh raspberries, 1 tbsp lime juice, 1 tbsp honey.
- Mango Layer: 1 cup diced mango (fresh or frozen), 1/4 cup orange juice.
- Coconut Layer: 1 cup full-fat coconut milk, 1 tsp vanilla extract, 1 tbsp maple syrup.
Step-by-Step Instructions
- Prep and Blend: Separately blend each set of ingredients until perfectly smooth. I promise, blending them one by one saves you from cleaning the blender eight times.
- Layer 1 (Raspberry): Pour the raspberry mixture into your popsicle molds, filling them about one-third full. Freeze for 30 minutes until slushy.
- Layer 2 (Coconut): Gently spoon the coconut mixture over the semi-frozen raspberry layer. (Don’t just pour it—we want distinct layers, people!) Freeze for another 30 minutes.
- Layer 3 (Mango): Add the mango layer to fill the molds to the top. Insert your popsicle sticks now (they’ll hold straight). Freeze the whole thing until solid, at least 4 hours.
Why You’ll Love It
It looks like an actual sunset—how cool is that? Plus, the contrast between the tangy raspberries, creamy coconut, and sweet mango is purely magical. This is 100% the popsicle you want when it’s 90 degrees out. 🙂
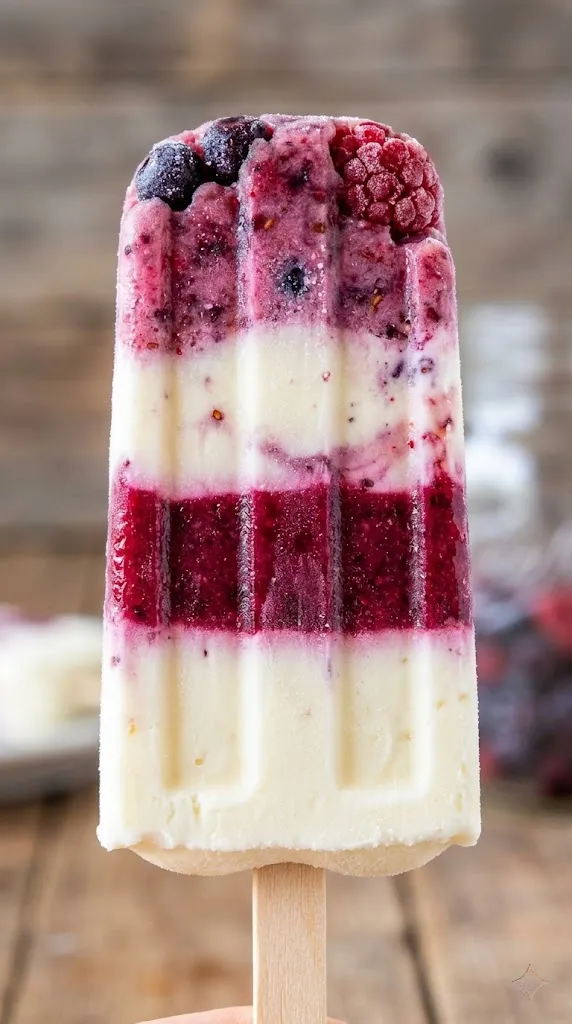
2. Very Berry Cheesecake Pops
Who doesn’t love dessert for breakfast? (Wait, is this breakfast? It can be!) This recipe gives you that rich, tangent cheesecake flavor we all crave, layered with an intense, gorgeous berry swirl that’s almost too pretty to eat. Almost.
Ingredients
- Cheesecake Layer: 8 oz softened cream cheese, 1/2 cup Greek yogurt (plain or vanilla), 1/4 cup powdered sugar, 1 tsp vanilla extract, 1/4 cup milk.
- Berry Swirl: 1 cup mixed berries (strawberries, blueberries, raspberries), 1 tbsp lemon juice.
Step-by-Step Instructions
- Cream and Blend: Whip the softened cream cheese, Greek yogurt, sugar, vanilla, and milk until completely smooth. You don’t want lumps here, trust me.
- Berry Purée: Blitz the mixed berries and lemon juice in a blender. If you’re picky about seeds, strain it. (I’m lazy, so I don’t.)
- The Alternate Layer: This is where the fun starts. Spoon a little cheesecake mixture into the mold, then add a drop of berry purée. Use a toothpick to drag the berry through the white base for a quick marble effect.
- The Main Layers: Repeat steps, freezing for 20 minutes between larger cheesecake and berry sections to get that definitive layered look shown in the image, or just pour them alternately and freeze immediately for a faster, slightly more merged style. Add the sticks halfway through the freezing process.
Why You’ll Love It
This is pure indulgence on a stick. It has the perfect balance of creamy, rich cheesecake and sharp, fruity berries. It feels sophisticated but is seriously easy. A total crowd-pleaser, guaranteed.
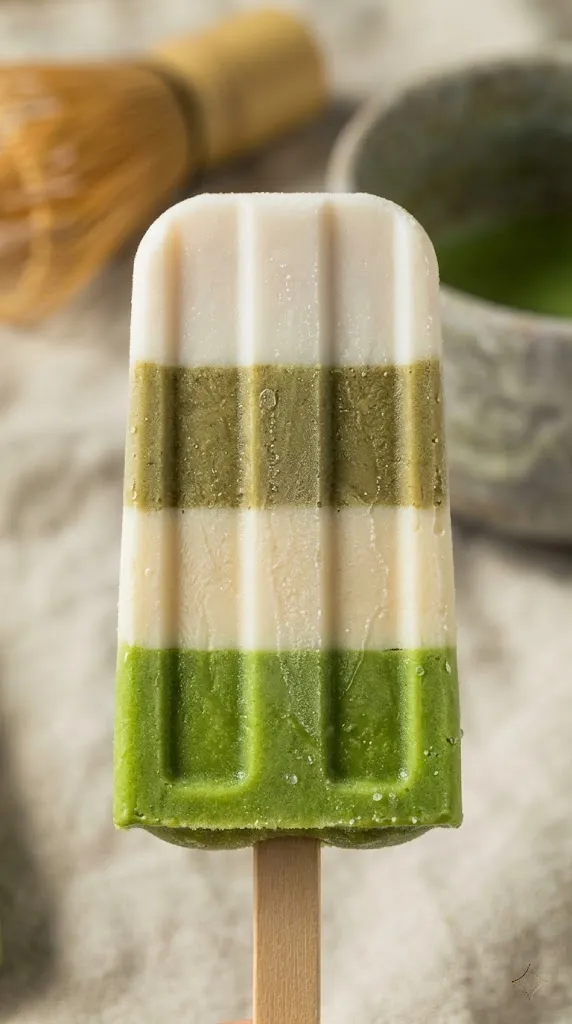
3. Creamy Matcha Latte Pops
Calling all matcha lovers! This one is for you. This popsicle is basically your favorite iced matcha latte, frozen into a perfectly layered treat. It combines the earthy, slightly bitter depth of matcha with a sweet, creamy vanilla base that balances everything out.
Ingredients
- Matcha Layer: 1 cup milk (dairy or oat works best), 1.5 tsp high-quality matcha powder, 2 tbsp maple syrup.
- Creamy Vanilla Layer: 1 cup vanilla Greek yogurt, 1/4 cup milk, 1 tsp vanilla extract.
Step-by-Step Instructions
- Whisk the Matcha: Vigorously whisk the matcha powder, milk, and maple syrup until the matcha is dissolved and it’s slightly frothy. A bamboo whisk is best, but a small kitchen whisk (or blender) works too.
- Mix the Cream: In another bowl, stir together the vanilla yogurt, milk, and vanilla extract until smooth and pourable.
- The Stripe Method: Pour a shallow layer of the matcha mixture (maybe 1/2 inch) into each mold. Freeze for 30 minutes.
- Repeat Layers: Gently pour a similar layer of the vanilla cream. Freeze. Keep repeating until the molds are full, inserting sticks into one of the creamy layers once they are sturdy enough. The defined, clean layers look stunning.
Why You’ll Love It
It’s refreshing, not overly sweet, and gives you that gentle caffeine kick. The visual and flavor contrast between the bright green matcha and the snowy white vanilla is simple, elegant, and totally satisfying.
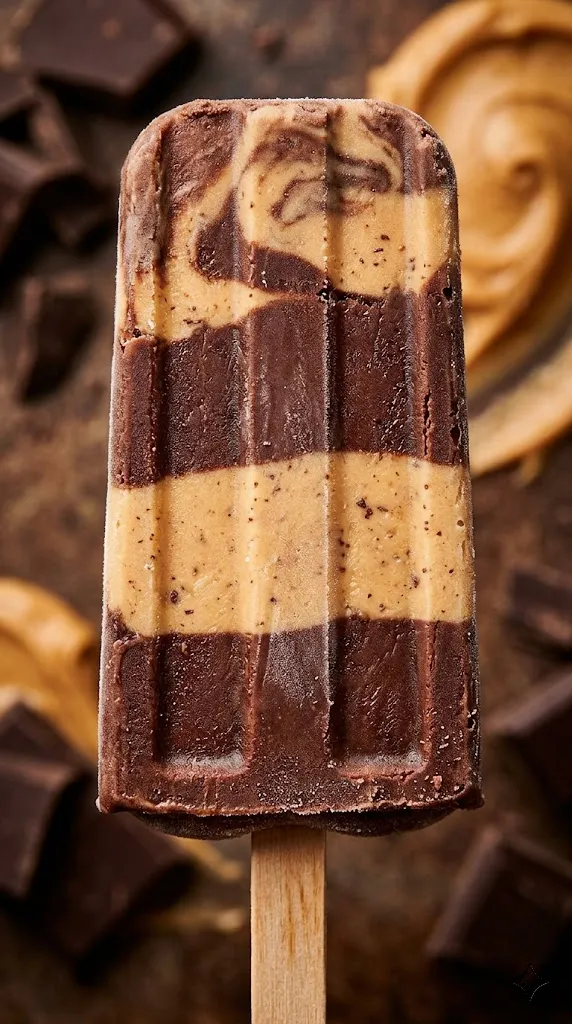
4. Chocolate Peanut Butter Swirl Pops
Sometimes you just need chocolate and peanut butter. It’s a classic for a reason. This recipe isn’t trying to be healthy or fruit-forward; it’s here to give you that rich, decadent fix you deserve.
Ingredients
- Chocolate Layer: 1 cup milk, 1/2 cup heavy cream, 3 tbsp cocoa powder, 3 tbsp sugar, 1/2 tsp vanilla extract.
- Peanut Butter Layer: 1/2 cup creamy peanut butter, 1/2 cup milk, 1 tbsp honey or maple syrup.
Step-by-Step Instructions
- Chocolate Base: In a small saucepan, gently heat the milk, heavy cream, cocoa, and sugar over low heat, whisking constantly until the sugar dissolves and it’s smooth. Remove from heat and stir in the vanilla. Let it cool completely.
- Peanut Butter Base: Whisk the peanut butter, milk, and sweetener until completely smooth.
- The Faux Swirl: We want those distinct, slightly messy layers. Pour a bit of chocolate mixture into the bottom of the mold. Add a spoonful of peanut butter mixture directly into the center.
- Repeat and Skewer: Repeat the process, Alternating chocolate and peanut butter. Take a skewer or thin knife and gently swirl it once or twice through the layers to create the dramatic effect shown. Do NOT overmix. Freeze until solid.
Why You’ll Love It
It’s like a frozen Reese’s Cup, but better. The rich chocolate and salty-sweet peanut butter swirl together perfectly. It’s dense, creamy, and satisfyingly indulgent. Best enjoyed after dark.
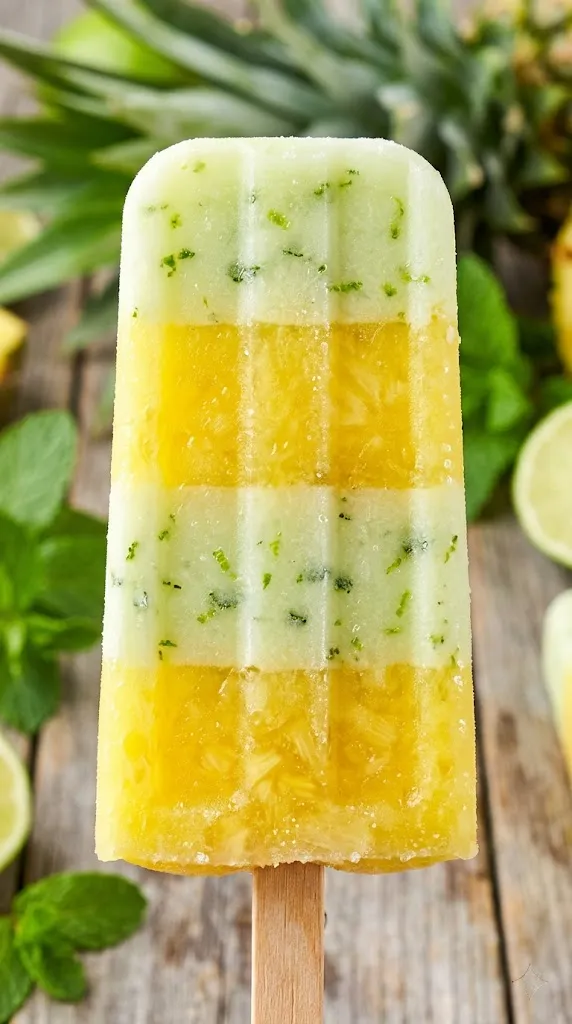
5. Pineapple Lime Mint “Mojito” Pops
Looking for something sophisticated, insanely refreshing, and not creamy? This is it. This popsicle is a zesty blend of tropical pineapple, sharp lime, and fresh mint. It’s essentially a frozen mojito (minus the rum… though you could totally add a splash if you want 😉 ).
Ingredients
- Pineapple Layer: 2 cups fresh pineapple chunks, 1/4 cup water (or coconut water).
- Lime Mint Layer: 1/2 cup fresh lime juice (about 4-5 limes), 1 cup water, 3 tbsp sugar or honey, 1/4 cup fresh mint leaves.
Step-by-Step Instructions
- Pineapple Purée: Blend the pineapple chunks and water until perfectly smooth. You want this layer thick and fruity.
- Lime Mint Infusion: In a blender, combine the lime juice, water, sweetener, and fresh mint leaves. Pulse until the mint is finely chopped but not total mush. The flecks of mint look beautiful when frozen.
- The Angled Layer: For a dynamic look like the photo, pour the pineapple purée into the molds, then prop the popsicle mold tray at an angle in your freezer (use a bag of frozen veggies to prop it up!). Freeze for 45 minutes.
- Finish the Layer: Once the pineapple is slushy, set the tray flat and pour the lime mint mixture to fill the rest of the mold. Add sticks and freeze completely.
Why You’ll Love It
It’s shockingly refreshing. The combination of sweet pineapple and zesty, minty lime is a flavor explosion that cleanses the palate and cools you down instantly. It’s light, vibrant, and perfect for hot afternoon patio sessions.
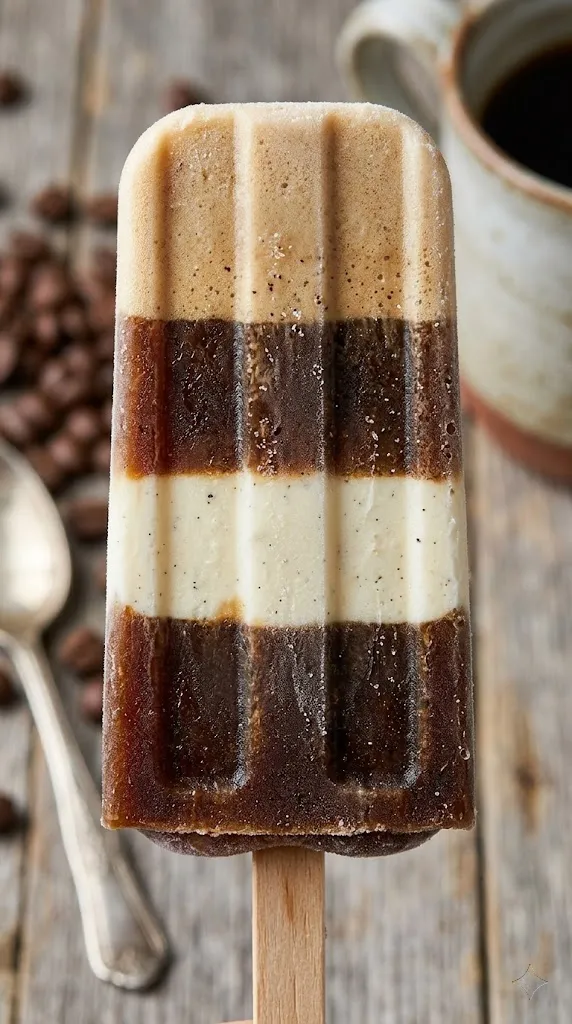
6. Cold Brew Coffee Float Pops
Yes, this is a real thing. It’s the ultimate afternoon pick-me-up: your smooth, bold cold brew coffee coffee, transformed into a refreshing frozen treat with a creamy vanilla float center. This is sophisticated, it’s bold, and it’s exactly what you need when you’re lagging on a Tuesday afternoon.
Ingredients
- Coffee Layer: 1.5 cups strong cold brew coffee (homemade or store-bought), 1-2 tbsp simple syrup or sweetened condensed milk (optional, but IMO, a must).
- Vanilla Float Layer: 1 cup heavy cream, 1/4 cup milk, 1/4 cup powdered sugar, 1 tsp vanilla extract, or just simplify things and use softened, melt-ish vanilla bean ice cream. (Shh, don’t tell the purists.)
Step-by-Step Instructions
- Prep the Coffee: If using sweetened condensed milk (do it!), whisk it into the cold brew until fully combined and smooth. This adds that rich texture we’re after.
- Prep the Cream: Combine the heavy cream, milk, sugar, and vanilla in a bowl and whisk vigorously until slightly thickened and pourable. (If using ice cream, let it soften until you can pour it).
- The Stripe Pattern: Create the classic stripe look from the image. Pour a thin layer (maybe 1/4 inch) of the coffee mixture into each mold. Freeze for 20 minutes.
- Finish the Pattern: Pour a thin layer of the cream. Freeze. Continue this tedious but rewarding process until the molds are full, adding popsicle sticks after the third or fourth layer so they stay upright. The defined, clean stripes look stunning.
Why You’ll Love It
It’s a caffeine kick and dessert in one. The creamy vanilla perfectly offsets the bold cold brew, and those stripes make it look incredible. This is the grown-up popsicle you’ve been waiting for.
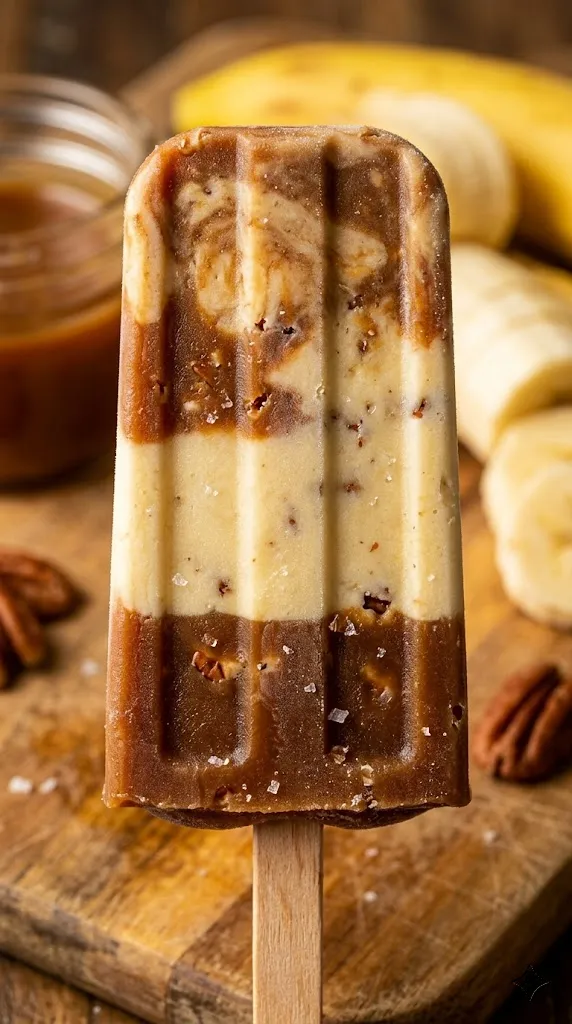
7. Salted Caramel Banana Pops
This is basically a frozen, fancy version of bananas foster, and it’s incredible. The key is using super ripe bananas, which get naturally sweet and creamy when blended, contrasting beautifully with the rich, slightly salty caramel.
Ingredients
- Banana Layer: 2 very ripe bananas, 1/2 cup Greek yogurt, 1 tsp vanilla extract, pinch of nutmeg.
- Caramel Layer: 1/2 cup homemade or high-quality store-bought caramel sauce, 1/4 tsp flaky sea salt.
- Optional Crunch: 1/4 cup crushed graham crackers or toasted pecans.
Step-by-Step Instructions
- Purée the Bananas: Blend the ripe bananas, Greek yogurt, vanilla, and nutmeg until completely smooth and creamy. Set aside.
- Prep the Caramel: In a small bowl, warm the caramel sauce slightly (just enough to make it pourable) and stir in the sea salt. Let it cool back to room temperature.
- The Ribbon Effect: For that dramatic ribbon effect shown, pour a large layer of the banana mixture into the molds (filling about halfway). Drizzle a generous tablespoon of the salted caramel directly into the center of the banana layer, swirling it slightly with a toothpick.
- Repeat and Freeze: Add another layer of banana mixture. Drizzle more caramel. If using graham crackers or pecans, sprinkle them into one of the layers. Insert sticks and freeze completely.
Why You’ll Love It
It’s like a dessert symphony. The creamy, smooth banana contrasts perfectly with the gooey, rich, sweet-and-salty caramel. Every bite is different, and the combination is simply irresistible. This is next-level delicious.
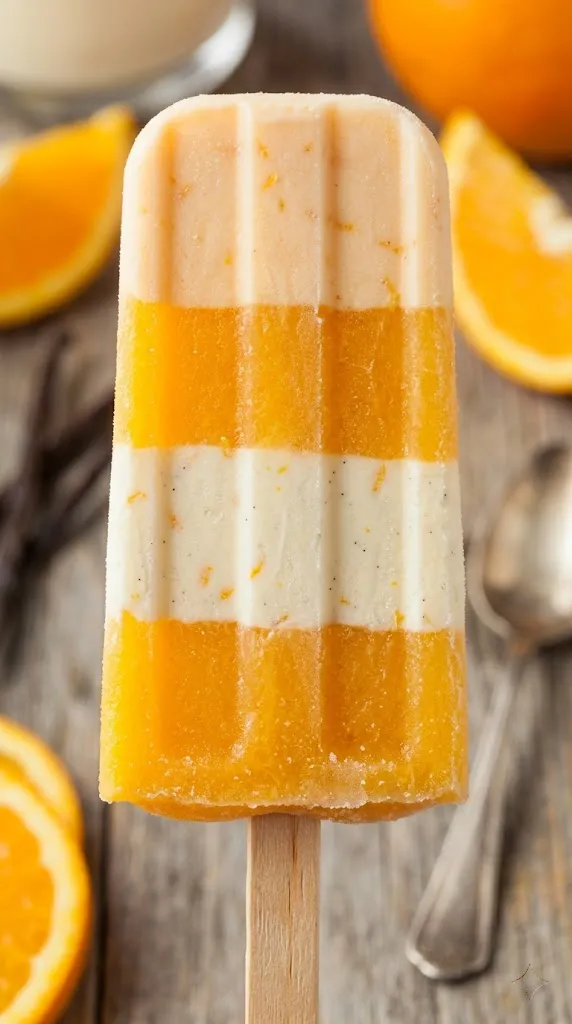
8. Orange Creamsicle Pops
Let’s finish with a total classic. This popsicle takes that nostalgic Orange Creamsicle flavor of your childhood and gives it a sophisticated, beautifully layered update. It combines bright, vibrant orange purée with a smooth, rich vanilla bean cream for a result that is sweet, tangy, and incredibly satisfying.
Ingredients
- Orange Layer: 2 cups freshly squeezed orange juice (seriously, use fresh!), 1 tsp orange zest, 1 tbsp honey (optional).
- Vanilla Cream Layer: 1 cup vanilla Greek yogurt, 1/4 cup heavy cream, 1/2 tsp vanilla bean paste (for those flecks!), 1 tbsp powdered sugar.
Step-by-Step Instructions
- Zest and Squeeze: Squeeze the oranges to get that fresh juice and grate some zest. Mix them together (with honey if needed). This layer is all about bright fruit.
- Mix the Cream: In another bowl, stir together the vanilla yogurt, heavy cream, vanilla bean paste, and sugar until completely smooth.
- The Layering (Stripe): To recreate the crisp stripe shown, pour a thin layer (maybe 1/4 inch) of the orange mixture into each mold. Freeze for 20 minutes.
- Repeat and Freeze: Pour a similar layer of the vanilla cream. Freeze. Alternate back and forth until the molds are full, inserting popsicle sticks after the third or fourth layer so they stay straight. The defined, clean stripes look stunning.
Why You’ll Love It
It’s pure nostalgia. The vibrant, tangy orange is perfectly balanced by the smooth, creamy vanilla, and that layered look transforms a simple flavor into a stunning, modern treat. It’s light, refreshing, and guaranteed to bring a smile to your face.
Related Recipes:
- 7 Best Summer Popsicle Recipes (No Sugar Added)
- 9 Fruity Summer Popsicle Recipes with Fresh Berries
- 7 Easy Summer Popsicle Recipes for Kids
That’s a Wrap!
There you have it—eight insane layered popsicle recipes that are guaranteed to make your summer cooler, sweeter, and a whole lot more fun. From tropical escapes and caffeinated floats to decadent desserts, we’ve covered every flavor base you need. These recipes are designed to be played with, so don’t be afraid to swap fruits, experiment with textures, or cough add a little alcohol (adults only, please!).
The best part? Making these is almost as satisfying as eating them. There’s something therapeutic about creating those defined layers, and seeing the final, frozen masterpiece makes the waiting totally worth it. So, what are you waiting for? Grab your molds, choose your first flavor, and let the great popsicle experiment begin. Your taste buds (and your Pinterest board) will thank you. Now go, get freezing, and enjoy every single vibrant layer! 🙂
Printable Recipe Card
Want just the essential recipe details without scrolling through the article? Get our printable recipe card with just the ingredients and instructions.