Hey, you! Yeah, the one scrolling through recipes while your stomach growls like it’s auditioning for a horror movie. Ever had one of those days where you want all the fall vibes—crisp apples, cinnamon spice, and that buttery crunch—without turning your kitchen into a war zone? Well, buckle up, because these Apple Crisp Bars are about to become your new obsession. They’re like apple pie’s chill cousin who shows up unannounced but always steals the show. Let’s dive in and make some magic happen, shall we?
Why This Recipe is Awesome
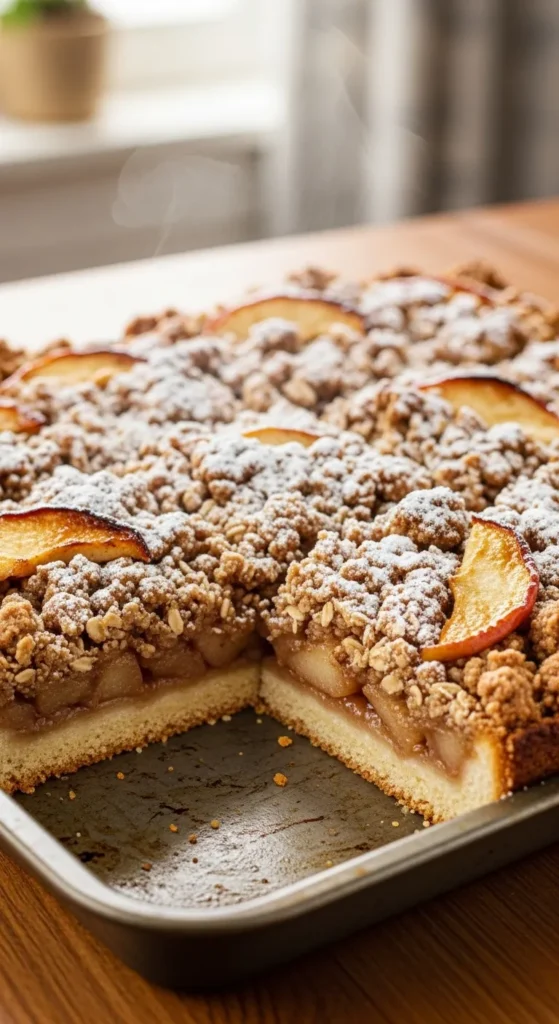
Okay, picture this: You’ve got a crunchy crust that holds everything together like a good hug, a layer of juicy apples that scream “autumn in a bite,” and a crumbly topping that’s basically edible confetti. What’s not to love? These bars are ridiculously easy to whip up—no fancy equipment needed, just a bowl, a pan, and your enthusiasm (or lack thereof, no judgment). They’re perfect for lazy weekends, potlucks where you wanna look like a pro, or midnight snacks when Netflix asks if you’re still watching.
And get this: They’re customizable AF. Gluten-free? Vegan? We’ve got subs coming up. Plus, the aroma wafting through your house? Pure therapy. It’s like wrapping yourself in a warm blanket made of deliciousness. IMO, if apple crisp and shortbread had a love child, this would be it—sweet, satisfying, and zero drama. Who wouldn’t want a dessert that makes you feel like a baking wizard without the actual wizardry?
Ingredients You’ll Need
Alright, friend, let’s raid your pantry. These are straightforward staples, nothing that’ll send you on a wild goose chase to the store. I’ve kept portions for an 8×8-inch pan, yielding about 9-12 bars depending on how generous you’re feeling with your slices. Pro tip: Measure with your heart, but don’t go rogue on the flour or you’ll end up with apple soup.
- For the Crunchy Crust:
- 1 cup all-purpose flour (the backbone—don’t skimp unless you’re subbing, more on that later)
- 1/2 cup unsalted butter, softened (because everything’s better with butter, duh)
- 1/4 cup granulated sugar (for that subtle sweetness kick)
- A pinch of salt (to keep things from getting too cloyingly sweet—trust me)
- For the Apple Filling:
- 4 medium apples, peeled and thinly sliced (Granny Smith for tartness, or Honeycrisp if you want ’em sweeter—your call)
- 1/4 cup granulated sugar (adjust if your apples are rebels)
- 1 teaspoon ground cinnamon (the spice that makes everything nice)
- 1 tablespoon lemon juice (fresh squeezed, not that bottled nonsense—to prevent browning and add zing)
- 1 tablespoon all-purpose flour (to thicken up the juices, no one likes soggy bars)
- For the Crumbly Topping:
- 3/4 cup old-fashioned oats (for that irresistible crunch—quick oats work in a pinch but won’t be as hearty)
- 1/2 cup all-purpose flour (more structure, yay)
- 1/2 cup brown sugar, packed (light or dark, depending on how moody you want it)
- 1/2 teaspoon ground cinnamon (double the spice, double the fun)
- 1/4 cup unsalted butter, melted (melted for easy mixing—lazy baker’s dream)
- Optional: A handful of chopped nuts like pecans or walnuts (if you’re feeling fancy and nutty)
That’s it! Simple, right? No exotic ingredients that’ll expire before you use ’em again.
Step-by-Step Instructions
Time to get your hands dirty—literally. Preheat your oven to 350°F (175°C) first, because waiting around is for amateurs. Line an 8×8-inch baking pan with parchment paper for easy removal, or grease it if you’re living on the edge. This whole thing takes about 15 minutes of active time, plus baking. Let’s roll.
- Make the crust. In a medium bowl, mix the flour, sugar, and salt. Cut in the softened butter with a fork or your fingers until it resembles coarse crumbs—think wet sand at the beach. Press this mixture firmly into the bottom of your prepared pan. Bake for 15 minutes until it’s lightly golden. Boom, base done.
- Prep the apple filling. While the crust bakes, toss your sliced apples with sugar, cinnamon, lemon juice, and flour in another bowl. Give it a good stir so every slice gets coated. If the apples start weeping juices, that’s normal—they’re just excited.
- Assemble the bars. Once the crust is out, layer the apple mixture evenly on top. Don’t pile it too high or it’ll overflow like a bad breakup.
- Whip up the topping. In the same bowl you used for the apples (fewer dishes, score!), combine oats, flour, brown sugar, and cinnamon. Pour in the melted butter and mix until crumbly. It should clump together when squeezed—if it’s too dry, add a splash more butter.
- Top and bake. Sprinkle the crumbly goodness over the apples, pressing down gently for max crunch. Pop it back in the oven for 30-35 minutes until the topping is golden brown and the apples are bubbly. Your kitchen will smell like heaven—resist the urge to dive in face-first.
- Cool and cut. Let it cool completely in the pan on a wire rack—about an hour, or speed it up in the fridge if you’re impatient like me. Slice into bars, and serve warm with ice cream if you’re feeling extra.
There you have it—straightforward steps that even a kitchen newbie can nail. Just remember, active voice keeps it snappy: Mix, bake, enjoy!
Common Mistakes to Avoid
We’ve all been there, staring at a baking fail like it’s modern art. But hey, learn from my mishaps so you don’t repeat ’em. Here’s the lowdown, served with a side of sarcasm.
- Skipping the preheat. Thinking, “Eh, the oven will catch up”? Wrong. Your crust ends up sad and soggy—always preheat for that crisp magic.
- Overloading on apples. More fruit sounds great until your bars turn into a slippery mess. Stick to 4 mediums; quality over quantity, folks.
- Not pressing the crust firmly. If it’s loose, it’ll crumble faster than your diet plans. Pack it down like you’re burying treasure.
- Baking too long. Golden brown is the goal, not charred black. Set a timer—your phone’s got one for a reason.
- Cutting while hot. Patience, grasshopper. Hot bars fall apart like a house of cards. Cool ’em first for clean slices.
Avoid these, and you’ll be golden. Or should I say, crumbly?
Alternatives & Substitutions
Life happens—maybe you’re out of butter or going dairy-free. No sweat; these bars are flexible like yoga pants. Here’s how to tweak without tanking the recipe, plus my two cents.
- Gluten-free? Swap all-purpose flour for a 1:1 gluten-free blend. Works like a charm, though the texture might be a tad softer—still delish.
- Vegan vibes? Use plant-based butter or coconut oil instead of regular butter. For the topping, coconut oil adds a tropical twist; IMO, it’s a fun surprise.
- Nut-free zone? Ditch the optional nuts entirely, or sub in seeds like pumpkin for crunch without the allergens.
- Sweeter tooth? Bump up the sugar in the filling, or use sweeter apples like Fuji. If you’re watching sugar, cut it back and let the fruit shine.
- Oat alternatives. No oats? Use more flour in the topping, but it’ll be less crumbly—more like a streusel. Or try quinoa flakes for a protein boost.
Experiment, but don’t go wild on your first try. These subs keep the cozy factor intact while suiting your style.
FAQs
Can I make these bars ahead of time?
Absolutely! Bake ’em up to 2 days in advance and store in an airtight container at room temp. They taste even better the next day—flavors mingle like old friends at a reunion. Reheat in the oven for that fresh-baked crispiness.
What if I don’t have parchment paper?
No biggie—grease the pan well with butter or spray. Just be gentle when removing the bars; a spatula is your BFF here. Why risk sticky disasters when prevention is this easy?
Are these bars freezer-friendly?
Heck yes! Cool completely, wrap individually in plastic, and freeze for up to 3 months. Thaw overnight and warm in the microwave. Perfect for those “I need dessert now” emergencies.
Can I use pre-made pie filling instead of fresh apples?
Technically, sure, but fresh is where the magic’s at—juicier and less processed. If you’re in a rush, go for it; just drain excess liquid to avoid sogginess. Your secret’s safe with me.
How do I know when the bars are done baking?
Look for bubbly edges and a toasty topping. Poke a fork into the apples—they should be tender but not mushy. Overbake, and you’ll have apple leather; underbake, and it’s raw city.
What apples work best?
Tart ones like Granny Smith balance the sweetness perfectly. Mix in some sweet varieties for contrast. Ever tried Pink Lady? Underrated gem—crisp and flavorful.
Can I double the recipe for a crowd?
Go for it! Use a 9×13 pan and add 5-10 minutes to baking time. Watch closely, though—ovens are sneaky. Great for parties where you wanna be the hero.
Final Thoughts
Whew, we’ve covered the crunchy, crumbly goodness from start to finish. These Apple Crisp Bars aren’t just a recipe—they’re a vibe, a cozy escape in bar form. Whether you’re baking solo or sharing with pals, remember: Cooking’s about fun, not perfection. So grab those apples, crank up some tunes, and get to it. You’ve got this, champ—now go wow yourself (or that special someone) with your skills. If it flops? Blame the apples. Catch ya next time!
Printable Recipe Card
Want just the essential recipe details without scrolling through the article? Get our printable recipe card with just the ingredients and instructions.