Hey, picture this: It’s a chilly evening, you’re wrapped in your favorite blanket, and the smell of cinnamon and apples is wafting through the house like a warm hug from grandma. But wait, you’re the one making it happen without turning your kitchen into a war zone. Sound too good to be true? Nah, that’s just this classic apple crisp pulling its magic. If you’re like me—craving dessert but not the hassle—this one’s your new bestie. Let’s dive in and get that oven fired up
Why This Recipe is Awesome
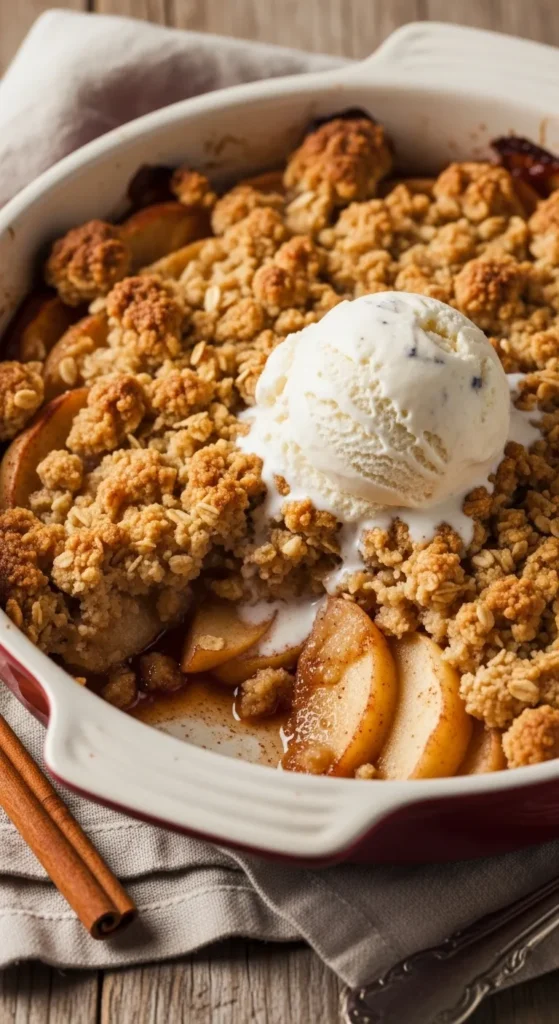
Okay, let’s cut to the chase—why bother with this apple crisp when you could just grab a store-bought pie? Because this bad boy is basically pie’s chill cousin: all the flavor, none of the crust-fumbling drama. It’s got tender, spiced apples bubbling under a buttery, crunchy oat topping that’s like a hug for your taste buds. And get this—it’s ridiculously easy. I mean, if I can whip it up after a long day without setting off the smoke alarm, anyone can. Plus, it’s versatile AF; serve it warm with ice cream for that melty bliss, or cold the next day for breakfast (no judgment here). It’s nostalgic, comforting, and screams fall vibes, but honestly, who needs a season to justify dessert? Pro tip: This recipe uses simple pantry staples, so no last-minute grocery runs. It’s idiot-proof, even for those of us who burn toast on the regular. Trust me, your friends will think you’re a baking wizard, but we’ll keep the secret that it took less effort than scrolling through your feed.
What really sets it apart? That topping—oh man, it’s all about the butter melding with oats and brown sugar into crispy, caramelized clusters. The apples soften just right, releasing their juices to create a natural syrup that ties everything together. No soggy bottoms here; just pure, unadulterated yum. And nutritionally? Apples bring the fiber, oats add some whole-grain goodness—hey, it’s practically health food if you squint. LOL, who am I kidding? But seriously, it’s a crowd-pleaser that feels homemade without the sweat. If you’re tired of complicated recipes that leave you with a sink full of dishes, this one’s your savior. It’s quick to assemble, bakes hands-off, and fills your home with that irresistible aroma that’ll have neighbors knocking. In short, it’s awesome because it delivers maximum coziness with minimal fuss. Ready to see why it’ll become your go-to?
Ingredients You’ll Need
Alright, pal, let’s raid the kitchen. This recipe serves about 8-10 people, or just you over a weekend—your call. I’ve kept it straightforward, but threw in some snarky notes because, why not? Grab these for the filling and topping. No fancy stuff required; we’re keeping it real.
For the Apple Filling:
- 8 medium apples (peeled and chopped into 1-inch chunks—mix tart like Granny Smith and sweet like Honeycrisp for that flavor pop. About 10 cups worth, FYI.)
- 1/2 cup packed brown sugar (light or dark; dark gives it a deeper, molasses-y vibe.)
- 1/4 cup all-purpose flour (to thicken those juices—don’t skip it or you’ll have apple soup.)
- 1 teaspoon pure vanilla extract (the good stuff, not that imitation junk.)
- 1 teaspoon ground cinnamon (because apples without cinnamon? Blasphemy.)
- 1/2 teaspoon ground nutmeg (adds that warm, spicy kick—trust me.)
- 1/4 teaspoon salt (balances the sweetness; yeah, even desserts need salt.)
For the Buttery Oat Topping:
- 3/4 cup all-purpose flour (spoon it in, don’t pack—key tip for fluffy texture.)
- 3/4 cup packed brown sugar (again, light or dark; your mood.)
- 1 teaspoon ground cinnamon (double the spice, double the nice.)
- 1/2 cup unsalted butter (cold and cubed—cold is crucial for that crumbly magic.)
- 1 cup old-fashioned rolled oats (not quick oats, unless you want mush. Go for the hearty ones.)
Optional extras: A drizzle of salted caramel or a scoop of vanilla ice cream for serving. Because why stop at great when you can go epic?
That’s it—simple, right? No hunting for obscure ingredients. If your pantry’s looking bare, a quick store trip won’t break the bank.
Step-by-Step Instructions
Time to get hands-on, but don’t worry— this is more assembly than actual cooking. Preheat your oven first, folks; we’ll chat more about that later. Grab a large bowl and let’s make some magic. I’ll keep each step snappy, with short bursts of guidance so you don’t zone out.
- Preheat and prep the pan. Crank your oven to 350°F (177°C). Grease a 9×13-inch baking dish with butter or spray. Any similar-sized dish works, but this size ensures even baking. While that’s heating, peel and chop those apples. Aim for uniform chunks so they cook evenly—no one wants half-mushy, half-crunchy bites.
- Mix the filling. Toss the apple chunks, brown sugar, flour, vanilla, cinnamon, nutmeg, and salt into a large bowl. Stir until everything’s coated—like giving the apples a sweet spice bath. Spread this mix evenly into your prepared pan. Pat it down gently; you want it snug but not squished. This step takes maybe 5 minutes, tops.
- Whip up the topping. In a medium bowl, whisk together the flour, brown sugar, and cinnamon. Add the cold cubed butter and use a pastry cutter (or your fingers, if you’re feeling rustic) to cut it in until the mixture looks like coarse crumbs. Don’t overdo it—lumps are your friends for that crispy texture. Stir in the oats last. Sprinkle this crumbly goodness all over the apples, covering every inch for maximum crunch.
- Bake it to perfection. Pop the dish into the oven and bake for 45-50 minutes. You’re looking for a golden-brown topping and bubbly juices around the edges. If it browns too fast, tent with foil. The smell? Intoxicating. Use this time to clean up or scroll memes—hands-free baking at its best.
- Cool and serve. Pull it out, set on a wire rack, and let it cool for at least 5 minutes. This lets the juices thicken up. Serve warm for that gooey factor, or room temp if you’re patient. Top with ice cream or caramel for extra decadence. Dig in with a spoon; forks are optional when it’s this good.
There you have it— from chopping to chowing in under an hour of active time. Easy peasy, right? If something feels off, double-check your measurements; precision pays off here.
Common Mistakes to Avoid
We’ve all been there—excited to bake, only to end up with a sad, soggy mess. But hey, learning from screw-ups is half the fun. Here’s the lowdown on pitfalls to dodge, with a side of sarcasm because, well, who takes baking too seriously?
- Skipping the peel on apples. Sure, skins add fiber, but in crisp? They turn chewy and weird. Peel ’em, lazy bones—it’s worth the extra minute to avoid that “healthy” regret.
- Using warm butter for the topping. Cold butter is non-negotiable; warm stuff melts too soon and gives you a flat, greasy layer instead of crunchy clusters. Chill it in the freezer if needed. Rookie move to ignore this.
- Overbaking or underbaking. Too long and it’s dry; too short and apples stay crunchy. Watch for those bubbles— they’re your signal. Set a timer, but trust your eyes over the clock.
- Piling on too much topping. Tempting, I know, but balance is key. Overload it and the apples drown; underdo it and it’s just baked fruit. Aim for even coverage.
- Forgetting to grease the pan. Nothing kills the vibe like scraping stuck-on crisp. A quick spray saves the day—and your sanity.
Avoid these, and you’re golden. Baking’s forgiving, so even if you mess up, it’s still edible. Probably.
Alternatives & Substitutions
Life happens—maybe you’re out of something, or dietary needs pop up. No sweat; this recipe’s flexible like yoga pants. Here’s how to tweak it without ruining the vibe, plus my two cents because opinions are free.
For gluten-free? Swap the all-purpose flour with a 1:1 gluten-free blend. Oats are naturally GF, but check labels for cross-contamination. It works great; I’ve tried it and barely noticed the difference.
Vegan twist: Use plant-based butter (like Earth Balance) in place of regular. Tastes just as buttery, IMO, and keeps that crumbly texture intact.
Apple alternatives: No apples? Pears work wonders for a softer, sweeter crisp. Or mix in berries for a fruity mash-up—think apple-blueberry for a tart kick. Just adjust sugar if your fruit’s super sweet.
Spice it up: Swap nutmeg for ginger if you want zing, or add cloves for holiday feels. Don’t overdo; a pinch goes far.
Nutty addition: Toss in 1/2 cup chopped pecans or walnuts to the topping for extra crunch. It’s optional but elevates it to fancy territory without effort.
Sugar subs: Brown sugar out? White sugar plus a teaspoon of molasses mimics it. Or use coconut sugar for a caramel-like note—healthier vibe, same sweetness.
These swaps keep things simple and delicious. Experiment, but start small; you can always adjust next time.
FAQs
Got questions? I’ve got casual, no-BS answers. Let’s tackle the common ones like we’re gossiping over coffee.
Can I make this ahead of time?
Absolutely! Assemble it up to a day ahead, cover, and fridge it. Bake when ready—might need an extra 5 minutes. Or bake fully and reheat at 350°F for 15-20 mins. Perfect for parties without last-minute chaos.
What if I don’t have old-fashioned oats?
Quick oats will do in a pinch, but the topping might turn powdery. Stick to rolled for that hearty bite. If you’re out entirely, double the flour for a crumble vibe—still tasty, just different.
Is peeling the apples really necessary?
Technically no, but do you want tough skins ruining the melt-in-your-mouth magic? Peel for best results. If you’re lazy (hey, me too), try it once and see— you’ll convert.
Can I use margarine instead of butter?
Well, sure, but why settle for less? Margarine lacks that rich flavor, making the topping blah. Stick to butter if possible; your taste buds will thank you.
How do I store leftovers?
Cover and fridge ’em for up to 5 days. Reheat in the microwave for 30 seconds or oven for crispiness. Freezes well too—up to 3 months. Thaw and warm; it’s like fresh-baked all over.
What apples are best?
Mix tart and sweet for balance—Granny Smith for zing, Honeycrisp for sweetness. Avoid Red Delicious; they’re mealy when baked. Experiment with what’s in season.
Can I halve the recipe?
Yep, for a smaller crowd. Use an 8×8 pan and cut bake time to 30-35 minutes. Same great taste, less to devour solo.
Final Thoughts
Whew, we made it! Now that you’ve got this classic apple crisp in your arsenal, go forth and conquer dessert time. Whether you’re impressing date night or just treating yourself after a rough day, this recipe’s got your back. It’s simple, scrumptious, and sure to spark some “Whoa, you made this?” moments. Give it a whirl, tweak it your way, and hit me up in the comments if you nail it (or hilariously fail—stories welcome). You’ve earned that cozy bite—dig in, friend!
Printable Recipe Card
Want just the essential recipe details without scrolling through the article? Get our printable recipe card with just the ingredients and instructions.