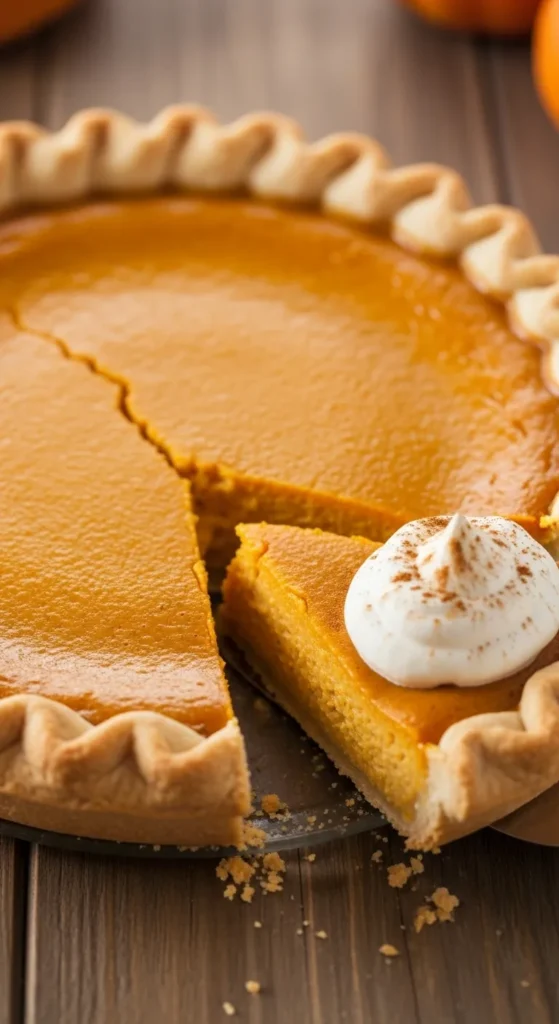
Hey there, pie enthusiast! Picture this: It’s a crisp autumn evening, leaves crunching underfoot, and you’re wrapped in your comfiest sweater with a fork in hand, diving into a warm slice of pumpkin pie that’s got that perfect spice kick. But hold up—why settle for store-bought when you can whip up this classic from scratch? Trust me, once you nail that flaky homemade crust, you’ll feel like a baking wizard. And if you’re like me, slightly chaotic in the kitchen but always up for a tasty adventure, this recipe’s your new bestie. Let’s dive in and make some magic happen—your taste buds will thank you later.
Why This Recipe is Awesome
Okay, let’s be real: Pumpkin pie is basically fall in edible form, but what sets this one apart? First off, it’s got that homemade crust that’s so flaky, it’ll make you question every pre-made version you’ve ever eaten. We’re talking buttery layers that shatter just right with each bite—none of that soggy nonsense. The filling? Silky smooth, packed with real pumpkin puree and those warm spices that hit you with nostalgia vibes. Plus, it’s surprisingly forgiving for beginners. I mean, I’ve burned water before (don’t ask), and even I pulled this off without a hitch. It’s versatile too—serve it at Thanksgiving to wow the fam, or hoard it all for yourself on a rainy day. No judgment here. And hey, who doesn’t love a dessert that screams “I put in effort” but actually takes less time than binge-watching your favorite show? This pie’s not just awesome; it’s your ticket to feeling like a pro without the stress.
Ingredients You’ll Need
Gather ’round, folks—these are the stars of the show. I’ve kept it simple, but with a few cheeky notes because, why not? We’re making enough for one 9-inch pie, serving about 8 slices (or 4 if you’re really hungry).
For the Flaky Homemade Crust:
- 1 1/4 cups all-purpose flour: The foundation—don’t skimp on quality, or it’ll bite back.
- 1/2 teaspoon salt: Just a pinch to keep things balanced, like your life… sort of.
- 1/4 cup unsalted butter, chilled and cubed: Cold is key here; think arctic vibes for max flakiness.
- 1/4 cup vegetable shortening, chilled: The secret weapon for that tender texture—don’t tell the butter purists.
- 3-5 tablespoons ice water: Ice cold, baby. Too much and it’s a sticky mess; too little and it’s crumbly chaos.
For the Pumpkin Filling:
- 1 (15-ounce) can pumpkin puree: Not pumpkin pie filling—pure puree only, or you’ll end up with a sugar bomb.
- 3/4 cup granulated sugar: Sweetens the deal without overwhelming the spices.
- 1/2 teaspoon salt: Yep, again—keeps the flavors from going flat.
- 1 teaspoon ground cinnamon: The warm hug in spice form.
- 1/2 teaspoon ground ginger: Adds a little zing; skip if you’re spice-averse, but why would you?
- 1/4 teaspoon ground cloves: Earthy depth—don’t overdo it, or it’ll taste like a potion.
- 1/4 teaspoon ground nutmeg: Freshly grated if you’re feeling fancy.
- 2 large eggs: Room temp for better mixing—pro tip right there.
- 1 (12-ounce) can evaporated milk: Makes it creamy AF; whole milk works in a pinch, but this is the classic way.
There you have it—nothing exotic, just good ol’ pantry staples with a dash of attitude.
Step-by-Step Instructions
Alright, let’s roll up our sleeves and get to it. I’ll keep these steps snappy and straightforward, like a quick chat over coffee. Remember, preheat your oven to 425°F (220°C) right off the bat—don’t forget, or you’ll be waiting forever.
- Make the crust dough. In a large bowl, whisk together the flour and salt. Cut in the chilled butter and shortening using a pastry blender or your fingers until it looks like coarse crumbs—think pea-sized bits. Sprinkle in the ice water, one tablespoon at a time, mixing with a fork until the dough just holds together. Don’t overwork it; that’s the enemy of flakiness.
- Roll out the crust. Dump the dough onto a floured surface and shape it into a disk. Roll it out to about 12 inches in diameter—aim for even thickness. Gently transfer it to a 9-inch pie plate, trimming the edges and crimping them for that fancy look. Poke the bottom with a fork to prevent bubbles. Chill it in the fridge for 15 minutes while you mix the filling.
- Whisk up the filling. In a big bowl, beat the eggs until frothy. Stir in the pumpkin puree, sugar, salt, and all those glorious spices until smooth. Gradually pour in the evaporated milk, whisking constantly—no lumps allowed here, folks.
- Assemble and bake. Pour the filling into the chilled crust. Pop it in the preheated oven for 15 minutes, then drop the temp to 350°F (175°C) and bake for another 40-50 minutes. You’ll know it’s done when a knife inserted near the center comes out clean, but the middle still jiggles a bit—like a good custard.
- Cool and serve. Let it cool on a wire rack for at least 2 hours. This is crucial for setting; slice too soon and it’s a gooey disaster. Top with whipped cream if you’re feeling extra, and dig in.
Each step should take you no more than 10-15 minutes of active time, leaving plenty for scrolling memes while it bakes. Easy peasy, right?
Common Mistakes to Avoid
We’ve all been there—staring at a pie that’s more flop than fabulous. But fear not; I’m here to call out the usual suspects with a side of snark so you can sidestep them like a pro.
- Skipping the chill time for the crust. Oh, you think warm dough rolls out fine? Spoiler: It doesn’t. It tears, sticks, and turns tough. Always chill for at least 15 minutes to keep that butter cold and flaky.
- Overmixing the dough. Treat it like a delicate flower, not a wrestling match. Too much handling melts the fats and leads to a chewy crust. Gentle is the name of the game.
- Using the wrong pumpkin. Grabbing pie filling instead of puree? Rookie error—it’s already sweetened and spiced, throwing off the whole balance. Stick to plain puree, or suffer the overly sweet consequences.
- Not blind-baking if needed. For this recipe, we don’t, but if your crust looks soggy post-bake, next time line it with foil and beans for the first 10 minutes. Don’t learn this the hard way.
- Slicing while hot. Patience, my friend! Cutting in too soon means runny filling everywhere. Let it cool fully—your pie (and counter) will thank you.
Avoid these, and you’ll be golden. Or should I say, pumpkin-orange?
Alternatives & Substitutions
Life happens—maybe you’re out of an ingredient or catering to picky eaters. No sweat; here’s how to tweak this recipe without ruining the vibe. I’ll throw in my two cents because, IMO, experimenting is half the fun.
- Butter-only crust: Ditch the shortening for all butter if you’re anti-shortening. It won’t be as flaky, but it’ll taste richer. Just keep it super cold to compensate.
- Gluten-free swap: Use a 1:1 gluten-free flour blend for the crust. It might be a tad crumblier, but hey, still delicious for your GF pals.
- Spice adjustments: Not a cloves fan? Swap for allspice or just amp up the cinnamon. Personal fave: Add a pinch of cardamom for an exotic twist—trust me, it’s a game-changer.
- Dairy-free filling: Sub evaporated milk with coconut milk. It adds a subtle tropical note, which sounds weird but works surprisingly well in pumpkin pie.
- Sugar alternatives: Brown sugar instead of white for deeper molasses vibes, or maple syrup for a natural sweetener. Reduce by a bit since it’s liquid—about 1/2 cup should do.
These swaps keep things flexible without sacrificing that classic feel. Play around, but don’t go too wild unless you’re feeling adventurous.
FAQs
Can I make the crust ahead of time?
Absolutely! Roll it out, fit it into the pie plate, and freeze it for up to a month. Just thaw in the fridge before filling. Saves you time on the big day—because who wants extra stress?
What if my pie cracks on top?
Ah, the dreaded crack—usually from overbaking or temp swings. Next time, check it earlier and tent with foil if it’s browning too fast. But hey, cracks just mean more room for whipped cream, right?
Is fresh pumpkin better than canned?
Technically, fresh is “purer,” but canned is consistent and way easier. Roasting your own pumpkin? Go for it if you’ve got time, but IMO, canned wins for convenience without skimping on flavor.
Can I use a store-bought crust?
Sure, if you’re in a rush, but you’ll miss that homemade flaky magic. It’s like comparing fast food to a home-cooked meal—doable, but not the same soul-satisfying win.
How do I store leftovers?
Wrap it tight and fridge it for up to 4 days. Or freeze slices for later cravings. Pro tip: Warm a slice in the microwave for 20 seconds—tastes fresh-baked every time.
What toppings go best with this pie?
Whipped cream is classic, but try caramel drizzle or candied pecans for extra flair. Vanilla ice cream? Game over—it’s dessert heaven.
Can I make mini versions?
Totally! Use a muffin tin for individual pies. Bake time drops to 20-30 minutes. Perfect for parties or portion control (if that’s your thing).
Final Thoughts
Whew, we’ve baked our way through this pumpkin pie adventure, and look at you—ready to conquer the kitchen like a boss. Whether it’s your first time or your fiftieth, this recipe’s got that cozy, heartwarming punch that’ll make any gathering (or solo Netflix sesh) feel special. Give it a whirl, laugh off any mishaps, and savor every bite. You’ve got this—now go flex those baking skills and make someone’s day a little sweeter. Catch you in the kitchen next time!
Printable Recipe Card
Want just the essential recipe details without scrolling through the article? Get our printable recipe card with just the ingredients and instructions.


