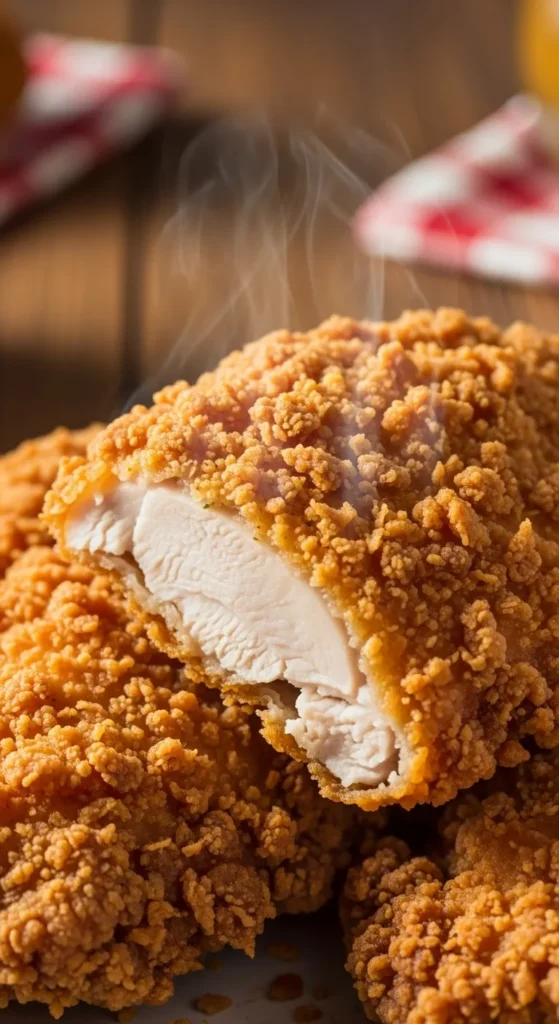
So, you’ve decided you want to achieve fried chicken nirvana. Not the sad, soggy kind that makes you question your life choices, but the kind with a crust that shatters with an audible CRUNCH, giving way to the most ridiculously juicy, flavorful meat inside. You’ve come to the right place. Forget everything you think is complicated about frying—this is your foolproof ticket to glory.
Why This Recipe is Awesome
Let’s cut to the chase. This recipe is awesome because it works. It’s the kind of fried chicken that makes people awkwardly hover near the kitchen, hoping for scraps. We’re not just dredging and frying; we’re deploying a one-two punch of flavor with a buttermilk brine that tenderizes the chicken into submission and a seasoned flour coating that fries up into a golden, craggy armor of deliciousness. It’s idiot-proof, even I didn’t mess it up, and I once tried to open a can with a hammer
.
Ingredients You’ll Need
Gather your squad. This isn’t a surprise party; everything needs to be present and accounted for.
For the Buttermilk Brine:
- 1 whole chicken, cut into 8 pieces (or 3 lbs of your favorite pre-cut parts – thighs and drums are champions here)
- 2 cups buttermilk (The MVP. This is non-negotiable for tenderness.)
- 1 tablespoon hot sauce (Frank’s RedHot is a classic for a reason)
- 1 teaspoon garlic powder
- 1 teaspoon onion powder
- 1 ½ teaspoons salt (Don’t be shy.)
- 1 teaspoon black pepper
For the Seasoned Flour:
- 2 cups all-purpose flour
- 1 tablespoon cornstarch (The secret weapon for extra crunch)
- 2 teaspoons salt
- 1 teaspoon black pepper
- 1 tablespoon paprika (for that gorgeous color)
- 2 teaspoons garlic powder
- 2 teaspoons onion powder
- ½ teaspoon cayenne pepper (Adjust to your spice-tolerance level. Be brave!)
For Frying:
- 1 quart neutral oil (like vegetable, canola, or peanut oil) – enough to come about 1.5 inches up the side of your pot
Step-by-Step Instructions
- Bribe the Chicken. In a large bowl, whisk together the buttermilk, hot sauce, and all the brine seasonings. Plop your chicken pieces into this glorious bath, making sure everything is submerged. Cover that bowl and shove it in the fridge for at least 4 hours, but honestly, overnight is best. This is the step you don’t skip. It’s the difference between good and “OH MY GOSH WHAT IS THIS SORCERY?”
- Prep Your Station. When you’re ready to fry, take the chicken out of the fridge about 30 minutes beforehand. Let it sit on the counter. Getting it closer to room temp helps it fry evenly. In another large bowl, whisk together all the seasoned flour ingredients. This is your crunch-creating dust.
- Dredge Like a Boss. Using one hand for wet and one hand for dry, take a piece of chicken from the buttermilk, let the excess drip off, and plop it into the flour. Use your dry hand to bury it, press the flour on firmly, and then shake off the excess. This press is key for getting those gorgeous, crispy nooks and crannies.
- Double Dip for Extra Crunch (Optional but Highly Recommended). For the craggiest crust ever, do a double dredge. Dip the floured piece back into the buttermilk brine for just a second, then back into the flour for a second coating. Press and shake again. Place your perfectly coated chicken on a wire rack while you heat the oil.
- Heat the Oil to Perfection. Pour your oil into a large, heavy-bottomed pot (like a Dutch oven). Attach a deep-fry or candy thermometer to the side. Heat over medium-high heat until the oil reaches 350°F (175°C). This is the magic number. Maintaining this temp is the secret to chicken that’s cooked through without being greasy.
- Fry to Golden Glory. Carefully lower 3-4 pieces of chicken into the hot oil using tongs. Don’t crowd the pot! The temperature will drop—adjust the heat to keep it as close to 325°F as possible. Fry for about 10-15 minutes per side, turning occasionally, until the crust is deeply golden brown and the internal temperature of the chicken reads 165°F.
- Drain and Devour. Use tongs to move the finished chicken to a clean wire rack set over a baking sheet (this keeps the bottom from getting soggy). Let it rest for a few minutes. I know, it’s torture. But it allows the juices to redistribute. Then, gather your fans and serve immediately.
Common Mistakes to Avoid
- Frying Ice-Cold Chicken: Taking chicken straight from the fridge and plunging it into hot oil will give you a burnt outside and a raw inside. Let it sit out for 20-30 minutes first. Science!
- Crowding the Pot: Dumping all the chicken in at once is a one-way ticket to Soggy Town. The oil temp plummets, the chicken steams instead of fries, and you get a greasy mess. Fry in batches. Your patience will be rewarded.
- Not Using a Thermometer: Guessing the oil temperature is a game for fools. Too hot = burnt. Too cool = greasy. A $10 thermometer is your best friend here.
- Skipping the Rest: Slicing into that chicken the second it comes out of the oil will cause all the beautiful juices to run out onto the plate, leaving you with dry chicken. Let it rest on a wire rack for 5 minutes. Trust me.
Alternatives & Substitutions
- No Buttermilk? Make a DIY version! For every cup of milk, add 1 tablespoon of lemon juice or white vinegar. Stir and let it sit for 5 minutes until it curdles. Boom, soured milk.
- Gluten-Free? Swap the all-purpose flour for your favorite gluten-free all-purpose blend. The cornstarch is already GF!
- Spice Level: Control the heat with the cayenne. Leave it out for mild, double it for a kick, or add a pinch to the buttermilk brine for an extra layer of warmth.
- Boneless? You can use boneless, skinless thighs or breast tenders. Just reduce the frying time significantly (about 4-6 minutes total) and keep a close eye on them.
FAQ
Can I bake this instead of frying?
Well, you can try to fly by flapping your arms really hard, but it won’t be nearly as effective. This is a recipe specifically designed for frying. If you want baked “fried” chicken, you’ll need a different recipe with different techniques (like using baking powder). It won’t be the same, but it can still be tasty!
How do I store leftovers?
Leftovers? That’s adorable. If you somehow have any, store them in an airtight container in the fridge for up to 3 days. Reheat them in an air fryer or a 400°F oven to bring back the crunch. Do not microwave unless you enjoy disappointment.
What’s the best oil for frying?
You want a neutral oil with a high smoke point. Vegetable, canola, and peanut oil are all excellent choices. Save your fancy extra-virgin olive oil for salads.
Can I use chicken wings for this?
Absolutely! Wings will cook much faster, so keep a close eye on them. They’ll probably only need 6-8 minutes in the oil.
Why did my coating fall off?
This usually happens for one of two reasons: 1) The oil wasn’t hot enough when you added the chicken, or 2) You didn’t shake off the excess flour after dredging. A nice, hot oil bath and a good shake are key to a coating that stays put.
Related Recipes;
- Pineapple Cheesecake Parfaits Recipe You’ll Crave
- Chicken Rice Casserole Recipe You’ll Crave
- Apple Blueberry Crumble Recipe That’ll Steal Your Heart
- Apple Raspberry Galette Recipe to Steal Hearts
Final Thoughts:
Crispy buttermilk fried chicken is the ultimate comfort food—crunchy on the outside, juicy on the inside, and full of flavor. Whether it’s for a family dinner, weekend treat, or picnic favorite, this recipe brings restaurant-quality fried chicken straight to your kitchen. One bite, and you’ll know why it’s a timeless classic.
Printable Recipe Card
Want just the essential recipe details without scrolling through the article? Get our printable recipe card with just the ingredients and instructions.

![The Secret to Making Crispy & Juicy Chicken Every Time [With Tutorial]](https://sumararecipes.com/wp-content/uploads/2025/03/1-7-1024x536.jpg)