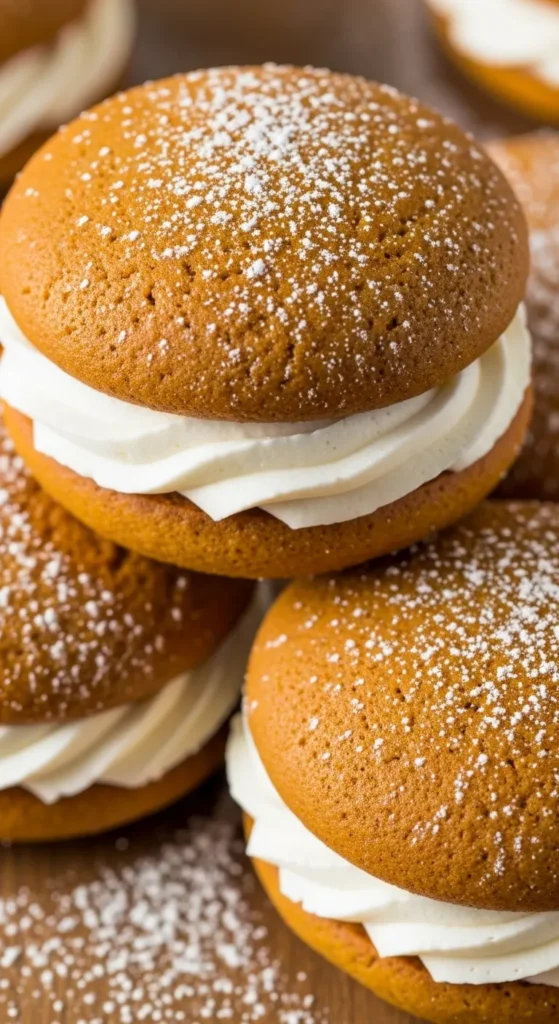
So, you want something sweet, fluffy, and packed with fall flavor, but don’t feel like making a whole dang cake? Enter: Pumpkin Whoopie Pies — the adorable dessert sandwiches you didn’t know you needed. They’re soft, pillowy, and stuffed with the kind of frosting that makes you question your life choices (in a good way). These little guys are basically pumpkin spice heaven in handheld form.
Why This Recipe is Awesome
Let’s be real — whoopie pies sound fancy, but they’re basically cake cookies with frosting in the middle. Translation: easy win.
Here’s the deal:
- They’re idiot-proof (even I didn’t mess them up).
- You get the cozy vibes of pumpkin spice without having to bake a full cake or pie.
- They look cute enough to impress your friends but require, like, zero skill.
- The filling? Light, fluffy, and dangerously addictive. You’ll probably “taste-test” it way too much.
Basically, this is your go-to recipe when you want to look like you tried — but didn’t.
Ingredients You’ll Need
Alright, grab your whisk and get ready to feel like a pro. Here’s what you need:
For the Pumpkin Cakes:
- 2 cups all-purpose flour – basic, reliable, the foundation of all good things.
- 1 teaspoon baking powder – helps puff those cakes up like little clouds.
- 1 teaspoon baking soda – team rise-and-shine.
- 1 tablespoon pumpkin pie spice – if fall had a smell, this would be it.
- ½ teaspoon salt – balances out the sweet stuff.
- 1 cup brown sugar – gives that cozy, caramel vibe.
- ½ cup vegetable oil – keeps things moist (yeah, sorry for saying “moist”).
- 1½ cups pumpkin puree – the star of the show.
- 2 large eggs – for structure and fluffiness.
- 1 teaspoon vanilla extract – the secret weapon of all good desserts.
For the Fluffy Filling:
- ½ cup (1 stick) butter, softened – because butter makes everything better.
- 1 cup marshmallow fluff – the magic ingredient.
- 1½ cups powdered sugar – for sweetness and texture.
- 1 teaspoon vanilla extract – just a little more love.
- Pinch of salt – keeps it from being too sweet (if that’s even possible).
Step-by-Step Instructions
Alright, enough chatting — let’s make magic.
- Preheat the oven.
Set it to 350°F (175°C). Don’t skip this. No one likes sad, underbaked whoopie pies. - Mix the dry stuff.
In one bowl, whisk together the flour, baking powder, baking soda, pumpkin spice, and salt. Set aside and feel accomplished already. - Mix the wet stuff.
In another bowl, combine the brown sugar, oil, pumpkin puree, eggs, and vanilla. Stir until it looks smooth and slightly dreamy. - Combine the two worlds.
Add the dry ingredients to the wet ones. Mix until just combined — don’t overmix or your whoopie pies might end up more “hockey puck” than “heavenly puff.” - Scoop and bake.
Drop tablespoon-sized mounds of batter onto a lined baking sheet. Keep them about 2 inches apart — they like their personal space.
Bake for 10–12 minutes, until the tops bounce back when gently poked. - Make the filling.
While the cakes cool, beat together the butter and marshmallow fluff until light and fluffy. Add powdered sugar, vanilla, and a pinch of salt. Beat until it looks irresistible. Try not to eat it all straight from the bowl (good luck). - Assemble the magic.
Pair up the cakes by size (like dessert Tinder) and spread or pipe the filling on one side. Top with its partner and press gently. Boom — whoopie pies!
Common Mistakes to Avoid
- Not preheating the oven. Rookie mistake. Your pies will bake unevenly and you’ll blame me. Don’t do that.
- Overmixing the batter. You’re not kneading bread. Chill.
- Overbaking. If they’re dry, they’re dead inside. Pull them out once they spring back.
- Too much filling. Okay fine, there’s no such thing, but if you go overboard, it’ll ooze out like a frosting crime scene.
- Skipping the cooling step. If you sandwich warm cakes, the filling melts. Science, baby.
Alternatives & Substitutions
- No pumpkin pie spice? Mix cinnamon, nutmeg, ginger, and cloves. Boom, DIY fall vibes.
- Want it dairy-free? Use plant-based butter and marshmallow fluff alternatives. Still delish.
- Don’t like marshmallow fluff? Swap it for cream cheese frosting — you rebel.
- Gluten-free version? Use a 1:1 gluten-free baking mix. Texture might be slightly different, but still awesome.
- Low-sugar hack: Use less powdered sugar in the filling (but honestly… why?).
FAQs
Can I make these ahead of time?
Totally! Store them in an airtight container in the fridge for up to 3 days. Just bring them to room temp before serving so they’re soft again.
Can I freeze whoopie pies?
Yep! Wrap individually and freeze for up to a month. Thaw before eating (unless you enjoy frozen desserts that double as jaw workouts).
Do I need a mixer for the filling?
You can hand-mix it, but your arm might fall off. A hand or stand mixer makes life easier — and fluffier.
Can I use canned pumpkin pie filling instead of puree?
Please no. That stuff already has sugar and spices. Your pies will taste like chaos. Use plain pumpkin puree.
How do I make them look perfect?
Use a cookie scoop for uniform size. Or don’t — they’ll still taste amazing, and “rustic” is totally a vibe.
What if my filling is too runny?
Add more powdered sugar until it firms up. Or refrigerate it for 15 minutes — it’ll stiffen like a champ.
Are they healthy?
LOL. Next question.
Final Thoughts
So there you have it — Pumpkin Whoopie Pies that are easy, impressive, and dangerously snackable. You can whip them up for a party, share them with friends, or just hoard them all for yourself (zero judgment).
Printable Recipe Card
Want just the essential recipe details without scrolling through the article? Get our printable recipe card with just the ingredients and instructions.