Look, I get it. You’re planning an event, and the pressure is on. Whether it’s a corporate lunch, a backyard birthday bash, or your best friend’s bridal shower, the food needs to be memorable—but you’re not exactly trying to replicate a Michelin-star experience in your kitchen at 6 AM.
Here’s the thing: professional food planners have been keeping secrets from us. Those effortlessly chic spreads you see at events? They’re not as complicated as they look. In fact, most catering pros rely on a handful of creative, repeatable ideas that look impressive but won’t have you sobbing into your cutting board at midnight.
I’ve spent way too much time talking to caterers, event planners, and that one friend who somehow always throws the perfect dinner party (you know the one). And honestly? The tricks they use are surprisingly simple. We’re talking crowd-pleasers that scale easily, look gorgeous, and—most importantly—won’t drain your bank account or your sanity.
So grab your notepad (or just bookmark this page, no judgment). These seven creative catering ideas are about to become your secret weapons. Your guests will think you hired someone. Your Instagram feed will never be the same. And you? You’ll actually get to enjoy your own party for once.
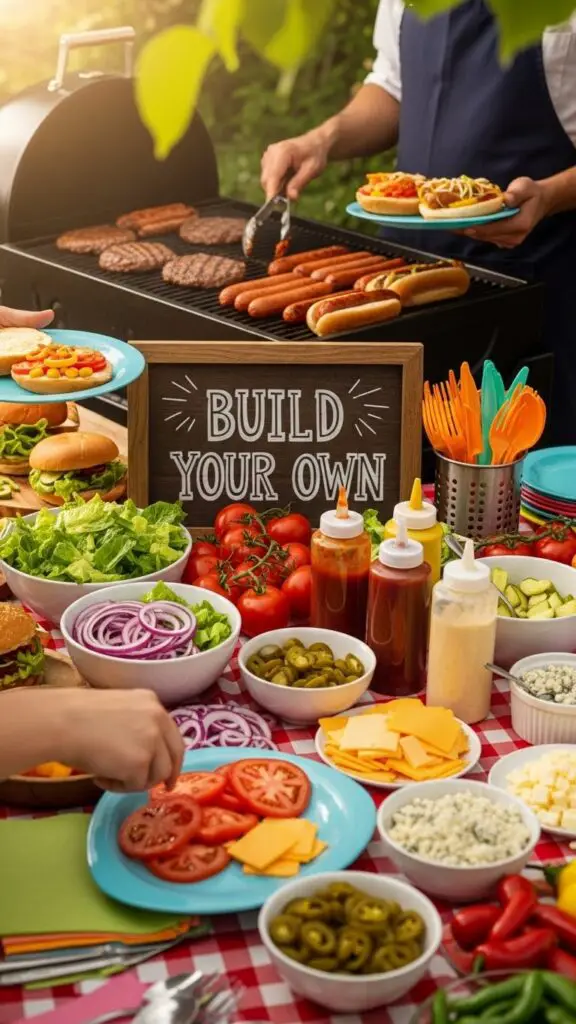
1. The “Build Your Own” Bar (Because People Love Playing With Their Food)
Okay, real talk: DIY food stations are the MVP of catering. Why? Because they practically run themselves AND everyone gets exactly what they want. No weird dietary restriction drama, no picking olives off plates—just pure, customizable happiness.
The concept is stupid simple: Set up a gorgeous spread of ingredients and let your guests create their own masterpiece. Tacos, grain bowls, bruschetta, slider bars—pick your vibe and run with it.
What You’ll Need
For a killer taco bar (serves 15-20):
- 3 lbs protein options (shredded chicken, seasoned ground beef, or grilled veggies)
- 24-30 small tortillas (corn and flour—options, people!)
- Toppings galore: shredded lettuce, diced tomatoes, pickled onions, jalapeños, cilantro, lime wedges
- Cheese situation: cotija, cheddar, or pepper jack
- Sauces: sour cream, salsa verde, chipotle mayo, regular salsa
- Black beans and Mexican rice as sides
How to Set It Up
- Prep everything the day before. Chop, slice, cook your proteins, and store everything in labeled containers. Future you will be so grateful.
- Arrange stations logically: tortillas first, then proteins, then toppings (wet to dry), then sauces last. Think assembly line, not chaos.
- Use tiered serving platters or cake stands to create height and visual interest. A $12 cake stand from HomeGoods just elevated your taco bar to caterer status—you’re welcome.
- Add cute labels with little chalkboard signs or printed cards. “Spicy Chipotle Mayo (Proceed with Caution!)” beats an unlabeled bowl of mystery sauce every time.
- Keep cold things cold and hot things hot. Chafing dishes aren’t just for hotels, folks. You can rent them for like $10 each.
Why Food Planners Swear By It
IMO, this is the smartest catering move you can make. It cuts your labor by about 60% because guests do the work themselves. Plus, dietary restrictions? Handled. Picky eaters? Not your problem anymore. That vegetarian cousin and your carnivore brother-in-law can both make something they’ll actually eat.
I used a Mediterranean grain bowl bar for my sister’s baby shower last year, and people are still talking about it. And between you and me? I spent maybe two hours on actual day-of work. The rest was just strategic prep and pretty bowls.
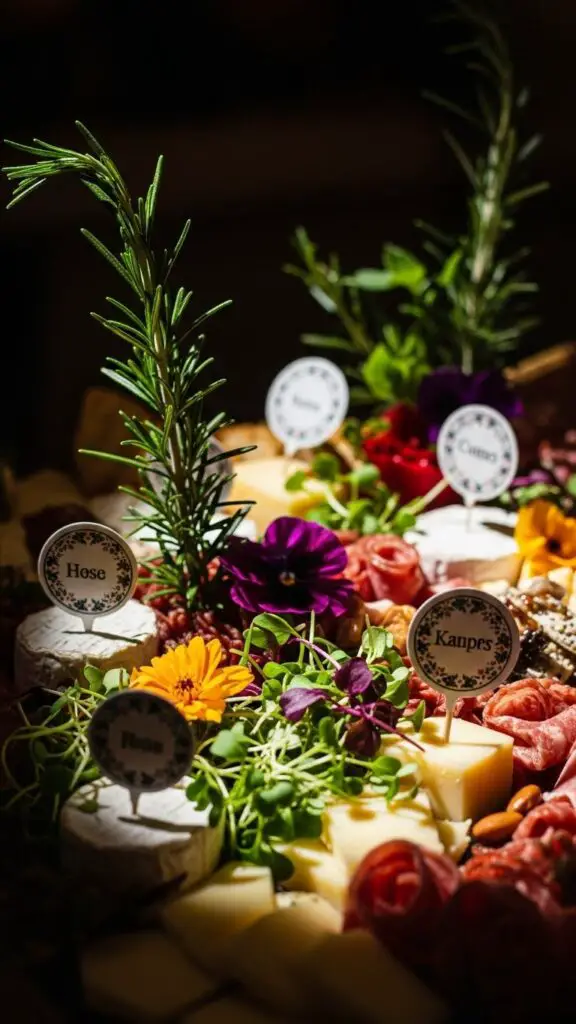
2. Charcuterie Boards on Steroids (Go Big or Go Home)
Listen, charcuterie boards aren’t new. But the way pro caterers do them? That’s next-level. We’re not talking about a sad little cheese plate from the grocery store deli. We’re talking grazing tables that look like edible art installations.
What You’ll Need
For a show-stopping board (serves 20-25):
- 4-5 cheese varieties: soft (brie), hard (aged cheddar), blue (gorgonzola), something unexpected (smoked gouda)
- 3-4 cured meats: prosciutto, salami, chorizo, or whatever’s good at your local spot
- Crackers and bread: at least 3 types (water crackers, crostini, breadsticks)
- Fresh and dried fruits: grapes, figs, apricots, apple slices
- Nuts: almonds, candied pecans, or marcona almonds (fancy!)
- Spreads and extras: honey, fig jam, whole grain mustard, olives, pickles
- Fresh herbs for garnish (rosemary and thyme look chef’s kiss)
How to Build It
- Start with your biggest items first. Place your cheese blocks and bowls of spreads/olives to anchor the board.
- Add your meats in swoopy, folded piles or little salami roses if you’re feeling extra. YouTube has tutorials—it’s easier than it looks.
- Fill gaps with crackers standing up vertically in rows. Creates dimension and looks way more professional.
- Scatter fruits, nuts, and fresh herbs in the empty spaces. Think organized chaos, not perfection.
- Add small labels with cheese names if you want to look super fancy (bonus points if you include tasting notes like “pairs well with honey”).
Why Food Planners Swear By It
Charcuterie scales beautifully. You can make a massive grazing table or individual boxes—same concept, different execution. It’s elegant, requires zero cooking, and works for literally any time of day. Breakfast? Add yogurt parfaits. Lunch? You’re set. Cocktail hour? Absolutely.
Pro tip from a caterer friend: Buy your cheese from Costco (seriously, don’t overpay at boutique shops unless you’re feeding actual royalty), but display it like you got it from that overpriced artisan place downtown. Presentation is everything 🙂
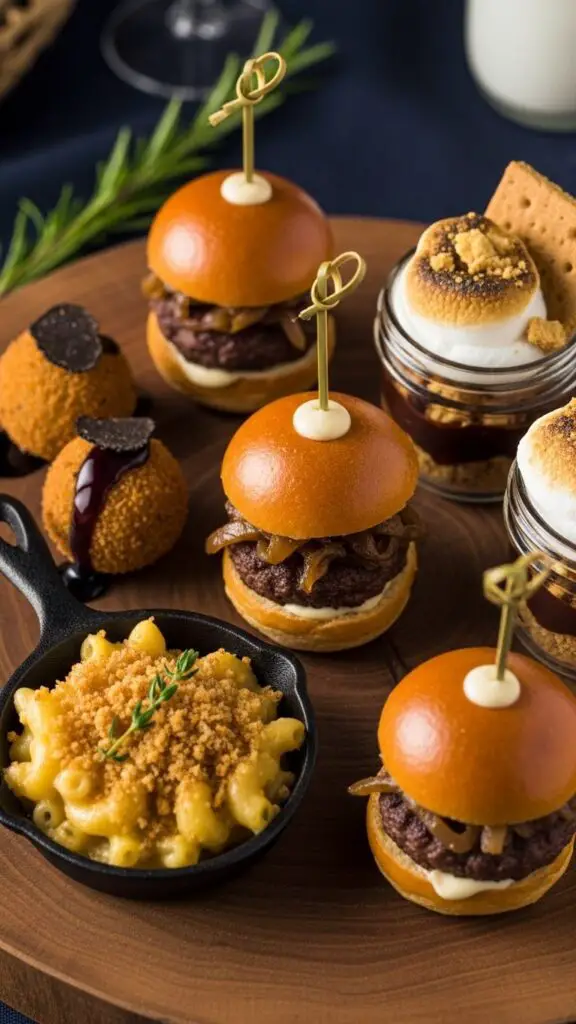
3. Elevated Comfort Food in Mini Form (Because Tiny Things Are Cuter)
Here’s a secret: People lose their minds over miniature versions of regular food. Mini grilled cheese with tomato soup shooters? Adorable. Tiny shepherd’s pies in ramekins? Stop it, that’s too cute. Sliders instead of burgers? Now we’re talking catering gold.
What You’ll Need
For mini mac and cheese cups (serves 20):
- 1 lb elbow macaroni
- 4 cups shredded cheese blend (sharp cheddar, gruyere, fontina—get creative)
- 4 cups whole milk
- 1/2 cup butter
- 1/2 cup flour
- 24 mini muffin tin cups or small disposable ramekins
- Breadcrumb topping: 1 cup panko, 2 tbsp melted butter, fresh parsley
- Salt, pepper, garlic powder, smoked paprika
Step-by-Step Instructions
- Cook your pasta al dente (it’ll cook more in the oven, so don’t overdo it). Drain and set aside.
- Make a killer cheese sauce: Melt butter in a large pot, whisk in flour for 2 minutes (you’re making a roux—fancy!), slowly add milk while whisking. Add cheese gradually until melted and smooth. Season with salt, pepper, garlic powder, and a pinch of smoked paprika.
- Combine pasta and sauce until everything’s well coated. Taste it. Adjust seasoning. This is your moment.
- Spoon mixture into greased muffin tins or ramekins, filling almost to the top.
- Mix panko with melted butter and parsley, then sprinkle generously on top of each cup.
- Bake at 375°F for 20-25 minutes until tops are golden and crispy. Let cool for 5 minutes before removing from tins.
Why Food Planners Swear By It
Portion control meets Instagram-worthy presentation. These little guys are perfect for standing receptions where people are mingling with drinks. No plates needed, no utensils (okay, maybe tiny forks), and everyone gets the crispy top part—which is obviously the best part.
FYI, this strategy works with basically any comfort food. Chicken pot pie? Mini versions. Lasagna? Cupcake-style in muffin tins. Meatloaf? You get the idea. The formula is undefeated.
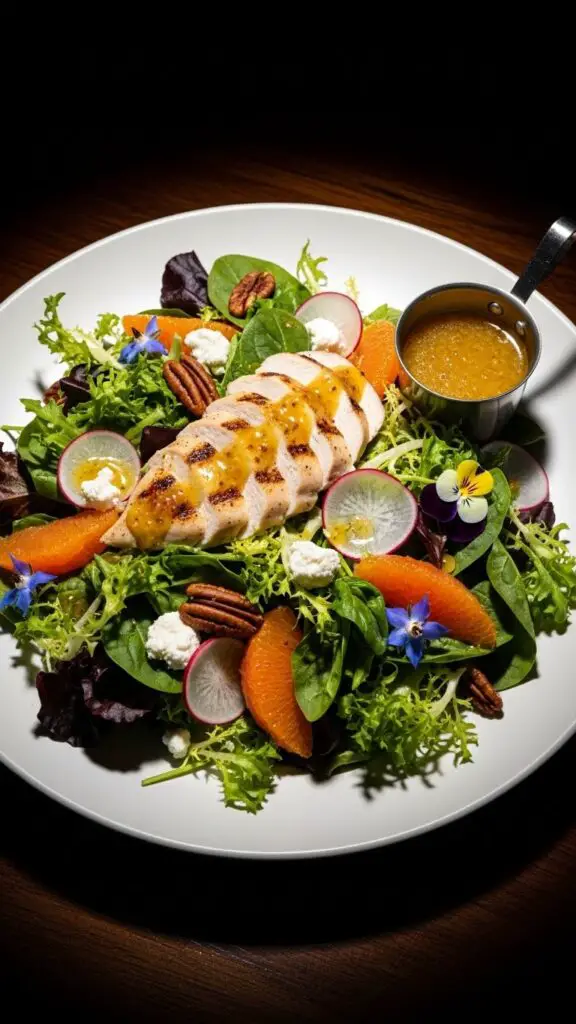
4. The Showstopper Salad (Yes, Salad Can Be Exciting)
I know what you’re thinking: “Salad? Really?” But hear me out. Professional caterers know that a stunning, thoughtfully composed salad can actually steal the show—if you do it right.
The secret? Layer it in a clear glass bowl or display it on a massive platter so people can see all the gorgeous components. Add unexpected textures and flavors. Make it look like it belongs in a cookbook photoshoot.
What You’ll Need
For a show-stopping fall harvest salad (serves 15-20):
- 16 cups mixed greens (spinach, arugula, spring mix—variety is key)
- 3 cups roasted butternut squash cubes
- 2 cups dried cranberries
- 2 cups candied pecans
- 1 cup crumbled goat cheese (or feta if goat cheese isn’t your thing)
- 1 cup pomegranate arils (those jewel-like seeds that cost way too much)
- Dressing: 1/2 cup olive oil, 1/4 cup balsamic vinegar, 2 tbsp maple syrup, 1 tbsp Dijon mustard, salt and pepper
Step-by-Step Instructions
- Roast your butternut squash the day before: toss cubes with olive oil, salt, and cinnamon, roast at 400°F for 25 minutes. Let cool completely.
- Make your dressing by whisking all ingredients together. Taste and adjust—add more maple if you want it sweeter, more vinegar if you want tang.
- Assemble in a clear trifle bowl if you have one: layer greens, then squash, then cranberries, then pecans, then cheese. Repeat. Top with pomegranate arils because they’re basically edible rubies.
- Dress right before serving (never before, unless you enjoy soggy sadness). Toss gently and transfer to your display platter if needed.
Why Food Planners Swear By It
It’s the “healthy option” that people actually want to eat. Every event needs something fresh and bright, but nobody wants boring iceberg lettuce with ranch. This salad has sweet, savory, crunchy, and creamy all happening at once—that’s the magic formula.
Also, real talk: it photographs beautifully, which means your guests will do your marketing for you when they post it on social media. Strategic thinking, people.
5. Street Food Stations (World Cuisine Without the Passport)
Want to know what makes catering feel expensive and worldly? Bringing authentic street food vibes to your event. Think Vietnamese bánh mì bars, Mediterranean mezze spreads, or a full-on sushi hand roll station. It’s unexpected, it’s fun, and it makes you look incredibly cultured.

What You’ll Need
For a DIY bánh mì station (serves 15-20):
- 3-4 baguettes, sliced into 6-inch segments and split
- Pickled vegetables: carrots and daikon radish (make these 2 days ahead)
- Proteins: marinated grilled pork, lemongrass chicken, or crispy tofu
- 3 cucumbers, julienned
- 2 bunches fresh cilantro
- 4-5 jalapeños, sliced thin
- Sriracha mayo and hoisin sauce for drizzling
- Pâté if you’re going authentic (optional but traditional)
Step-by-Step Instructions
- Quick-pickle your veggies: Mix equal parts rice vinegar, water, and sugar with a pinch of salt. Pour over julienned carrots and daikon. Let sit at least 4 hours (or overnight).
- Marinate and grill your protein the morning of: mix soy sauce, fish sauce, brown sugar, garlic, and lemongrass. Grill until caramelized and slightly charred.
- Toast your baguettes lightly so they’re crispy outside but still soft inside.
- Set up your station with all components in separate bowls, assembly-line style.
- Let guests build their own sandwiches by spreading mayo/pâté, adding protein, piling on pickles, cucumbers, cilantro, jalapeños, and finishing with sauces.
Why Food Planners Swear By It
Street food = casual sophistication. It’s approachable and fun but also feels special and different. Plus, it’s usually pretty budget-friendly compared to traditional catering proteins like steak or salmon.
I did a Mediterranean mezze station for a work event last summer—hummus, baba ganoush, falafel, pita, all the fixings—and people went absolutely bananas for it. Cost me maybe half what a “regular” catering menu would’ve run, and the feedback was off the charts.
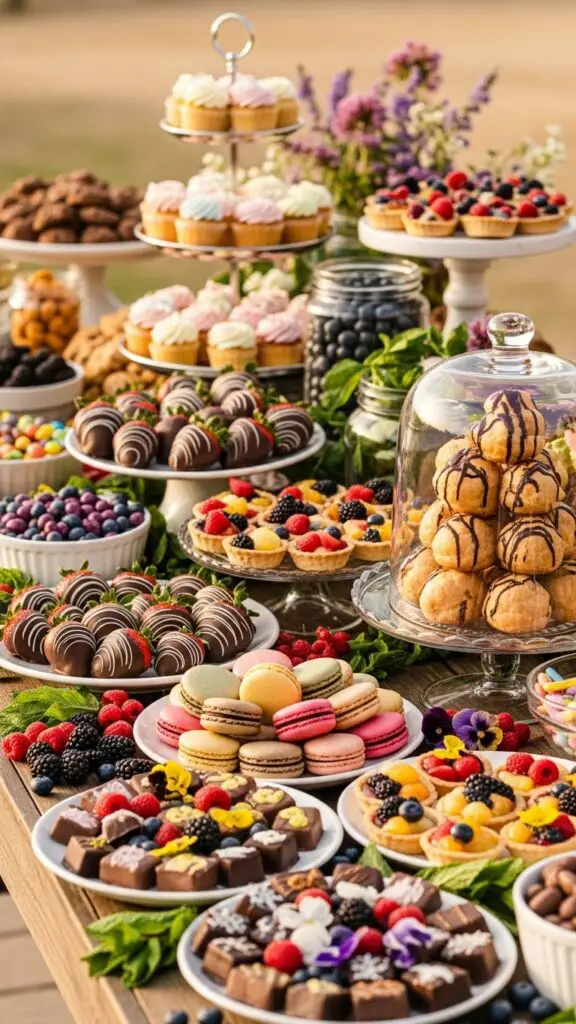
6. Dessert Grazing Tables (Sugar Overload in the Best Way)
If charcuterie boards are having a moment, dessert grazing tables are having a whole year. This is where you abandon portion control, embrace abundance, and create what I like to call “organized dessert chaos.”
What You’ll Need
For a dessert table (serves 20-30):
- 3-4 types of cookies: chocolate chip, snickerdoodles, biscotti, macarons
- 2-3 types of brownies or bars: classic fudge, blondies, lemon bars
- Fresh fruit: strawberries, grapes, figs (for people pretending to be healthy)
- Chocolate options: truffles, chocolate-covered pretzels, fancy chocolate bars broken into pieces
- Candy: gummy bears, M&Ms, Jordan almonds, whatever fits your vibe
- Mini desserts: cheesecake bites, cream puffs, tiny tarts
- Decorative elements: fresh flowers, gold leaf, twinkle lights
How to Build It
- Choose a focal point: maybe a small cake, a gorgeous tart, or a tower of macarons in the center.
- Add height with cake stands at different levels. This creates visual drama and makes everything more accessible.
- Group similar items together but create variety in texture and color throughout the table.
- Fill in gaps with flowers, greenery, or decorative elements that fit your theme.
- Add serving utensils, small plates, and napkins at one end so guests can grab and go.
Why Food Planners Swear By It
It’s completely flexible and scalable. You can bake some items yourself and buy others from a local bakery—nobody has to know. It accommodates all dietary needs if you include variety (gluten-free, vegan options). And honestly? People remember a gorgeous dessert spread way more than they remember the main course.
The best part: You can prep almost everything days in advance. Cookies? Freeze them. Brownies? They actually taste better the next day. Day-of is just arranging, which you can do in like 30 minutes.
7. Interactive Food Experiences (Make It Memorable)
This is the big guns strategy that separates amateur planners from the pros. Give people an experience, not just a meal. Think live cooking demos, DIY cocktail stations with a “mixologist” (your friend who watches too much bartending TikTok), or even something as simple as a s’mores bar with a tabletop fire pit.

What You’ll Need
For a DIY bruschetta bar (serves 15-20):
- 4 baguettes, sliced and toasted
- Classic tomato topping: 6 cups diced tomatoes, fresh basil, garlic, olive oil, balsamic, salt
- White bean and rosemary: 3 cans cannellini beans, rosemary, lemon, garlic
- Whipped ricotta with honey: 2 lbs ricotta, honey, lemon zest
- Mushroom and thyme: 4 cups sautéed mixed mushrooms, fresh thyme, white wine
- Prosciutto and fig jam as a fifth option
- Garnishes: microgreens, balsamic glaze, flaky salt, extra herbs
Step-by-Step Instructions
- Prep all your toppings the morning of and keep them in separate bowls with serving spoons.
- Toast baguette slices until golden and crispy, about 5 minutes at 375°F. You can do this a few hours ahead.
- Arrange everything on a long table with toasted bread at one end, toppings in the middle, and garnishes at the end.
- Add instructions on a cute sign: “Toast + Topping + Garnish = Perfection!”
- Stand back and watch people get creative. Someone will inevitably make some wild combination, and it’ll become a conversation starter.
Why Food Planners Swear By It
Engagement is everything. When people interact with their food, they’re more invested in the experience. They remember it. They talk about it. They post about it (hello, free marketing).
Plus, interactive stations naturally encourage mingling. People chat while they build their plates, share recommendations on toppings, compliment each other’s choices. You’ve basically created a social lubricant disguised as dinner.
Here’s the Thing About These Catering Ideas
None of these require culinary school. None of them cost a fortune. And every single one can be adapted to your budget, your theme, and your crowd size.
The secret that food planners know? Great catering isn’t about being the most complicated or expensive—it’s about being thoughtful, strategic, and just a little bit creative. It’s about making your guests feel special without making yourself crazy in the process.
Mix and match these ideas. Do a charcuterie board as appetizers and a DIY taco bar for the main event. Set up a build-your-own salad station for lunch and a dessert grazing table for later. The formula is flexible—that’s the whole point.
And look, your event is going to be great because you cared enough to plan it well. These ideas are just tools to make your life easier and your food more memorable. Use them, adapt them, make them your own.
Now go forth and cater like a pro. Your guests are going to lose their minds, and you’re going to look like you’ve been doing this for years.
(Just maybe don’t tell them how easy it actually was. Let them think you’re magic 😉
Printable Recipe Card
Want just the essential recipe details without scrolling through the article? Get our printable recipe card with just the ingredients and instructions.

