So you’re staring at that fancy jar of almond butter at the store, side-eyeing the price tag, and thinking, “I could probably make that.” Spoiler: You totally can. And it’s way easier than assembling that IKEA bookshelf currently gathering dust in your hallway. Let’s turn some almonds into liquid gold.
Why This Recipe is Awesome
Let’s be real. This recipe is idiot-proof. If you can operate a food processor without injuring yourself, you’re already 90% of the way there. You get to control what goes in it (goodbye, weird preservatives you can’t pronounce) and it’s cheaper than the store-bought stuff. Plus, the sheer satisfaction of saying, “Oh this? I made it myself,” is almost as good as the almond butter itself. Almost.
Ingredients You’ll Need for Almond Butter
Gather your squad. You don’t need much.
- 3 cups Raw Almonds: The star of the show. Don’t get roasted and salted ones; we’re the bosses of flavor here.
- ½ – 1 tsp Fine Sea Salt: Start with ½, add more later if your taste buds are screaming for it.
- 1-2 tbsp Neutral Oil (optional): Avocado, grapeseed, or a light olive oil. This is just for help if your machine is struggling. You might not need it!
- Optional Flavor Boosters: Because why not? A drizzle of honey or maple syrup for sweetness, a dash of cinnamon, or even a pinch of cacao powder for a chocolatey twist.
Step-by-Step Instructions
- Preheat Your Oven. Crank it to 350°F (175°C). This is non-negotiable. We’re toasting these nuts for maximum flavor. Trust me, skipping this is a one-way ticket to bland town.
- Toast Those Nuts. Spread your almonds in a single layer on a baking sheet. Whack them in the oven for 10-12 minutes. You’ll know they’re ready when the kitchen smells amazing and they have a slightly darker hue. Give them a shake halfway through. Don’t wander off and forget them—nobody wants burnt almonds.
- Let Them Cool (A Little). Tip the toasted almonds into your food processor bowl. I know you’re excited, but let them cool for just a minute or two. We’re making nut butter, not melting your appliance.
- Pulse, Then Process. Secure the lid and let ‘er rip! Process for 1 minute, then stop and scrape down the sides. At first, it will look like almond dust. Then it’ll form a ball. This is normal! Keep going. It will feel like it’s never going to happen, but then… magic.
- Wait For The Magic. After a few more minutes, the ball will break down into a thick, gritty paste. Scrape the sides again. Keep processing. You’re on the home stretch!
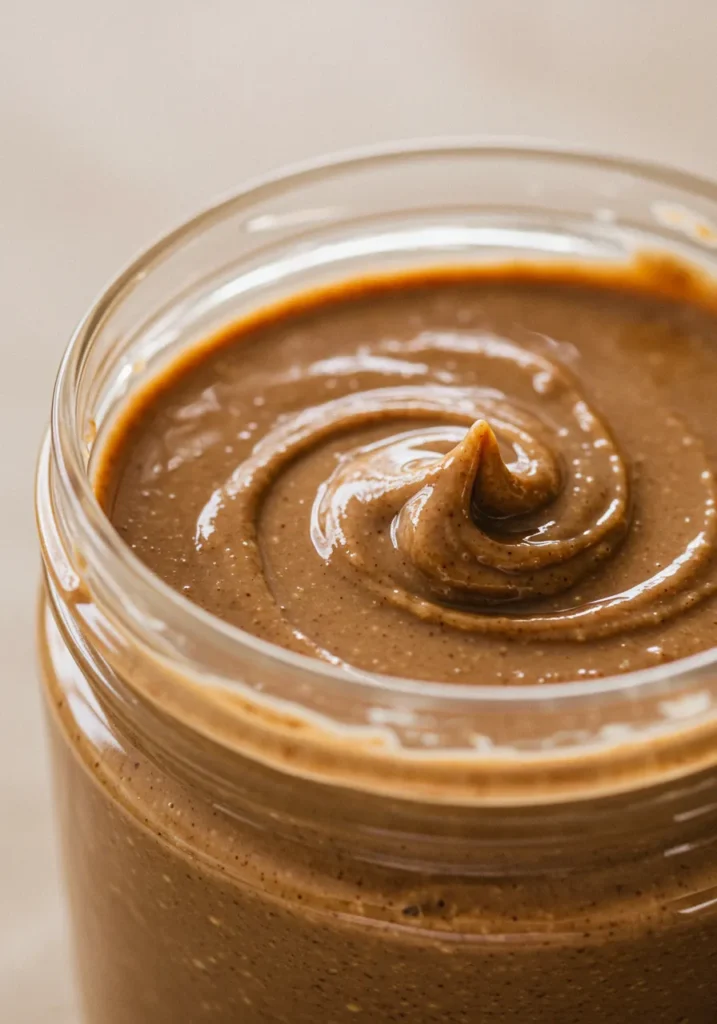
- Achieve Creamy Bliss. After about 10-15 minutes total, the natural oils will release fully and your gritty paste will transform into smooth, luxurious almond butter. If your machine is really struggling and getting hot, you can add a tablespoon of oil to help it along.
- Season & Store. Once it’s at your desired consistency, add your salt and any other flavor boosters. Process for another 30 seconds to mix it all in. Taste it. Is it perfect? Yes. Yes, it is. Scoop it into a jar, lid it, and store it in the fridge.
Common Mistakes to Avoid
- Using Roasted Almonds. Just don’t. They often have salt and oils already added, which can throw off your recipe and make the butter way too salty. Start from raw, people!
- Giving Up Too Soon. The transformation from crumbly mess to creamy dream is a test of patience. Do not quit during the “thick ball” phase. Your food processor is working hard. Let it do its job.
- Not Letting the Nuts Cool. Tossing piping hot nuts straight into the processor traps steam, which can make your butter weirdly gummy. A brief cool-down is your friend.
Alternatives & Substitutions
No food processor? A high-powered blender (like a Vitamix or Blendtec) will work, but you might have to stop and scrape more often.
Want to mix it up? Try using other nuts! Cashews make an incredibly creamy butter much faster. Pecans and walnuts are delicious too (though they can be a bit more bitter).
For an oil-free version, simply omit the oil. Your butter might be a tad thicker, but it will still be delicious. You just have to be extra patient during the processing stage.
FAQs about Almond Butter
How long does homemade almond butter last?
In a sealed jar in the fridge, it’s good for up to 3-4 weeks. If it lasts that long. IMO, it won’t.
Why is my almond butter not getting smooth?
You probably just need to process it longer. I know, it’s annoying. But it’s almost always the answer. Also, make sure you toast your almonds—this helps release their oils.
Can I make it crunchy?
Absolutely! After making your smooth butter, pulse in some finely chopped almonds at the end until it’s as crunchy as you like.
Do I have to use oil?
Nope! It’s totally optional. The almonds have plenty of their own natural oil. The added oil just helps the process along if your machine isn’t a powerhouse.
My food processor is getting really warm. Should I be worried?
It’s normal for it to get a bit warm. If it’s too hot to touch or starts smelling like a burning motor, give it a 5-minute break to cool down. We’re making butter, not smoke signals.
Related Recipes
Final Thoughts about Almond Butter
See? That wasn’t so hard, was it? You just made something incredibly delicious from scratch. Slather it on toast, dollop it on oatmeal, or—my personal favorite—eat it straight from the jar with a spoon. No judgment here.
Now go forth and spread the word (and the nut butter). You’ve officially leveled up in life.
Printable Recipe Card
Want just the essential recipe details without scrolling through the article? Get our printable recipe card with just the ingredients and instructions.

