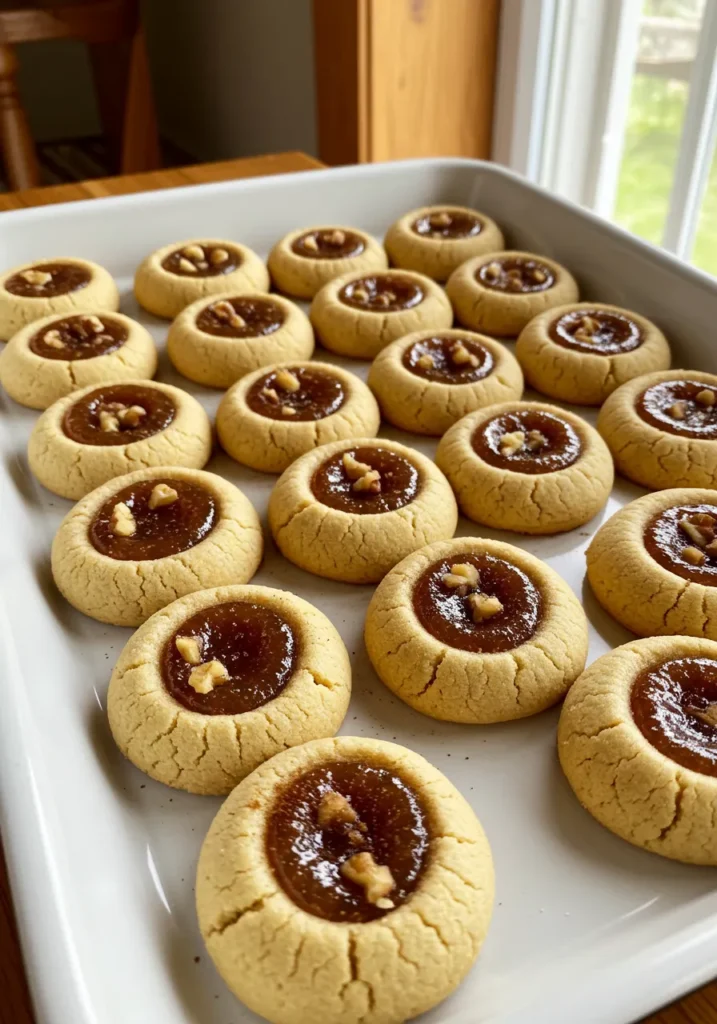
So, you’re staring into the pantry, hoping something magically delicious will appear. It never does, does it? Well, stop hoping and start baking, my friend. These Apple Butter Thumbprint Cookies are about to become your new favorite solution to that “I need a cookie NOW” feeling. They’re like a cozy fall sweater, but in dessert form and infinitely more delicious.
Why This Recipe is Awesome
Let’s cut to the chase. This recipe is ridiculously easy. We’re talking “I-just-woke-up-from-a-nap-and-can-still-make-these” levels of easy. They look fancy and taste like you spent all day in the kitchen, but the secret is that they come together with minimal effort. The dough is forgiving, the filling is store-bought (no shame in our game!), and the result is a buttery, spiced, melt-in-your-mouth cookie that will have people begging you for the recipe. It’s the ultimate culinary hack for instant hero status.
Ingredients You’ll Need for Apple Butter Thumbprint Cookies
Gather your squad. Here’s what you’ll need to make cookie magic happen. Pro tip: use a kitchen scale for the flour if you have one—it’s a game-changer for consistency.
For the Cookies:
- 1 cup (2 sticks) unsalted butter, softened: This is a non-negotiable ingredient. Don’t you dare use cold butter straight from the fridge. We want it soft, not melted.
- ⅔ cup granulated sugar: For that perfect sweetness.
- 2 large egg yolks: Save the whites for an omelet or a healthy(ish) meringue disaster later.
- 1 teaspoon vanilla extract: The good stuff. Don’t skimp.
- ½ teaspoon salt: To balance all the sweetness.
- 2 cups all-purpose flour: The foundation of our beautiful cookie empire.
For the Filling & Topping:
- ½ cup apple butter: Not applesauce. Apple butter. It’s thicker, spicier, and infinitely better for this job. Find it near the jams.
- ½ teaspoon ground cinnamon: Because more spice is always nice.
- Coarse sugar (like turbinado or sanding sugar): For that gorgeous, sparkling, crunchy edge.
Step-by-Step Instructions
- Preheat and Prep. Crank your oven to 350°F (175°C). Line a couple of baking sheets with parchment paper. Preheating is crucial—don’t be that person who puts cookies in a cold oven.
- Cream the Good Stuff. In a large bowl, beat the softened butter and granulated sugar together with an electric mixer. Beat it for a good 2-3 minutes until it’s light, fluffy, and pale yellow. This is where you build the cookie’s texture, so don’t rush it!
- Bring in the Backup. Beat in the egg yolks and vanilla extract until everything is beautifully combined. It might look a little curdled for a second, but just keep mixing; it’ll come together.
- Dry Party. In a separate bowl, whisk together the flour and salt. Gradually add this to the wet ingredients, mixing on low speed until the dough just comes together. Don’t overmix! You’ll end up with tough cookies, and nobody wants that.
- Sugar & Shape. Pour your coarse sugar into a small bowl. Roll the dough into 1-inch balls, then roll each ball in the coarse sugar to coat it completely. This is your cookie’s glittery jacket.
- Make the Thumbprint. Place the sugar-coated balls on your prepared baking sheets, about 2 inches apart. Now, use your thumb, the end of a wooden spoon, or a ½ teaspoon measure to press a firm, deep indent into the center of each cookie. Make the indent deeper than you think you need—it will puff up a bit while baking.
- Bake (Part One). Pop those bad boys in the oven for 10 minutes. They will have puffed up and the indentations will have shrunk a little.
- Re-press and Finish. Take the trays out of the oven (carefully!). Using that same spoon or measuring spoon, gently re-press the indentations. This is the secret step for a perfect, well-defined well for all that apple butter goodness. Return them to the oven for another 4-6 minutes, or until the edges are just lightly golden.
- Cool Completely. Let the cookies cool on the baking sheet for 5 minutes before transferring them to a wire rack to cool completely. They must be fully cooled before you add the filling. I know it’s hard, but be strong.
- Fill ‘Er Up. Once the cookies are completely cool, stir the cinnamon into the apple butter. Spoon a generous little dollop (about ½ teaspoon) into each cookie’s well. Now, devour.
Common Mistakes to Avoid
- Not Letting the Butter Soften Enough: If your butter is still cold, your dough will be crumbly and a nightmare to work with. Plan ahead! Take the butter out an hour before you start.
- Skipping the Re-press Step: If you don’t redefine the thumbprint halfway through baking, it will bake shut. You’ll be left with a sad, flat cookie with no place to put the glorious apple butter. Don’t do this to yourself.
- Filling Warm Cookies: Adding apple butter to a warm cookie is a one-way ticket to Soggy Town. The filling will melt and seep everywhere. Patience is a virtue, especially in baking.
Alternatives & Substitutions
No apple butter? No problem (well, a small problem, but we can work around it).
- Apple Butter Substitute: Use a thick, spiced applesauce or any other fruit butter (peach butter? yes please!). You can even use a thick jam, but warm it slightly first so it’s easier to spoon.
- Gluten-Free: A 1:1 gluten-free flour blend works wonderfully here. I’ve tested it!
- Vegan: Use your favorite plant-based butter sticks (not the tub kind). For the egg yolk, a flax “egg” (1 tbsp ground flax + 3 tbsp water per egg, set for 5 mins) should work, though the texture might be slightly more delicate.
- Spice It Up: Feel free to add a pinch of nutmeg or cardamom to the dough for an extra flavor kick.
FAQs about Apple Butter Thumbprint Cookies
Can I use margarine instead of butter?
Technically, yes. But will the cookie be as rich, flavorful, and worthy of your love? Absolutely not. Butter is best. IMO, it’s always worth it.
My dough is too crumbly! What do I do?
Did you use cold butter? Probably. If your dough isn’t coming together, add a teaspoon of cold water at a time until it becomes workable. Don’t go overboard!
Can I make the dough ahead of time?
You sure can! Mix the dough, form the balls, and keep them in an airtight container in the fridge for up to 2 days. Roll them in sugar and bake when you’re ready.
How do I store these masterpieces?
Store them in a single layer (or with parchment between layers) in an airtight container at room temperature for up to 4 days. They never last that long in my house, though.
Can I freeze them?
Yes! Freeze the baked, unfilled cookies. When you’re ready, thaw and then add the apple butter filling. You can also freeze the filled cookies, but the texture of the filling might change slightly.
Why only the egg yolk?
The yolk adds richness and tenderness without the drying effect the white can have. It gives us that perfect, melt-in-your-mouth shortbread texture.
Related Recipes
Final Thoughts about Apple Butter Thumbprint Cookies
And there you have it. You are now the proud creator of the most delightful, easy, and impressive cookie on the block. Whether you’re bribing your coworkers, impressing a date, or just treating yourself after a long day (the best reason), these cookies are your answer. Now go forth, bake, and enjoy the well-deserved compliments. You’ve totally got this
Printable Recipe Card
Want just the essential recipe details without scrolling through the article? Get our printable recipe card with just the ingredients and instructions.

