So you’ve got apples sitting in your kitchen, staring at you like, “Eat me or I’ll rot and make you feel guilty.” Don’t worry—I’ve got your back. Instead of pretending you’ll “snack healthy” (spoiler: you won’t), let’s turn those apples into a dessert that’ll make you do a little happy dance. Lazy? Busy? Totally fine. This recipe doesn’t require you to be the next Gordon Ramsay. Just grab some apples, a few basics, and boom—you’re in dessert heaven.
Why This Recipe is Awesome
- It’s stupidly simple. If you can slice an apple, you’re already 80% done.
- Cheap AF. Apples don’t cost a fortune, and you probably have most of the ingredients already.
- Crowd-pleaser. Serve it at a party, and suddenly you’re “the dessert person.”
- Zero stress. No need for pastry chef skills. (But if you do have them, flex away, my friend.)
- And the best part? It makes your house smell like a cozy fall wonderland. Seriously, your neighbors will think you’re auditioning for a baking show.
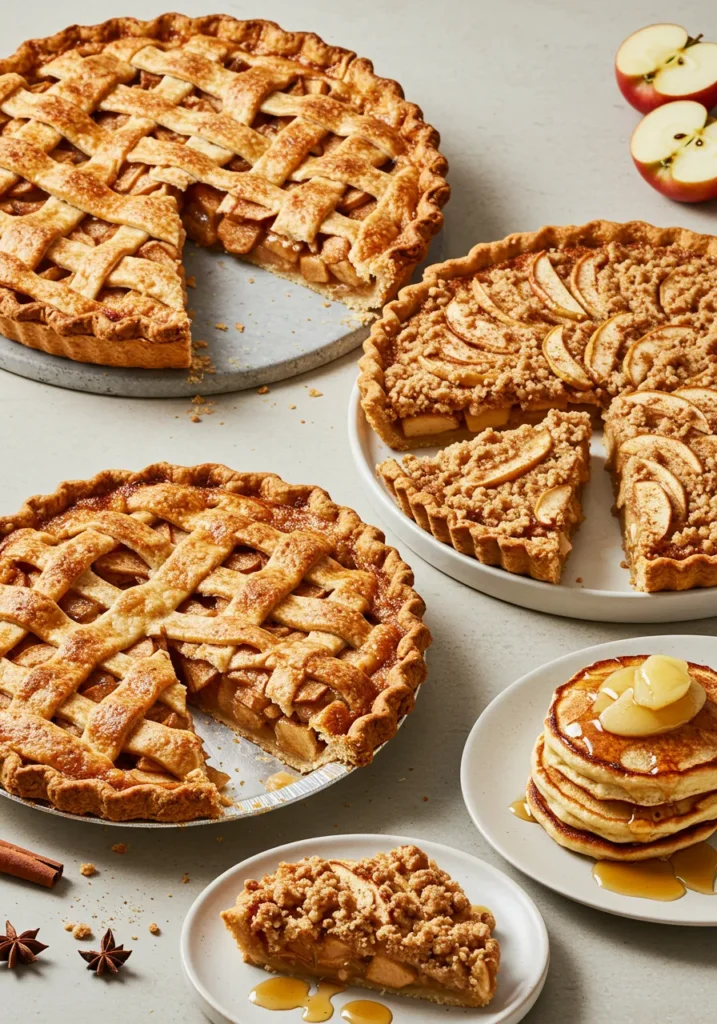
Ingredients You’ll Need for Apple Desserts
- 4 medium apples (any kind, but Granny Smith = tangy, Fuji = sweet, your call)
- 2 tbsp butter (the real stuff, not margarine—life’s too short for fake butter)
- 3 tbsp brown sugar (because caramel vibes, duh)
- 1 tsp cinnamon (your kitchen’s best perfume)
- ½ tsp nutmeg (optional, but makes you feel fancy)
- 1 tbsp lemon juice (so your apples don’t look sad and brown)
- A handful of crushed nuts or oats (optional but adds crunch)
- Vanilla ice cream (not optional—unless you’re a robot)
Step-by-Step Instructions
- Preheat your oven to 350°F (175°C). Yes, actually preheat it. Don’t just “turn it on and hope for the best.”
- Slice your apples into thin wedges. Leave the skin on if you’re lazy (extra fiber, you’re welcome).
- Melt the butter in a pan, toss in the sugar, cinnamon, nutmeg, and lemon juice. Stir like you mean it until it looks all syrupy.
- Add the apples and cook for 5 minutes until they get soft but not mushy. Think “tender but holding it together.”
- Transfer to a baking dish (or whatever oven-proof thing you’ve got). Sprinkle nuts or oats on top for crunch.
- Bake for 20 minutes. This is when your house starts smelling like a Pinterest board.
- Serve warm with a scoop of vanilla ice cream on top. Eat immediately. Regret nothing.
Common Mistakes to Avoid
- Skipping the lemon juice. Your apples will turn into sad, brown blobs. Nobody wants that.
- Forgetting to preheat the oven. Then you’ll wait forever, and your apples will just sit there, judging you.
- Overbaking. Burnt apples = chewy nightmares.
- Using margarine. Don’t. Just… don’t.
Alternatives & Substitutions
- No brown sugar? Use white sugar + a drizzle of honey. Boom—problem solved.
- Hate cinnamon? Try pumpkin spice. It’s basically cinnamon in disguise anyway.
- Want it healthier? Skip the ice cream and serve with Greek yogurt. (But why deny yourself joy?)
- No nuts? Granola works and makes you feel like you planned it that way.
FAQS about Apple Desserts
Can I use any kind of apple?
Yep. Sweet, tart, whatever. Just don’t use the wrinkly one at the back of the fridge—it deserves retirement.
Can I make this ahead of time?
Sure, but it’s best fresh. Reheat it in the oven, not the microwave, unless you like apple soup.
Do I have to peel the apples?
Nope. The peel adds texture and saves you time. Lazy chefs unite!
Can I make this vegan?
Totally. Swap butter for coconut oil. The apples won’t complain.
Can I skip the sugar?
You can, but then it’s basically just warm apples. And where’s the fun in that?
How do I make it fancier?
Top it with caramel drizzle, whipped cream, or even a splash of bourbon. Instant glow-up.
Related Recipes
Final Thoughts about Apple Desserts
And there you have it—an apple dessert that’s simple, cozy, and ridiculously good. It’s basically comfort food disguised as a “fruit serving,” so technically, you’re being healthy. 😉 Now go make it, grab a spoon, and treat yourself. Seriously—you’ve earned this one.
Printable Recipe Card
Want just the essential recipe details without scrolling through the article? Get our printable recipe card with just the ingredients and instructions.

