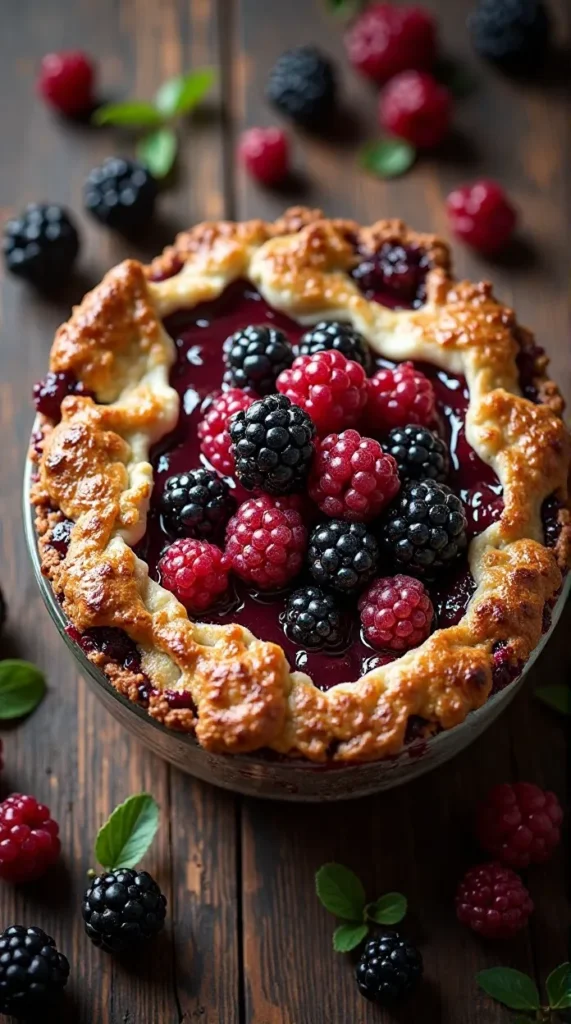
So, you’re craving something sweet, juicy, and just a little bit sassy, huh? Welcome to the blackberry pie party, where buttery crust meets tart, jammy goodness. This pie is like a warm hug from your favorite person—comforting, indulgent, and impossible to resist. Whether you’re baking for a crowd or just treating yourself (no judgment), this recipe is your ticket to pie paradise. Let’s dive in and make some magic happen!
Why This Recipe is Awesome
This blackberry pie isn’t just a dessert; it’s a vibe. It’s got that perfect balance of sweet and tart that’ll make your taste buds do a happy dance. It’s stupidly easy to make, even if your kitchen skills are more “microwave maestro” than “master chef.” Plus, it’s versatile—serve it warm with ice cream, cold with coffee, or sneak a slice straight from the fridge at midnight. No one’s judging, and this pie’s not snitching.
The crust? Flaky, buttery perfection. The filling? Bursting with blackberry goodness that screams summer (even if it’s February). And let’s be real: baking this will make you feel like a domestic goddess or god, even if you burn toast on the regular.
Ingredients You’ll Need
Here’s what you’ll need to whip up this masterpiece. No fancy stuff, just the good ol’ basics—because who has time to hunt down unicorn tears at the grocery store?
- For the Crust:
- 2 ½ cups all-purpose flour (the cheap stuff works fine, don’t stress)
- 1 cup unsalted butter (cold, cut into cubes—none of that soft nonsense)
- 1 tsp salt (table salt, not that artisanal nonsense)
- 1 tbsp sugar (for that subtle sweet flex)
- 6–8 tbsp ice water (yes, ice water—keep it chill)
- For the Filling:
- 5 cups fresh blackberries (frozen works too, but fresh is the VIP)
- ¾ cup granulated sugar (sweet, but not cloying)
- ¼ cup cornstarch (the glue that holds this party together)
- 1 tbsp lemon juice (freshly squeezed, because you’re fancy like that)
- 1 tsp lemon zest (optional, but it’s like adding sparkles)
- 1 tsp vanilla extract (because vanilla makes everything better)
- 1 tbsp butter (for dotting on top—trust me, it’s worth it)
- For the Egg Wash:
- 1 egg (beaten, for that golden glow)
- 1 tbsp milk (to make it extra shiny)
- 1 tbsp coarse sugar (optional, for that bakery-level swagger)
Step-by-Step Instructions
Ready to get your hands dirty? Here’s how to make this pie without losing your cool. Short, sweet, and to the point—just like me when I’m hangry.
- Make the Crust: Toss flour, sugar, and salt in a big bowl. Cut in the cold butter with a pastry cutter or your fingers (channel your inner caveman). Keep going until it looks like coarse crumbs. Sprinkle in ice water, 1 tbsp at a time, mixing until the dough just holds together. Don’t overwork it—you’re not kneading bread here.
- Chill the Dough: Split the dough into two disks, wrap in plastic, and refrigerate for at least 1 hour. Go watch a TikTok or two while you wait. Cold dough = flaky crust, so don’t skip this.
- Prep the Filling: In a large bowl, gently mix blackberries, sugar, cornstarch, lemon juice, zest, and vanilla. Don’t mash the berries unless you want a soupy mess. Set aside and let the flavors mingle like guests at a cocktail party.
- Roll Out the Dough: On a floured surface, roll one dough disk into a 12-inch circle. Transfer it to a 9-inch pie dish (no judgment if it tears—just patch it up). Trim the edges if you’re feeling extra.
- Fill ‘Er Up: Pour the blackberry filling into the crust. Dot with that extra tablespoon of butter for richness. Trust me, it’s the secret sauce.
- Top It Off: Roll out the second dough disk. Want a lattice crust? Slice it into strips and weave like you’re on Project Runway. Prefer a solid top? Just slap it on and cut a few slits for steam. Crimp the edges to seal—fancy or not, your call.
- Egg Wash Magic: Mix egg and milk, then brush it over the crust. Sprinkle with coarse sugar if you’re feeling bougie. This gives your pie that Instagram-worthy glow.
- Bake It: Preheat your oven to 375°F (190°C). Pop the pie on a baking sheet (to catch drips—learn from my mistakes). Bake for 50–60 minutes until the crust is golden and the filling is bubbly. If the edges brown too fast, cover them with foil.
- Cool and Serve: Let the pie cool for at least 2 hours. I know, waiting sucks, but it helps the filling set. Serve with ice cream, whipped cream, or just a fork and zero shame.
Common Mistakes to Avoid
Don’t be that person who ruins a perfectly good pie. Here’s what not to do, served with a side of shade:
- Skipping the Chill: Warm dough is your enemy. It’ll stick, tear, and make you cry. Chill it, or face the consequences.
- Overmixing the Dough: You’re making pie, not a bodybuilding routine. Overmix = tough crust. Keep it gentle.
- Using Sad Berries: Mushy or flavorless blackberries will ruin the vibe. Taste one first—save yourself the heartbreak.
- Forgetting the Egg Wash: Want a pale, sad crust? Skip the egg wash. Otherwise, don’t be lazy—brush it on.
- Cutting Too Soon: Slice into a hot pie, and you’ll have a soupy disaster. Patience is a virtue, my friend.
Alternatives & Substitutions
Life happens, and sometimes you don’t have all the ingredients. No stress—here’s how to pivot like a pro:
- No Blackberries? Swap in raspberries, blueberries, or a mixed berry combo. Just keep the total at 5 cups, and you’re golden.
- Gluten-Free? Use a 1:1 gluten-free flour blend for the crust. It’s not my thing, but it works.
- Vegan Vibes? Replace butter with vegan margarine or coconut oil. Skip the egg wash and brush with plant-based milk. Tastes just as epic.
- Low Sugar? Cut the sugar to ½ cup or use a sweetener like stevia. IMO, it’s less fun, but you do you.
- No Cornstarch? Arrowroot or tapioca starch can step in. Same amount, no drama.
FAQs
Can I Use Frozen Blackberries?
Yup, totally! Just thaw and drain them first to avoid a soggy pie. Nobody wants a swamp in their dessert, right?
Do I Need a Fancy Pie Dish?
Nah, any 9-inch pie dish works. Glass, metal, or that old one from your grandma’s cupboard—doesn’t matter. Just make sure it’s deep enough.
Can I Skip the Lattice Crust?
Absolutely. A solid top crust is easier and just as tasty. Cut a few slits for steam, and you’re good to go.
How Do I Store This Pie?
Cover it loosely and keep it at room temp for a day or two. After that, fridge it for up to 5 days. Pro tip: warm a slice in the microwave for 10 seconds. Heaven.
Can I Freeze the Pie?
Yes! Bake it, cool it, then wrap it tightly in plastic and foil. Freeze for up to 3 months. Thaw overnight in the fridge before reheating.
What If My Crust Burns?
First, don’t panic. Cover the edges with foil halfway through baking to slow the browning. Next time, check your oven temp—ovens can be sneaky liars.
Can I Use Store-Bought Crust?
Sure, if you’re feeling lazy (no shade). Homemade is better, but a pre-made crust won’t ruin your life. Just don’t expect it to taste as epic.
Final Thoughts
There you have it—your ticket to blackberry pie glory! This recipe is your new BFF, whether you’re baking for a party, a date, or just because you deserve it. Don’t overthink it—grab those ingredients, crank some tunes, and get baking. You’ve got this, and your kitchen’s about to smell like a dream. Now go make that pie and flex those culinary skills. You’re basically a pro now!
Related Recipe
Printable Recipe Card
Want just the essential recipe details without scrolling through the article? Get our printable recipe card with just the ingredients and instructions.

