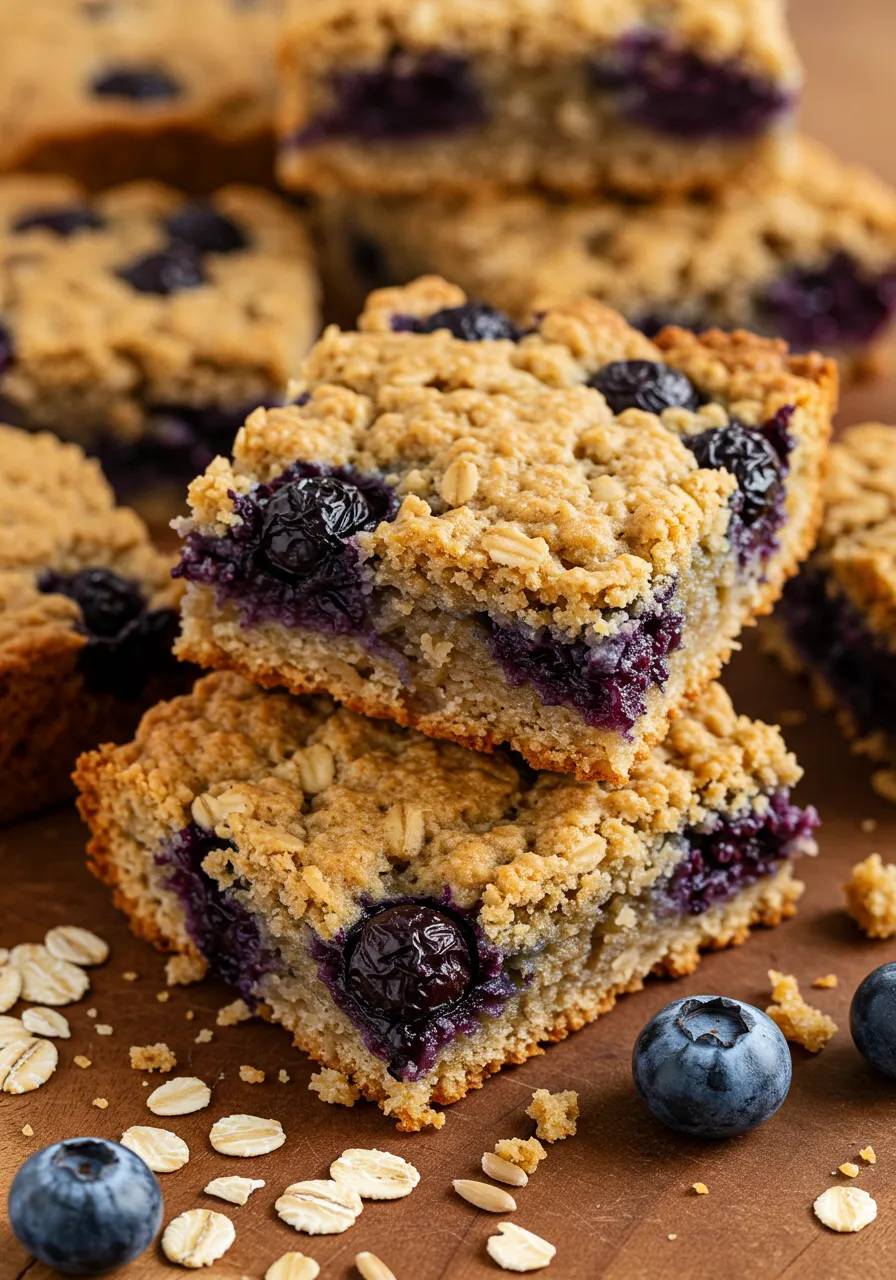
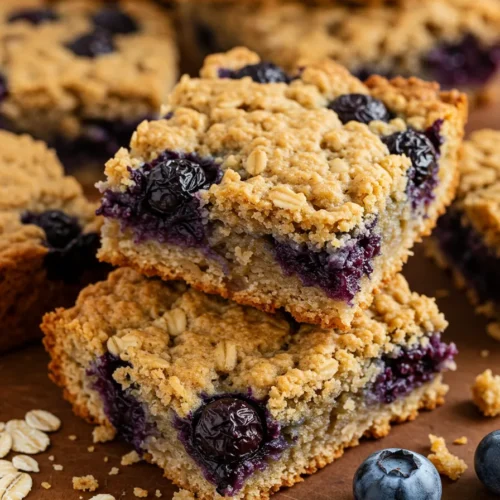
Ah, the eternal breakfast struggle: you’re late, you’re hungry, and your only option seems to be…sad toast. Been there, hated that. 😅 If you’re anything like me and prefer to start your morning with something worth waking up for, then these blueberry oatmeal breakfast bars are about to become your new BFF.
These bars are not just delicious (I’m talking crumbly, chewy, and bursting with blueberries), but they’re also super easy to make. No fancy equipment, no chef-level skills required. Trust me, if I can whip them up before my morning coffee kicks in, so can you.
Let’s get into it, shall we?
Why Make Blueberry Oatmeal Breakfast Bars?
Okay, I know what you’re thinking: “Why bother making these when I can grab a granola bar from the store?” Fair point. But also… wrong.
Here’s why these homemade bars absolutely crush anything you’ll find wrapped in plastic:
- Fresh, real ingredients: You actually know what’s in them. Wild concept, right? 😉
- Customizable sweetness: Wanna cut back on sugar? Or add more? Up to you.
- Packed with fiber & protein: Thanks to oats and blueberries, these actually keep you full.
- They freeze beautifully: Meal-prep friendly FTW.
Plus — and this is key — they don’t taste like cardboard. Ever bite into a “healthy” store bar that felt more like chewing a flip-flop? Yeah, not here.
Ingredients You’ll Need
Here comes the fun (and totally not intimidating) grocery list. Don’t worry — nothing weird or unpronounceable.
Dry Ingredients:
- 1 ½ cups rolled oats (not instant; we want texture)
- 1 cup all-purpose flour (you can sub whole wheat if you’re feeling extra virtuous)
- ⅓ cup brown sugar (light or dark — IMO dark gives a deeper flavor)
- ½ teaspoon baking soda
- ½ teaspoon salt
Wet Ingredients:
- ½ cup melted butter (unsalted is best — because salt happens elsewhere)
- 1 large egg
- 1 teaspoon vanilla extract
Filling:
- 1 ½ cups fresh or frozen blueberries (don’t even bother thawing frozen ones — who has time?)
- 2 tablespoons sugar
- 1 tablespoon cornstarch (helps thicken the filling, like magic)
- 1 tablespoon lemon juice
See? You probably already have half this stuff lurking in your kitchen anyway.
Step-by-Step Instructions
Alright, enough talking — let’s actually make these things.
Step 1: Preheat & Prep
Set your oven to 350°F (175°C). Line an 8×8-inch baking pan with parchment paper, leaving a little overhang so you can lift the bars out later. (Trust me, this little trick saves you from bar-related rage later.)
Step 2: Mix the Dry Stuff
In a big bowl, whisk together the oats, flour, brown sugar, baking soda, and salt.
Step 3: Add Wet Stuff
Pour the melted butter, egg, and vanilla into the dry mix. Stir it all together until it looks crumbly but sticks when you press it.
Step 4: Make the Filling
In another bowl, toss your blueberries with sugar, cornstarch, and lemon juice. You’re giving them a sweet little jacket of love.
Step 5: Assemble
Press about two-thirds of the oat mixture firmly into your prepared pan. Top it with the blueberry mixture. Then sprinkle the remaining oat mixture on top, like a crumb topping.
Step 6: Bake
Pop it into the oven for 35–40 minutes, or until the top looks golden brown and your kitchen smells like heaven.
Step 7: Cool & Slice
Let them cool completely in the pan before slicing into bars. Pro tip: use a sharp knife and wipe it between cuts so your bars don’t look like a crime scene.
Pro Tips for Perfect Bars
Because we’re friends now, I’m gonna share a few tips I’ve learned (the hard way):
- Don’t overbake. They’ll firm up as they cool, so resist the urge to bake them into oblivion.
- Chill them before cutting. If you’re after neat squares, stick them in the fridge for a bit first.
- Add-ins? Yes, please! Chopped nuts, shredded coconut, or even a sprinkle of cinnamon can take these up a notch.
- Use parchment paper. Yes, I already mentioned this. No, you shouldn’t ignore it.
Can You Make These Healthier?
Oh, you wanna feel smug while eating these? Same. Here are some ideas:
- Swap half the flour for almond or whole wheat flour.
- Cut the sugar by 25% if you’re okay with them being a little less sweet.
- Use coconut oil instead of butter for a dairy-free version.
- Throw in some chia or flax seeds for an extra fiber boost.
Now you can brag about your healthy breakfast bars on Instagram, no shame. 😉
When Are These Best Enjoyed?
Let’s be real: there’s no wrong time. But here are some of my faves:
- Morning coffee companion.
- Midday snack that actually tides you over.
- Dessert when you’re “trying to be good” but still want something sweet.
- Midnight snack because… life happens.
Basically, they’re the Swiss Army knife of snacks.
Storing & Freezing Your Bars
Here’s the deal — these bars don’t hang around long at my place. But if you somehow have leftovers:
- Store them in an airtight container at room temp for up to 3 days.
- Or stick them in the fridge for up to a week.
- Wanna stockpile? Freeze them! Wrap individual bars in plastic wrap and pop them in a freezer bag. They’ll last about 2 months.
Pro move: warm frozen bars in the microwave for a few seconds so they taste freshly baked.
Why This Recipe Works (AKA Why You Should Trust Me)
I’ve tried a lot of breakfast bar recipes (like, embarrassingly many), and here’s why this one stands out:
- The butter-to-oat ratio is just right — chewy but not greasy.
- The blueberry filling stays juicy without turning into soup.
- The crumble topping? Chef’s kiss.
You don’t need a PhD in pastry to make these, and they taste like you spent way more effort than you did.
Ever wondered why store-bought bars never taste this good? It’s because they’re made to survive on shelves for months. Yuck.
FAQs
Can I use other fruits instead of blueberries?
Absolutely. Try raspberries, blackberries, or even diced apples. Adjust the sugar according to the sweetness of the fruit.
Do I have to use butter?
Nope. Coconut oil or even vegan margarine works too — but IMO, butter gives the best flavor.
Can I make these gluten-free?
Yes! Use a 1:1 gluten-free flour blend and make sure your oats are certified gluten-free.
Why are my bars crumbly?
You probably didn’t press the base down firmly enough. Next time, really pack it in there.
How do I make them sweeter or less sweet?
Add or subtract a couple of tablespoons of sugar from the filling and/or crust depending on your vibe.
Related Recipes
- Oatmeal Breakfast Bowl: The Ultimate Healthy Start
- French Toast Pizza Bake: A Delicious Twist on Breakfast
- Crescent Roll Breakfast Casserole – Easy & Delicious Bake
Final Thoughts: Ready to Bake?
There you have it, folks — the blueberry oatmeal breakfast bars recipe that will have you feeling like a domestic god/goddess with minimal effort. Who needs overpriced coffee-shop pastries when you can whip these up in your own kitchen, right?
So grab those oats, wrangle some blueberries, and show your oven who’s boss. These bars are simple, satisfying, and — dare I say — kinda impressive. Even if you’re just impressing yourself. 🙂
Go on, make a batch. And maybe save me one? Or don’t. I get it.
If you want, I can also help you draft a printable recipe card, social media captions, or even a shopping list template for this recipe. Just say the word. 🚀
Blueberry Oatmeal Breakfast Bars Recipe
Ingredients
- 1 ½ cups rolled oats
- ¾ cup whole wheat flour
- 1 tsp cinnamon
- ½ tsp baking soda
- ¼ tsp salt
- ⅓ cup honey or maple syrup
- ¼ cup melted coconut oil or butter
- 1 large egg
- 1 tsp vanilla extract
- 1 cup fresh or frozen blueberries
Instructions
- Preheat oven to 350°F (175°C) and line an 8x8-inch pan with parchment paper.
- In a bowl, mix oats, flour, cinnamon, baking soda, and salt.
- In another bowl, whisk honey, oil, egg, and vanilla until smooth.
- Combine wet and dry ingredients, then gently fold in blueberries.
- Spread the mixture evenly in the prepared pan.
- Bake for 25–30 minutes or until golden and set in the center.
- Let cool completely before slicing into bars.
Notes
- Store bars in the fridge for up to 5 days or freeze for longer storage.
- Use dairy-free butter and flax egg for a vegan version.
- Add a handful of chopped nuts for crunch or a sprinkle of brown sugar on top for sweetness.
DID YOU MAKE THIS EASY RECIPE?
If you have, then share it with us by sending a photo. We’re excited to see what you’ve made 🙂
Printable Recipe Card
Want just the essential recipe details without scrolling through the article? Get our printable recipe card with just the ingredients and instructions.