So you’re staring at those bananas on your counter, slowly morphing from bright yellow to a spotty brown, and you’re thinking, “Smoothie? Boring. Banana bread? Been there, baked that.” What if I told you that in less time than it takes to watch your favorite sitcom, you could transform those humble fruits into a show-stopping, restaurant-quality dessert that will make you feel like a total culinary rockstar? Yeah, we’re going there. This isn’t just a tart; it’s a golden, caramelized masterpiece of minimal effort.
Why This Recipe is Awesome
Let’s cut to the chase. This caramelized banana tart is the dessert equivalent of a little black dress—it looks incredibly fancy and sophisticated, but it’s deceptively simple to put together. It’s the perfect weapon for impressing your in-laws, a date, or just yourself on a Tuesday night because you deserve it. The best part? It’s almost idiot-proof. The crust is a press-in situation (no rolling pin anxiety here), and the “fancy” caramel is just sugar and butter doing its magical thing. You basically can’t mess it up. IMO, any recipe that makes me look like a pastry chef without the technical meltdown is a winner.
Ingredients You’ll Need for Caramelized Banana Tart
Gather your squad. This is a short and sweet list (pun intended).
For the Tart Shell:
- 1 ½ cups all-purpose flour
- ½ cup powdered sugar – Because we’re fancy like that.
- ¼ tsp salt – The silent hero that makes everything taste better.
- 9 Tbsp very cold unsalted butter, cubed – I’m talking “just came out of the fridge” cold.
- 1 large egg yolk – The glue that holds our dreams together.
For the Caramelized Banana Filling:
- 4-5 just-ripe bananas – You want them yellow with maybe a few brown specks. Not green, not mushy.
- 6 Tbsp unsalted butter
- ¾ cup packed brown sugar – Light or dark, your call. Dark will give a deeper, molasses-y flavor.
- ¼ tsp salt
- 1 tsp vanilla extract – The good stuff. No imitation, please.
- A pinch of cinnamon or a dash of dark rum (optional, but highly encouraged for extra ~flavor vibes~)
Step-by-Step Instructions
- Blitz the Crust. In a food processor, pulse the flour, powdered sugar, and salt a few times to combine. Pro Tip: No food processor? A bowl and your fingertips work just fine—just work quickly so you don’t melt the butter with your hot hands.
- Add the Butter & Egg. Scatter the cold butter cubes over the flour mixture. Pulse until the mixture looks like coarse, sandy breadcrumbs. Add the egg yolk and pulse again until the dough just begins to clump together.
- Press It In. Dump the crumbly dough into a 9-inch tart pan with a removable bottom. Use your fingers to press it evenly across the bottom and up the sides. A small glass or measuring cup can help smooth the bottom. Prick the base all over with a fork and pop it in the freezer for 30 minutes. This prevents shrinkage! (We’ve all been there).
- Bake That Shell. Preheat your oven to 375°F (190°C). Bake the frozen shell for 15-18 minutes, or until it’s a beautiful light golden brown. Let it cool completely. FYI, walking away and forgetting it is the #1 cause of over-browning. Set a timer!
- Caramelize Like a Boss. Melt the 6 Tbsp of butter in a large skillet over medium heat. Add the brown sugar and salt. Stir until the sugar melts and combines with the butter into a glorious, bubbling sauce. Let it bubble for just 1 minute.
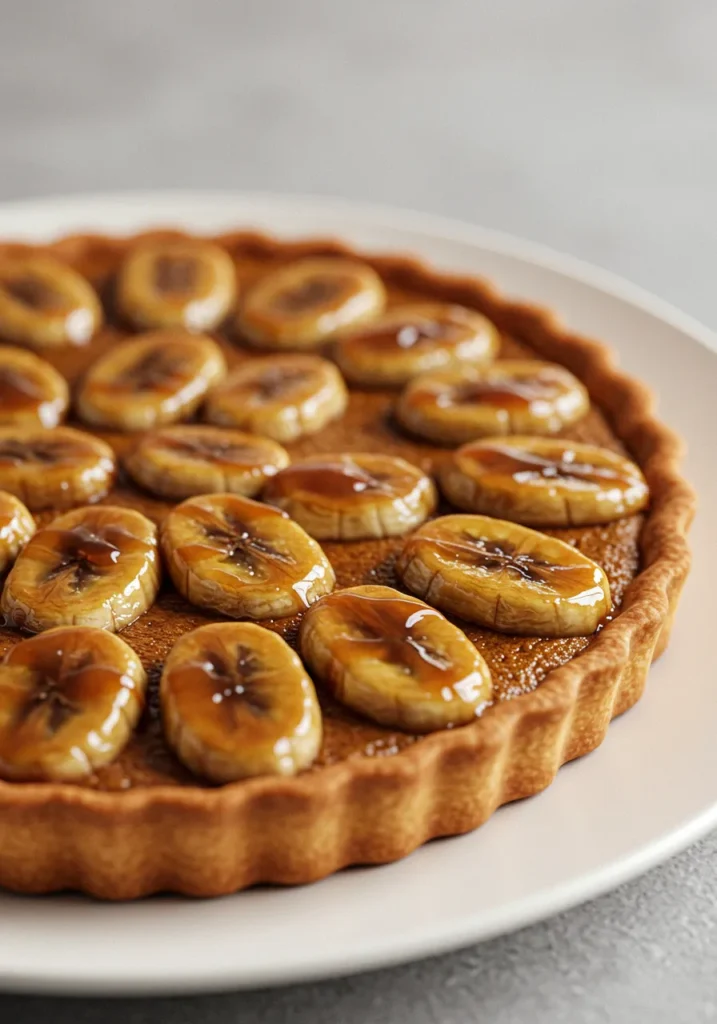
- Banana Time. Remove the skillet from the heat. Slice your bananas on a diagonal (it looks prettier, trust me) and carefully arrange them in the caramel sauce. You can do a fancy spiral pattern or just chuck ’em in—it will taste amazing either way.
- Cook the Bananas. Return the skillet to medium-low heat and cook for about 2-3 minutes per side, just until the bananas soften and become gorgeously glazed. Don’t stir! Gently flip them with tongs or a fork. Remove from heat and stir in the vanilla (and rum/cinnamon if using).
- Assemble & Serve. Carefully spoon the bananas and all that liquid gold caramel into your waiting tart shell. Spread it out evenly. That’s it. You’re done. Serve it slightly warm, maybe with a scoop of vanilla ice cream that starts melting all over it. Chef’s kiss.
Common Mistakes to Avoid
- Using Overripe Bananas: Save the black bananas for bread! For this, you need fruit that will hold its shape when cooked, not turn into baby food.
- Not Chilling the Crust: Skipping the freezer step is a rookie mistake. A cold crust = a flaky, non-shrunken crust. It’s non-negotiable.
- Overcooking the Caramel: The second the sugar and butter become a sauce, you’re good. Letting it cook too long will turn it into a hard, crackly layer instead of a saucy one.
- Manhandling the Bananas: Once they’re in the pan, be gentle. You’re giving them a flip, not mashing potatoes. We want beautiful slices, not banana mush.
Alternatives & Substitutions
- Gluten-Free? Swap the all-purpose flour for a 1:1 gluten-free baking blend. The texture might be slightly more crumbly, but it’ll still work.
- Dairy-Free? Use a high-quality vegan butter stick (not the tub kind) for both the crust and the caramel.
- No Tart Pan? A 9-inch pie dish will work in a pinch, though your slices might be a little messier.
- Out of Brown Sugar? White sugar plus a tablespoon of molasses is a decent stand-in.
- Want More? Add a handful of chocolate chips to the bottom of the baked shell before adding the bananas. Or sprinkle toasted pecans or flaky sea salt on top for the ultimate sweet-and-salty situation.
FAQS about Caramelized Banana Tart
Can I make this ahead of time?
You can totally bake the tart shell a day ahead and keep it at room temperature, tightly wrapped. Make the banana filling right before you want to serve it for the best texture.
My caramel seized up! What do I do?
Did a splash of water get in there? If it’s clumpy, take it off the heat and add a tablespoon of warm cream or water and whisk like crazy. It should smooth right out.
Can I use margarine instead of butter?
Well, technically yes, but why hurt your soul like that? The flavor of real butter is absolutely key here. I strongly advise against it.
Is it supposed to be so runny?
The caramel will be saucy when you pour it in. It will firm up a bit as it cools, but this is a gloriously messy, gooey dessert. Embrace it!
Do I have to use a food processor?
Nope! You can use a pastry cutter, two forks, or your fingertips to blend the butter into the flour for the crust. Just work fast.
Related Recipes
Final Thoughts about Caramelized Banana Tart
And there you have it. You just made a dessert that looks like it came from a fancy patisserie but required zero professional training. The combination of the buttery, shortbread-like crust with the warm, gooey, caramelized bananas is honestly a match made in heaven. Now go forth, take a picture for the ‘gram, and then devour it. You’ve absolutely earned it.
Printable Recipe Card
Want just the essential recipe details without scrolling through the article? Get our printable recipe card with just the ingredients and instructions.

