.So, you’re staring into the fridge, hoping a magical dessert fairy has left something sweet behind since the last time you looked (five minutes ago). We’ve all been there. Your stomach is singing a sad song of craving, but your brain is vetoing anything that requires a culinary degree or hours of slaving over a hot oven. I feel you. That’s exactly why this no-bake Cherry Delight is about to become your kitchen’s MVP. It’s the hero we deserve.
Why This Recipe is Awesome
Let’s cut to the chase. This dessert is awesome because it’s basically a cheat code for looking like a dessert genius. It requires zero baking, which means you can’t burn it. It’s made with simple ingredients you can find at any store, even the one that’s weirdly always out of basil. It’s creamy, it’s crunchy, it’s sweet, it’s tangy—it’s a whole party in a pan. Best of all, it’s idiot-proof. I made it while simultaneously explaining to my cat why he can’t eat plastic, and it still turned out perfectly. If I can do it with that level of distraction, so can you.
Ingredients You’ll Need
Gather your squad. This is the team that’s going to make you a dessert legend.
For the Crust:
- 2 sleeves of graham crackers: The foundation of our no-bake kingdom. About 2 ½ cups of crumbs if you’re buying pre-crushed, but crushing them yourself is a great way to take out any lingering frustration.
- ½ cup (1 stick) unsalted butter, melted: This is the glue. Salted butter works in a pinch, but we’ll adjust the saltiness later.
- ¼ cup granulated sugar: For a little sweetness in the crust. Because why not?
- A pinch of salt: To make all the other flavors pop.
For the Creamy Filling:
- 8 oz cream cheese, softened: Leave this out on the counter for an hour. If you forget (like I always do), you can microwave it for 15-second bursts on low power. Don’t melt it into a puddle!
- 1 cup powdered sugar: It dissolves like a dream and won’t give you a grainy texture. No substitutes, you rebel.
- 1 teaspoon vanilla extract: The secret weapon of happiness.
- 1 tub (8 oz) Cool Whip, thawed: The fluffy cloud that makes this so light and airy. You can use homemade whipped cream if you’re feeling fancy.
For the Topping:
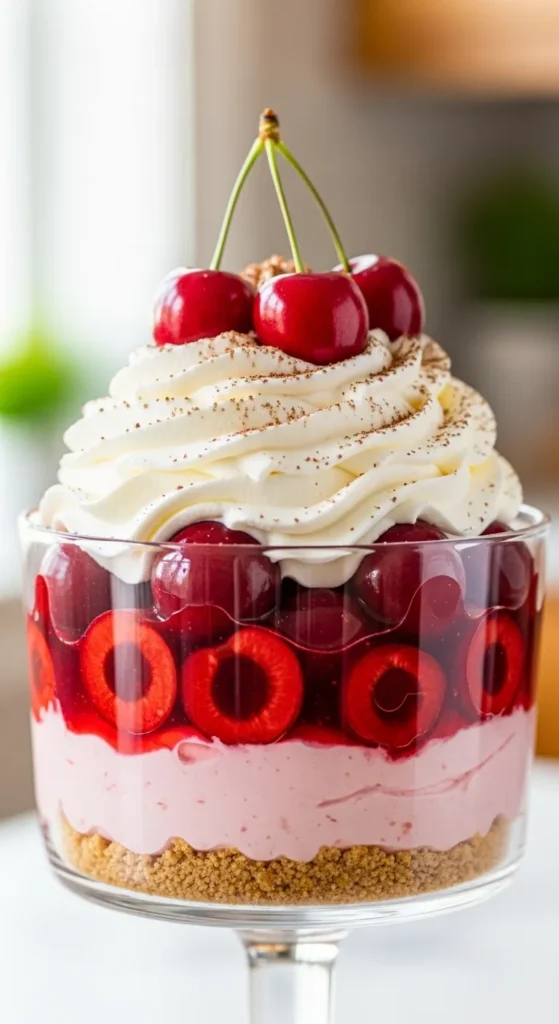
- 1 can (21 oz) cherry pie filling: The star of the show! That glorious, ruby-red, sweet-tart goodness that makes this dessert Cherry Delight.
Step-by-Step Instructions
Alright, team. Let’s huddle up and get this done. You’ll have this assembled in less time than it takes to watch one episode of your favorite sitcom.
- Pulverize the Graham Crackers. Toss your graham crackers into a food processor and let ‘er rip until you have fine crumbs. No food processor? No problem. Throw them in a sturdy zip-top bag and go to town with a rolling pin, a can, or whatever heavy object isn’t nailed down. Therapeutic and productive.
- Make the Crust. In a medium bowl, mix the graham cracker crumbs, the ¼ cup of sugar, and that pinch of salt. Pour in the melted butter and stir until every last crumb is moist and it looks like wet sand.
- Press it In. Dump your buttery crumb mixture into a 9×13 inch baking dish. Press it down firmly and evenly into the bottom of the pan. A flat-bottomed measuring cup or glass works great for this. Get it nice and compact so your slices hold together later. Pop this in the fridge to set up while you make the filling.
- Whip the Filling. In a large bowl, beat the softened cream cheese with an electric mixer until it’s smooth and creamy. No lumps allowed! Sift in the powdered sugar (this prevents lumps too) and add the vanilla. Beat it all together until it’s completely combined and silky.
- Fold in the Fluff. Now, gently fold in the thawed Cool Whip. Use a spatula and a light hand—we’re trying to keep all that airiness, not beat it into submission. Fold until no white streaks remain and you have a beautifully smooth, pale filling.
- Assemble the Masterpiece. Pull your crust out of the fridge. Spread the creamy filling evenly over the top, all the way to the edges.
- The Grand Finale. Open your can of cherry pie filling. Dollop spoonfuls of the cherries all over the creamy layer, then gently spread it out into an even layer of deliciousness.
- The Hardest Part. Cover the pan and refrigerate for at least 4 hours, but ideally overnight. I know, the waiting is torture. But it’s crucial for the layers to set and the flavors to become best friends. Trust the process.
Common Mistakes to Avoid
Let’s learn from the errors of others so you don’t have to make them yourself.
- Not softening the cream cheese: This is the big one. You’ll end up with a lumpy filling that looks like cottage cheese had a baby with whipped cream. Not a good look. Plan ahead!
- A sad, loose crust: You didn’t press it firmly enough, or you didn’t use enough butter. It should hold together when you press it. If it doesn’t, add a tad more melted butter.
- Spreading the cherries too aggressively: You’re not troweling cement. If you smash the filling with the cherries while spreading, you’ll get a swirly, pink mess instead of beautiful, distinct layers. Be gentle!
- Skipping the chill time: Impatience is the enemy of good dessert. If you try to cut it too soon, it’ll be a soupy mess. Let it set. Your future self will thank you.
Alternatives & Substitutions
Want to mix it up? Go for it! This recipe is wonderfully adaptable.
- Different Crust: Try using crushed Oreos (leave out the sugar) for a chocolatey twist. Nilla wafers or shortbread cookies are also fantastic.
- Different Filling: Not a cream cheese fan? You could use vanilla or cheesecake-flavored pudding mix prepared with milk. It’s not quite the same, but it’s still delicious.
- Different Topping: Blueberry pie filling? Amazing. Apple pie filling with a dash of cinnamon in the cream layer? Divine. Fresh strawberries macerated with a little sugar? Absolutely stellar.
- From Scratch: Want to go full gourmet? Make your own whipped cream from heavy cream and sugar to fold in, and simmer your own cherries with sugar and cornstarch for the topping. I salute your ambition!
FAQ
Can I use margarine instead of butter?
Technically, yes. But the flavor of the crust won’t be as rich and, well, buttery. Butter is always the superior choice for taste.
How long does Cherry Delight last in the fridge?
It will stay delicious for about 3-4 days if you can keep people from devouring it before then. Just keep it covered.
Can I freeze Cherry Delight?
You can! Wrap it tightly and freeze for up to a month. The texture of the creamy layer might change slightly upon thawing, becoming a little more crystalline, but it’ll still taste great. Thaw it in the fridge overnight.
My filling is runny! What did I do wrong?
This usually happens if the cream cheese wasn’t fully softened and didn’t incorporate properly, or if you used a store-brand Cool Whip that has a different stabilizer formula. It might also just need more time to set. Give it a few more hours in the fridge.
I don’t have a 9×13 pan. What else can I use?
A deep-dish pie plate works wonderfully! You’ll just have thicker layers. You could also use a square 8×8 or 9×9 pan; you’ll just have a taller, more decadent dessert (which is never a bad thing).
Related Recipes:
- Mango Sorbet Recipe That’ll Blow Your Mind
- Pineapple Upside Down Cake Recipe
- Pineapple Coconut Cream Tart Recipe: Delicious & Crazy Easy
Final Thoughts:
Cherry delight is a retro dessert that never goes out of style—creamy, fruity, and wonderfully easy to make. With its crunchy crust, fluffy filling, and cherry topping, it’s perfect for holidays, family dinners, or when you need a quick, crowd-pleasing sweet. Sometimes the simplest recipes bring the biggest smiles.
Printable Recipe Card
Want just the essential recipe details without scrolling through the article? Get our printable recipe card with just the ingredients and instructions.

