So you’re craving something sweet and chewy but can’t be bothered with complicated recipes that require a degree in rocket science? Perfect. You’ve stumbled upon the holy grail of lazy baking—chocolate chip blondies that’ll make you look like a kitchen wizard without actually being one.
These golden beauties are basically brownies’ cheerful cousin who went blonde and decided to be extra sweet about it. And the best part? You probably already have everything you need lurking in your pantry right now.
Why This Recipe is Awesome
Let me count the ways (because I’m dramatic like that). First off, this recipe is practically foolproof—I’ve watched people who burn water successfully make these. Second, they take about 30 minutes total, which is less time than it takes to decide what to watch on Netflix.
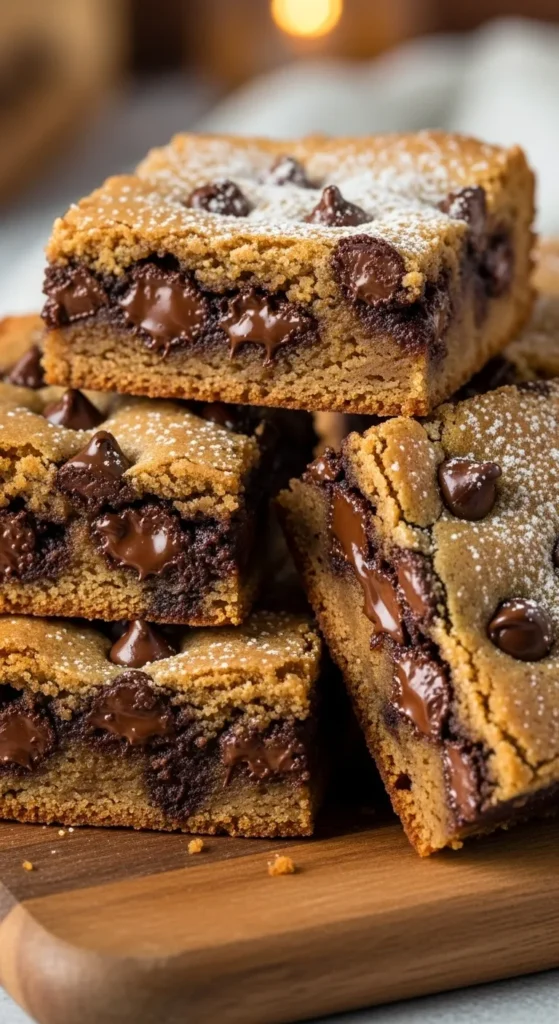
These blondies have that perfect chewy texture that makes you question whether you should share them or hide them in your room like a sugar goblin. They’re sweet without being diabetes-inducing, and the chocolate chips add just enough richness to make you feel fancy.
Plus, they freeze beautifully, so you can make a batch and portion them out for those “emergency chocolate situations” we all know and love.
Ingredients You’ll Need
Here’s your shopping list (or more likely, your pantry raid checklist):
- 1 cup (2 sticks) unsalted butter – Don’t even think about margarine, we’re not savages
- 1 cup packed brown sugar – Light or dark, your choice (dark makes them extra rich)
- 2 large eggs – Room temperature is ideal, but cold ones won’t ruin your life
- 1 teaspoon vanilla extract – The good stuff, not the imitation nonsense
- 1 cup all-purpose flour – Just regular flour, nothing fancy
- 1/2 teaspoon salt – Don’t skip this, it makes everything taste better
- 1 cup chocolate chips – Semi-sweet, milk chocolate, whatever makes your heart happy
- Optional: 1/2 cup chopped walnuts – For the texture lovers out there
Step-by-Step Instructions
- Preheat your oven to 350°F (175°C). Line an 8×8 inch baking pan with parchment paper. Trust me on the parchment paper—it’s the difference between easy removal and a wrestling match with your pan.
- Melt the butter completely. You can do this in the microwave (30-second intervals, stirring between) or in a small saucepan on the stove. Let it cool slightly so you don’t scramble your eggs in the next step.
- Mix the wet ingredients. In a large bowl, whisk together the melted butter and brown sugar until smooth. Add the eggs one at a time, then stir in the vanilla. The mixture should look glossy and gorgeous.
- Add the dry stuff. Gently fold in the flour and salt until just combined. Don’t overmix—we’re making blondies, not hockey pucks.
- Fold in the chocolate chips (and nuts if you’re using them). Save a few extra chips to sprinkle on top because presentation matters, even for lazy bakers.
- Spread and bake. Pour the batter into your prepared pan and spread evenly. Bake for 25-30 minutes until the edges are set and lightly golden. The center should still look slightly underdone—it’ll finish cooking as it cools.
- Cool completely before cutting. I know this is torture, but warm blondies are messy blondies.
Common Mistakes to Avoid
Overbaking is the enemy. These continue cooking in the hot pan, so pull them out when they look almost done. Nobody wants concrete blondies.
Don’t skip the parchment paper. Greasing the pan works, but parchment is your insurance policy against disaster. Plus, you can lift the whole thing out for easy cutting.
Overmixing the batter will make your blondies tough. Fold gently, like you’re tucking a baby into bed, not mixing cement.
Using cold eggs can make your batter lumpy. If you forgot to take them out early (we’ve all been there), just put them in warm water for 5 minutes.
Alternatives & Substitutions
Butter alternatives: You can substitute melted coconut oil or vegetable oil, but honestly, butter makes everything better. If you’re dairy-free, go with the coconut oil—it adds a subtle tropical vibe.
Sugar swaps: You can use white sugar instead of brown, but you’ll lose that molasses-y depth. Brown sugar is what makes these taste like blondies instead of just pale brownies.
Flour substitutions: Gluten-free flour works fine here—just use a 1:1 substitute. The texture might be slightly different, but still delicious.
Mix-in madness: Swap chocolate chips for butterscotch chips, dried cranberries, or mini marshmallows. White chocolate and macadamia nuts are fancy AF if you’re feeling bougie.
FAQ (Frequently Asked Questions)
Can I double this recipe?
Absolutely! Just use a 9×13 pan and keep an eye on the baking time—might need an extra 5-10 minutes. More blondies = more happiness, simple math.
How long do these keep?
They’ll stay fresh for about a week in an airtight container at room temperature. They also freeze beautifully for up to 3 months, individually wrapped.
Can I use margarine instead of butter?
Technically yes, but why hurt your soul like that? Butter makes them rich and flavorful. Life’s too short for margarine blondies.
What if I don’t have brown sugar?
Mix 1 cup white sugar with 2 tablespoons molasses, or just use white sugar and accept slightly less complex flavor. The blondie police won’t arrest you.
Can I make these dairy-free?
Sure! Use melted coconut oil instead of butter and dairy-free chocolate chips. They’ll have a slightly different flavor but still hit that sweet spot.
Why are my blondies too gooey?
You probably underbaked them. Pop them back in the oven for 5 more minutes. Better slightly overbaked than soup consistency.
Can I add other mix-ins?
Go wild! Toffee bits, crushed cookies, pretzel pieces—these blondies are your canvas. Just keep the total add-ins to about 1 cup so they don’t fall apart.
Related Recipes:
- Almond Wedding Cake Cupcakes Recipe
- Peanut Butter Granola Cookie Bars Recipe
- Sweet Air Fryer Churros Bites Recipe – Easy & Crispy
Final Thoughts
There you have it—your ticket to blondie bliss without the stress. These little golden squares are perfect for potlucks, bake sales, or that Tuesday afternoon when you need something sweet to make life make sense again.
The beauty of this recipe is its flexibility. Mess with the mix-ins, adjust the sweetness, make them your own. The only rule is that there are no rules (except maybe don’t forget to preheat the oven).
Now go impress someone—or yourself—with your new culinary skills. You’ve earned it! And remember, if anyone asks for the recipe, you can act all mysterious about your “secret family recipe” even though you literally just learned it five minutes ago.
Printable Recipe Card
Want just the essential recipe details without scrolling through the article? Get our printable recipe card with just the ingredients and instructions.

