So, you’ve got a chocolate emergency, huh? Maybe it’s a Tuesday. Maybe your soul just needs a big, chocolatey hug. I get it. You’re not looking for a fancy-pants, seven-layer, requires-a-physics-degree kind of cake. You want something gloriously simple, outrageously delicious, and guaranteed to make your kitchen smell like a bakery heaven. Well, my friend, stop your scrolling. Your search ends here.
Why This Recipe is Awesome
Let’s cut to the chase. This isn’t just *a* chocolate cake. This is The Chocolate Cake. The one-bowl-wonder, the no-fuss, the “holy-cow-did-you-really-make-this?” masterpiece. It’s ridiculously moist, deeply chocolatey, and so easy that even if your last baking project was a charcoal briquette, you can absolutely nail this. It’s the culinary equivalent of a trusty pair of jeans—reliable, always fits the occasion, and makes you feel fantastic.
Ingredients You’ll Need
Gather your squad. Most of this is probably already loitering in your pantry.
For the Cake:
- 2 cups all-purpose flour (the main structural support)
- 2 cups granulated sugar (for the sweet, sweet joy)
- ¾ cup unsweetened cocoa powder (use the good stuff—it matters!)
- 2 teaspoons baking soda
- 1 teaspoon baking powder
- 1 teaspoon salt (trust me, it makes the chocolate pop)
- 2 large eggs (the room-temp kind, if you can plan that far ahead)
- 1 cup buttermilk (see FAQs for a super easy cheat if you don’t have any)
- 1 cup strong black coffee, cooled (don’t panic! It won’t taste like coffee, it just makes it chocolate-ier)
- ½ cup vegetable oil (keeps things super moist)
- 2 teaspoons vanilla extract (the flavor booster)
For the Chocolate Frosting (The Best Part):
- 1½ cups unsalted butter, softened (that means soft, not melted!)
- 1 cup unsweetened cocoa powder
- 5 cups powdered sugar (sifted, unless you enjoy lumpy fights)
- ½ cup heavy cream or milk (plus a tad more if needed)
- 2 teaspoons vanilla extract
- A pinch of salt
Step-by-Step Instructions
Okay, apron on! Let’s do this.
- Preheat and Prep. First, get that oven heating to 350°F (175°C). Grease and flour two 9-inch round cake pans. Pro-tip: line the bottoms with a circle of parchment paper. This is your insurance policy against cake-sticking tragedies.
- The One-Bowl Magic. In a large bowl, whisk together the flour, sugar, cocoa, baking soda, baking powder, and salt. Just whisk it all until it looks like a uniform, chocolaty sand.
- Get Wet. Make a well in the center of your dry ingredients. Add the eggs, buttermilk, coffee, oil, and vanilla. Beat the living daylights out of it with a hand mixer (or a whisk and some serious elbow grease) until the batter is smooth and gorgeous. No need to overmix—just until everything is combined.
- Bake It ‘Til You Make It. Pour the batter evenly into your prepared pans. Slam them on the counter a few times to get rid of any air bubbles. Pop them in the oven for 30-35 minutes. You’ll know it’s done when a toothpick poked in the center comes out clean.
- The Patience Test. This is the hardest part. Let the cakes cool in the pans for 10 minutes. Then, run a knife around the edges and turn them out onto a wire rack to cool completely. I mean COMPLETELY. Frosting a warm cake is a slippery, melty mess you don’t want.
- Frosting Time! While you wait, make the frosting. Beat the softened butter until it’s smooth and creamy. Add the cocoa powder and beat again. Gradually add the powdered sugar, alternating with the cream and vanilla. Beat it on high for a few minutes until it’s light, fluffy, and spreadable. Add that pinch of salt to balance the sweetness.
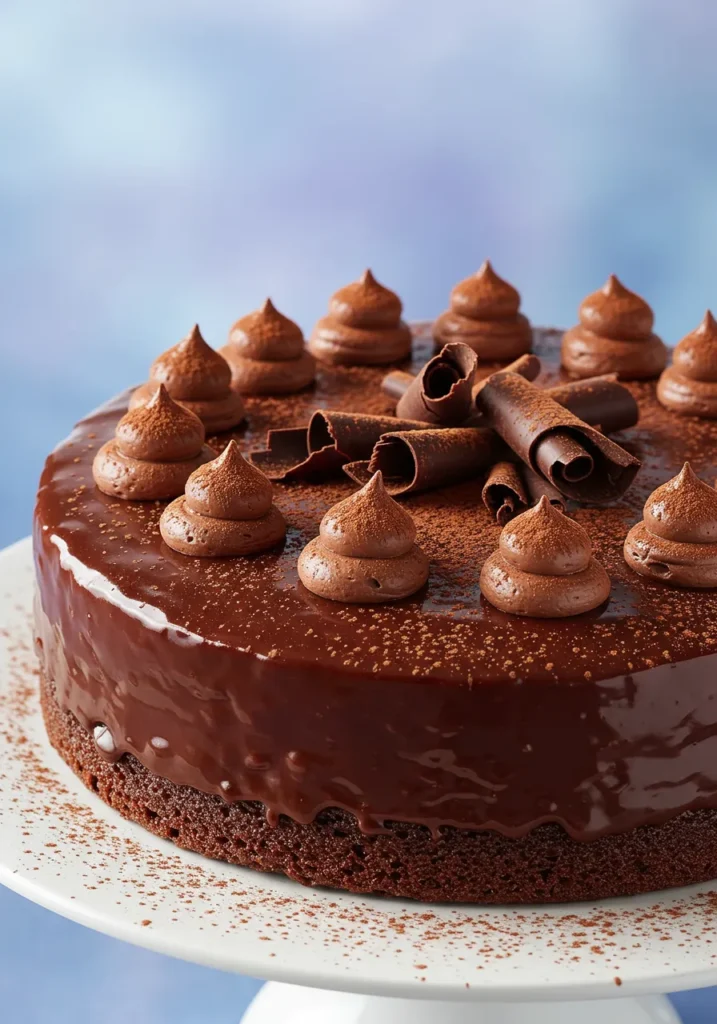
- Assemble Your Masterpiece. Place one cake layer on a plate. Plop a big ol’ dollop of frosting on top and spread it evenly. Gently place the second layer on top. Now, frost the top and sides like the artist you are. Swirls, swoops, who cares? It’s about to be devoured.
Common Mistakes to Avoid
Let’s learn from the errors of others so you can look like a genius.
- Skipping the Preheating: Your oven is not a suggestion box. Preheating is mandatory for a proper rise. Don’t put your beautiful batter into a lukewarm abyss.
- Frosting a Warm Cake: I said it once, I’ll scream it from the rooftops. Warm cake melts frosting. You’ll end up with a crumbly, gloppy mess. Let. It. Cool.
- Overmixing the Batter: Once the wet and dry ingredients are combined, STOP. Overmixing develops gluten and makes cakes tough. We want tender, not tire-like.
- Using Expired Baking Soda/Powder: These are your leavening agents—your rise crew. If they’re old and dead, your cake will be flat and sad. Check the dates!
Alternatives & Substitutions
Baking is science, but we can get a little creative.
- No Buttermilk? No sweat! Make your own: for every cup of milk, add 1 tablespoon of lemon juice or white vinegar. Let it sit for 5 minutes until it curdles. Science!
- Allergic to Eggs? You can try a “flax egg.” Mix 1 tablespoon of ground flaxseed with 3 tablespoons of water per egg and let it gel up.
- Hate Coffee? Just use boiling water. The coffee enhances the chocolate flavor without making it taste like a latte, but water works perfectly fine.
- Want Cupcakes? This batter makes about 24-30 cupcakes. Bake them for 18-22 minutes.
FAQs about Chocolate Cake
Can I make this cake ahead of time?
Absolutely! You can bake the layers a day in advance. Just wrap them tightly in plastic wrap once they’re cool and store them at room temp. Frost it the day you plan to serve it for maximum freshness.
Why coffee? I don’t like coffee!
I promise, cross my heart, you will not taste the coffee. Its only job is to amplify the chocolate flavor, making it richer and deeper. It’s a secret weapon. But if you’re adamant, hot water works too.
Can I use margarine instead of butter in the frosting?
Well, technically yes. But IMO, why would you? Butter gives you that rich, creamy, unparalleled flavor. Margarine might leave you with a slightly greasy, less flavorful frosting. Your cake deserves better.
My frosting is too thick/thin. Help!
Too thick? Beat in a teaspoon of cream at a time until it’s spreadable. Too thin? Add a little more sifted powdered sugar. Easy fixes!
How do I store this glorious beast?
Keep it covered at room temperature for a day or two. For longer storage (if it lasts that long), pop it in the fridge, but let it come to room temp before serving for the best texture and flavor.
Related Recipes
Final Thoughts about Chocolate Cake
And there you have it. You are now the proud creator of a truly legendary chocolate cake. This isn’t just a recipe; it’s a future core memory. It’s the cake for birthdays, for “I-had-a-hard-day” days, for “just because” days.
Now go forth, slice a mammoth piece, and enjoy the fruits of your labor. You’ve earned every single, decadent, crumbly, chocolatey bite. You’re a baker, baby
Printable Recipe Card
Want just the essential recipe details without scrolling through the article? Get our printable recipe card with just the ingredients and instructions.

