So, you’re staring into the abyss of your kitchen, craving something decadent but your motivation to actually bake is precisely zero. I feel you. The thought of preheating an oven feels like a monumental task fit for a medieval blacksmith, not someone in their comfy pants. What if I told you that the solution to your desperate sugar craving is just a few stirs away and requires absolutely zero heat? Stop eyeing that sad-looking granola bar. It’s time to make something legendary.
Why This Recipe is Awesome
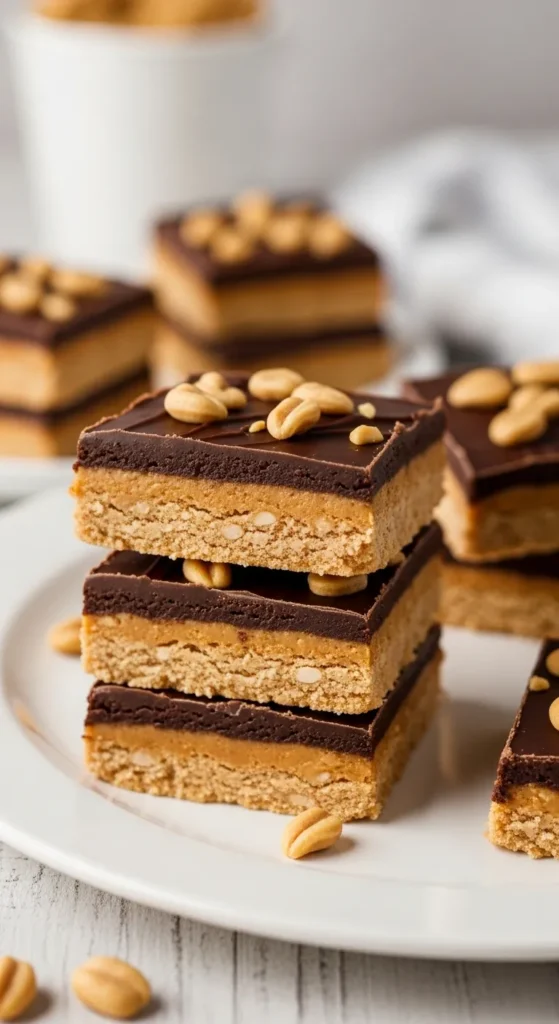
Let’s cut to the chase. This recipe is the culinary equivalent of finding a $20 bill in an old jacket—pure, unadulterated joy with minimal effort. It’s idiot-proof, even I didn’t mess it up, and that’s saying something. You get to feel like a gourmet pastry chef while essentially just mixing things in a bowl. The result? A rich, decadent bar with a creamy peanut butter layer and a slick chocolate topping that’s so good, it might just make you weep. They’re perfect for potlucks (you’ll be a hero), satisfying a 3 PM slump, or bribing your children. The possibilities are endless.
Ingredients You’ll Need
Gather your squad. This is the easiest party you’ll ever host in your mixing bowl.
For the Crust & Filling:
- Graham Cracker Crumbs (1 ½ cups): The sandy-texture hero. Buy them pre-crushed to level up your lazy game.
- Confectioners’ Sugar (1 cup): Also known as powdered sugar. Don’t try to be a maverick and use granulated. It won’t work, and we’ll all be sad.
- Creamy Peanut Butter (1 cup): Use the standard, shelf-stable stuff, not the natural kind that separates. We need that fat and sugar for binding, people!
- Unsalted Butter (½ cup, melted): The glorious glue that holds our dreams together. Melt it and let it cool slightly so it doesn’t cook the other ingredients.
For that Glorious Chocolate Topping:
- Semi-Sweet Chocolate Chips (1 ½ cups): The classic choice. Milk chocolate works too if you have a serious sweet tooth.
- Creamy Peanut Butter (¼ cup): A little extra PB swirled into the chocolate takes it from “yum” to “I need to hide these from myself.”
- A tiny pinch of Sea Salt: Optional, but highly recommended for that salty-sweet kick that makes your taste buds do a happy dance.
Step-by-Step Instructions
- Prep Your Pan. Grab an 8×8 inch baking dish. Line it with parchment paper, leaving some overhang on two sides. This is your future lifeline for lifting out the entire slab of deliciousness. Trust me, this parchment paper step is non-negotiable. If you skip it, you’ll be trying to dig bars out with a spoon like a savage.
- Mix the Base. In a medium-sized bowl, dump in your graham cracker crumbs, confectioners’ sugar, and 1 cup of peanut butter. Pour in the slightly cooled, melted butter. Now, stir until it looks like a thick, sandy, utterly delicious paste. It should clump together when you squeeze it.
- Press It! Dump this magnificent mixture into your prepared pan. Press it down into a firm, even layer. Use the flat bottom of a measuring cup or a glass to really pack it in—this prevents a crumbly base disaster.
- Make the Magic Shell. In a microwave-safe bowl, combine the chocolate chips and the remaining ¼ cup of peanut butter. Microwave in 30-second bursts, stirring well after each burst, until it’s melted and smooth. This should take about 90 seconds total. Don’t over-microwave it, or the chocolate will seize up and get weird.
- Top and Swirl. Pour the melted chocolate mixture over the peanut butter base. Spread it into an even layer with a spatula. For a fancy touch, drag a knife or a toothpick through the top to create some swirls. Sprinkle with that tiny pinch of sea salt if you’re using it.
- The Hardest Part: Wait. Place the pan in the refrigerator for at least 2-3 hours, or until the chocolate top is completely set. Want to speed things up? The freezer is your friend (about 45-60 minutes).
- Slice and Conquer. Once it’s rock solid, use the parchment paper overhang to lift the entire block out of the pan. Place it on a cutting board and slice it into bars or squares with a sharp knife. Wipe the knife clean between cuts for super clean edges.
Common Mistakes to Avoid
- Using the Wrong Peanut Butter: This is the big one. Natural, oily peanut butter will make your bars greasy and they won’t set properly. Stick to the classic, no-stir kinds like Jif or Skippy for this recipe.
- Skipping the Chill Time: Impatience is the enemy of good no-bake desserts. If you try to cut them before they’re fully set, you’ll have a gooey, delicious mess. A delicious mess, but a mess nonetheless.
- Not Packing the Base: If you just lightly press the base layer, it will be crumbly and fall apart. Put some muscle into it! Press it down firmly and evenly.
Alternatives & Substitutions
Got allergies or just want to mix it up? No problem.
- Graham Cracker Swap: No graham crackers? You can use crushed digestive biscuits, vanilla wafers, or even Oreos (scrape the filling out first for a chocolatey base).
- Nut-Free? Use sunflower seed butter instead of peanut butter! It has a similar consistency and taste. FYI, for some people, sunflower seed butter can react with the baking soda in other recipes and turn green, but that’s not an issue here since we’re not baking. Your bars will be perfectly, deliciously beige.
- Butter: For a dairy-free version, a plant-based butter substitute works just fine. IMO, Melt or Earth Balance brands are great for baking and no-bake projects.
- Chocolate: Feel free to use dark chocolate chips or even white chocolate chips for the topping. You do you!
FAQ
Can I use margarine instead of butter?
Well, technically yes, but why hurt your soul like that? Butter provides a far superior flavor. If it’s all you have, it will work in a pinch, but the taste won’t be as rich.
How long will these bars last?
Stored in an airtight container in the fridge, they are perfect for up to a week. You can also freeze them for up to 3 months. Just let them thaw for a few minutes before eating.
My chocolate topping is too thick! Help!
If your chocolate/PB mix is too thick to spread easily, add a tiny bit (like a ½ teaspoon) of coconut oil or vegetable shortening to thin it out. This will make it glossier and easier to work with.
Can I double this recipe?
Absolutely! Double all the ingredients and use a 9×13 inch pan. Your friends and family will thank you.
Why did my base turn out crumbly?
You probably didn’t pack it firmly enough, or you might have been a little short on the peanut butter or butter. Really press it down with some force next time!
Related Recipes;
- 3-Ingredient S’mores Dip: Quick & Gooey Dessert Recipe
- 3-Ingredient Cheesecake Dip: Quick & Creamy Dessert Recipe
- 12 Moist & Flavorful Fall Muffin Recipes
- 3-Ingredient Apple Nachos: Quick & Healthy Snack
Final Thoughts
And there you have it. You’ve just created a dessert that looks and tastes like it came from a fancy bakery, all without breaking a sweat or turning on an oven. You’re a kitchen wizard now. Go forth, slice yourself a generous square, and enjoy the fruits of your (incredibly minimal) labor. You’ve earned it
Printable Recipe Card
Want just the essential recipe details without scrolling through the article? Get our printable recipe card with just the ingredients and instructions.

