So, you want something sinfully delicious but are also vaguely aware of your gluten intake? Or maybe you just opened your pantry, saw a bag of coconut flour staring at you from that one ambitious health kick, and thought, “Well, now what?” I feel you. These aren’t just “good for being gluten-free” cupcakes. These are legitimately, unapologetically, might-eat-the-whole-batch-yourself fantastic. And the best part? They’re so easy, you could probably make them with one hand tied behind your back (though I don’t recommend it—batter licking is a key step).
Why This Recipe is Awesome
Let’s cut to the chase. This recipe is a game-changer. First, it’s gluten-free without tasting like sad, crumbly cardboard. It’s naturally sweet, incredibly moist, and has a hint of tropical flair from the coconut flour. Second, it’s idiot-proof. I’ve made these while simultaneously trying to stop my cat from climbing the curtains, and they still turned out perfectly. They’re quick to whip up, requiring minimal bowls and even less patience. Basically, it’s your new secret weapon for when a cupcake craving strikes with the force of a thousand suns.
Ingredients You’ll Need
Gather your squad. Here’s what you’ll need to make these little clouds of happiness:
- Coconut Flour: The star of the show! Don’t try to sub this with regular flour; it’s a totally different beast.
- Baking Powder: The lifter. The make-em-fluffy friend.
- Salt: To make all the other flavors pop. Non-negotiable.
- Eggs: They’re the glue that holds everything together in gluten-free baking. Pro tip: Make sure they’re at room temperature. It makes a huge difference in getting a smooth batter.
- Coconut Oil, melted: Or butter. Both are delicious. The coconut oil just amplifies that lovely flavor.
- Honey or Maple Syrup: Your natural sweeteners. Agave works too if that’s your jam.
- Milk of choice: Canned coconut milk will make them ultra-rich and coconutty, but any milk you have works.
- Vanilla Extract: The more the merrier. Splash it in like you mean it.
Step-by-Step Instructions
- Preheat and Prep. Get that oven heating to 350°F (175°C). Now, line a muffin tin with cupcake liners. This is crucial unless you enjoy chiseling cupcakes out of a pan. No judgment.
- Mix the Dry Stuff. In a medium bowl, whisk together ½ cup of coconut flour, 1 teaspoon of baking powder, and a ¼ teaspoon of salt. Give it a good whisk to break up any lumps and get everyone acquainted.
- Combine the Wet Squad. In a larger bowl, crack in 6 eggs. Yes, six. Trust the process. Add in ½ cup of melted (but slightly cooled) coconut oil, ½ cup of honey, ½ cup of milk, and a generous tablespoon of vanilla. Whisk it all until it’s one happy, smooth family.
- Become One. Gently add your dry ingredients into the wet ingredients. Whisk until you have a smooth, lump-free batter. It will be a bit thicker than a regular cake batter, but that’s A-OK. Let this batter sit for 5 minutes. This is the secret handshake of coconut flour baking—it needs a minute to absorb all the liquid.
- Scoop and Bake. Divide the batter evenly between your 12 cupcake liners. Pop the tin in the oven and bake for 18-20 minutes. They’re done when the tops are springy to the touch and a toothpick comes out clean.
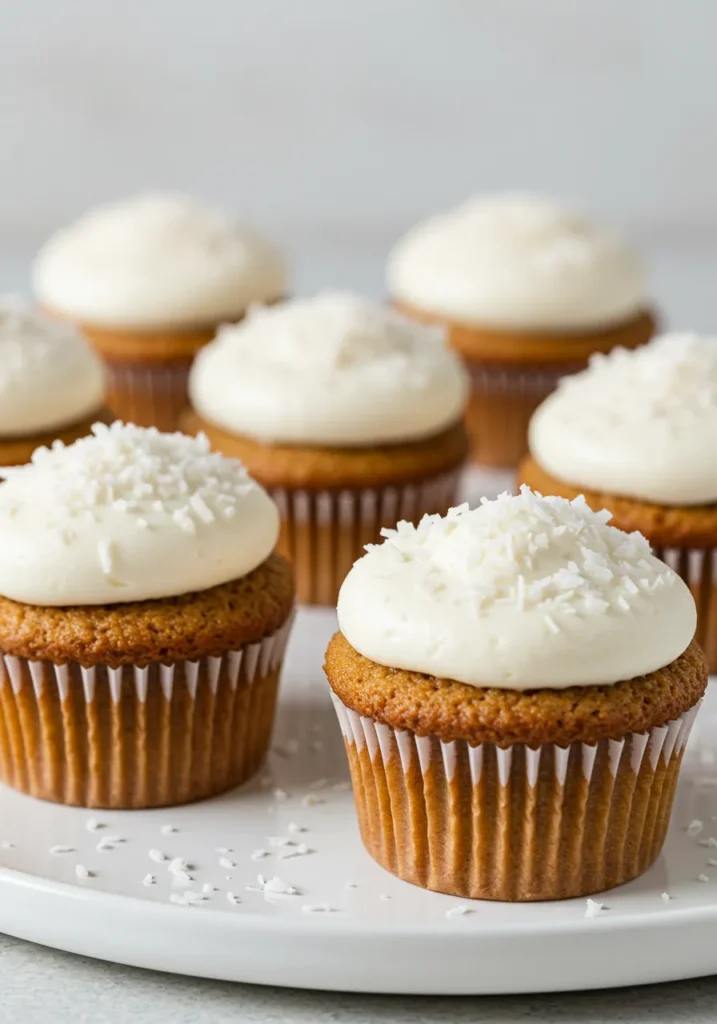
- Cool It. Let the cupcakes cool in the pan for 5 minutes before moving them to a wire rack. Let them cool completely before you even think about frosting them. I’m serious. Hot cupcake + frosting = puddle of sadness.
Common Mistakes to Avoid
- Skipping the Rest Time: I said it once, I’ll say it again. Let the batter sit! This hydrates the coconut flour and prevents a gritty texture.
- Using Cold Eggs: This can cause the melted coconut oil to solidify into little bits, which is just… weird. Room temp eggs are your best friend here.
- Overbaking: Coconut flour burns easier than your average dating app swipe. Set a timer! An overbaked cupcake is a dry cupcake, and we don’t do that here.
- Frosting While Hot: Patience, young grasshopper. You’ve waited this long. You can wait for them to cool.
Alternatives & Substitutions
Playing with your food is encouraged.
- No Honey? Maple syrup or agave nectar are perfect 1:1 substitutes.
- Dairy-Free? You’re already most of the way there! Just use a plant-based milk (coconut, almond, oat) and you’re golden.
- Want Chocolate? Add ¼ cup of cocoa powder to the dry ingredients and maybe some chocolate chips because… why not?
- Out of Coconut Oil? Melted butter works beautifully and gives a more classic vanilla taste.
- No Muffin Tin? You can bake this as a cake in an 8×8 inch pan! Just add a few minutes to the baking time.
FAQs
Can I use a different flour?
Nope. Coconut flour is incredibly absorbent and unique. Swapping it for almond or all-purpose flour will not work in this recipe and will lead to a baking tragedy.
Why are there so many eggs?
I know, it seems like a lot! Since coconut flour has no gluten, the eggs provide the necessary structure to hold the cupcakes together. They’re the bouncers of this party.
My batter is super thick, did I mess up?
You did not! Coconut flour batter is naturally much thicker than traditional batter. This is exactly what you want. The resting time will thicken it up even more.
Can I make these keto?
You can try! Swap the honey for a keto-friendly maple syrup substitute and use a sugar-free milk alternative. The carb count will mostly come from the coconut flour itself.
How should I store these?
Because they’re so moist, they’re best kept in an airtight container in the fridge for up to 5 days. Let them come to room temp before eating for the best texture.
What’s the best frosting?
A simple vanilla buttercream (dairy-free if needed) is a classic winner. A cream cheese frosting or even a dairy-free coconut whipped cream would be absolutely divine.
Related Recipes
Final Thoughts
And there you have it! You’ve just unlocked the power to create incredibly delicious, gluten-free cupcakes that will impress absolutely everyone. They’re moist, they’re flavorful, and they prove that eating well doesn’t mean sacrificing dessert. Now go forth, bake them, and then do the most important part: eat one (or three) immediately. You’ve earned it
Printable Recipe Card
Want just the essential recipe details without scrolling through the article? Get our printable recipe card with just the ingredients and instructions.

