So, your sweet tooth is staging a mutiny, but your motivation to bake a seven-layer cake is sitting at a solid zero? I feel you. Deeply. What if I told you there’s a dessert that’s basically the culinary equivalent of putting on your favorite cozy socks? It’s elegant without being fussy, delicious without being decadent, and it makes your house smell like a fancy spa. Welcome to the magical, lazy-person’s gourmet world of baked pears. Let’s get this cozy party started.
Why This Recipe is Awesome
Look, I’m not here to sell you a lie. This isn’t a 30-second microwave hack that tastes like regret. This is a real dessert that requires minimal effort for maximum payoff. It’s idiot-proof, even I didn’t mess it up. We’re talking about a dessert that impresses your mother-in-law but is simple enough to whip up on a Tuesday night because you deserve it. It feels fancy, looks gorgeous on a plate, and is secretly healthy-ish. It’s the superhero of the dessert world, disguised in a humble fruit costume.
Ingredients You’ll Need
Gather your squad. This list is short, sweet, and probably already in your kitchen.
- 4 firm-ripe pears (Bosc or Anjou are my go-to): Don’t use mushy ones. They’ll just give up on life in the oven and become sad pear soup.
- 2 tablespoons of butter, cubed: The good stuff. Salted or unsalted, I won’t tell the culinary police.
- 3 tablespoons of honey or maple syrup: For that natural, sticky sweetness. Agave works too if that’s your vibe.
- 1 teaspoon of ground cinnamon: The quintessential cozy spice.
- A pinch of nutmeg (optional, but highly recommended): Makes it smell like Christmas, which is always a win.
- A pinch of salt: To make all the other flavors pop. Don’t you dare skip it.
- Optional Add-ins: A handful of walnuts or pecans for crunch, a handful of raisins or dried cranberries, or a splash of vanilla extract. You do you.
Step-by-Step Instructions
Preheat your oven to 375°F (190°C). Don’t just turn it on when you put the pears in. Preheating is non-negotiable for that perfect, tender bake.
- Prep Your Pears: Slice the pears in half lengthwise. Now, you have a choice. You can be a purist and leave the skin on (it gets tender and adds fiber!), or you can peel them for a super silky texture. Use a melon baller or a small spoon to scoop out the core and seeds, making a little well. This is where the buttery, spicy goodness will pool. It’s a flavor swimming pool.
- Arrange and Anoint: Place the pear halves cut-side-up in a baking dish just big enough to hold them snugly. They like to be close. Drizzle the honey or maple syrup all over them. Plop a little cube of butter into each of the wells you made. Sprinkle the cinnamon, nutmeg, and that all-important pinch of salt evenly over everything.
- Bake to Perfection: Pop the dish into your preheated oven and bake for 25-35 minutes. You’re looking for the pears to be easily pierced with a fork but not completely collapsing. They should be tender and glorious.
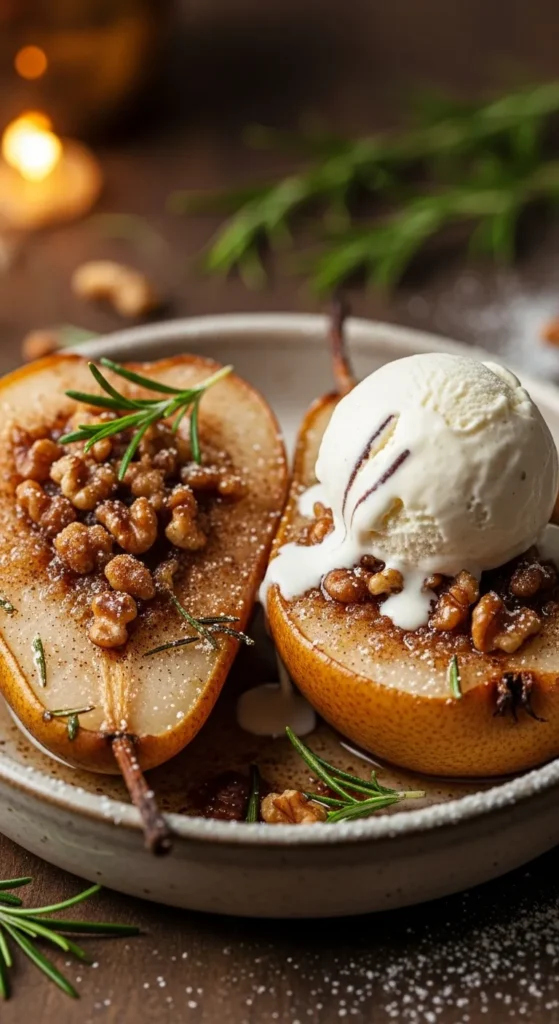
- Serve and Swoon: Take them out of the oven (oven mitts, people!). Let them cool for a hot minute. Pro tip: Spoon the incredible syrupy, buttery juices from the pan back over the pears right before serving. This is liquid gold. Enjoy them as-is, or with a scoop of vanilla ice cream that slowly melts into the warm pear. You’ve just achieved greatness.
Common Mistakes to Avoid
Let’s avoid some classic kitchen oopsies, shall we?
- Using Overripe Pears: I said it before, I’ll say it again. A firm pear holds its shape. A mushy pear will turn into baby food. Choose wisely.
- Skipping the Preheat: Your oven needs time to get to the right temp! Putting pears in a cold oven is like jumping into a cold pool—it’s a shocking, unpleasant experience for everyone involved.
- Forgetting the Salt: Salt is the wingman of sweetness. It makes everything taste more like itself. Leaving it out is a flavor flatline.
- Not Basting: That sauce in the bottom of the pan isn’t for decoration. It’s the best part! Not spooning it back over the finished pears is a culinary crime.
Alternatives & Substitutions
Don’t have something? No stress. This recipe is wonderfully flexible.
- No Honey? Maple syrup is a perfect 1:1 swap. Brown sugar works too—just mix it with the butter before stuffing it in the cores.
- Vegan? Easy. Swap the butter for your favorite plant-based butter or even coconut oil. It works like a charm.
- Spice It Up: Not a cinnamon fan? (Weird, but okay). Try a pinch of cardamom or ginger for a different kind of warmth.
- Add a Crunch: In the last 10 minutes of baking, sprinkle some chopped nuts or even oats over the top for a delightful texture contrast.
- Boozy Pears: Feeling fancy? Add a tablespoon of bourbon, rum, or amaretto to the baking dish before it goes in the oven. FYI, your kitchen will smell incredible.
FAQ
1. Do I need to peel the pears before baking?
Peeling is optional. Leaving the skin on helps the pears hold their shape, while peeling gives a softer, more delicate texture.
2. What type of pears work best for baking?
Bosc and Anjou pears are the best choices because they hold up well when baked and don’t turn mushy.
3. Can I prepare baked pears ahead of time?
Yes! You can bake them a day ahead and reheat gently in the oven before serving.
4. What toppings go well with baked pears?
Whipped cream, vanilla ice cream, yogurt, chopped nuts, or a drizzle of honey or caramel make great toppings.
Related Recipes:
- 3-Ingredient S’mores Dip: Quick & Gooey Dessert Recipe
- 3-Ingredient Cheesecake Dip: Quick & Creamy Dessert Recipe
- 12 Moist & Flavorful Fall Muffin Recipes
- 3-Ingredient Apple Nachos: Quick & Healthy Snack
Final Thoughts
And there you have it. You’re now armed with the knowledge to create a dessert that is stupidly easy but looks and tastes like you’re a culinary genius. It’s the perfect recipe for a quiet night in, a last-minute dinner party guest, or just because you wanted something sweet without the guilt.
Now go impress someone—or, even better, just yourself—with your newfound pear-baking prowess. You’ve totally earned that warm, cozy, delicious bite. Enjoy
Printable Recipe Card
Want just the essential recipe details without scrolling through the article? Get our printable recipe card with just the ingredients and instructions.

