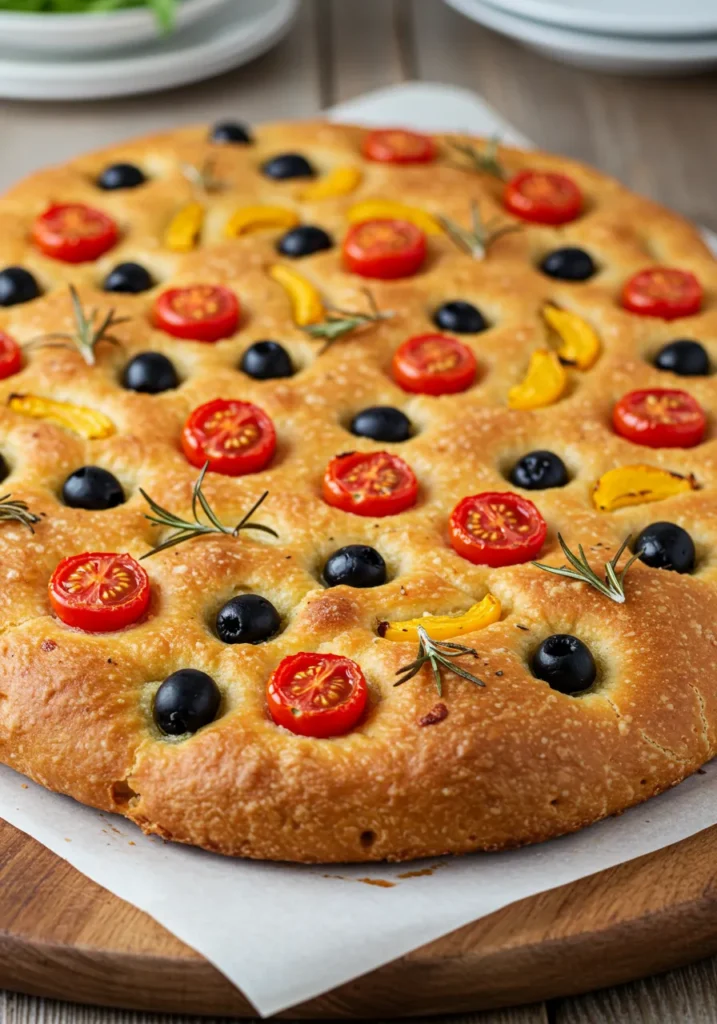
So, you want bread that looks like art but doesn’t require a degree from some fancy French culinary school? Same. Enter: decorated focaccia bread. It’s bread, it’s canvas, it’s edible Instagram content. Seriously, this is the one dish that makes people think you’ve got your life together—when in reality, you just raided the veggie drawer and shoved it all on dough.
Why This Recipe is Awesome
First off, it’s bread. Who doesn’t love bread? Secondly, it’s decorated bread, which automatically makes it 100% fancier than your average loaf. It’s also idiot-proof. I mean, I made it and didn’t screw it up, so you’ll be fine.
Plus, it’s customizable. Wanna make a sunflower out of peppers and olives? Do it. Want a minimalist vibe with just some rosemary sprigs? Go ahead, Picasso. Basically, this bread lets you pretend you’re artistic—without having to frame anything or clean paintbrushes afterward. Win-win.
Ingredients You’ll Need for Decorated Focaccia Bread
Alright, here’s the magic shopping list. Don’t panic; it’s mostly stuff you either already have or can grab without needing a second mortgage.
- 4 cups all-purpose flour (bread’s backbone, aka carbs galore)
- 1 packet (2 ¼ tsp) instant yeast (tiny flavor magicians)
- 1 ½ cups warm water (like a cozy bath, not boiling lava)
- 2 tsp salt (because bland bread is a crime)
- ¼ cup olive oil (the golden nectar of life)
- Toppings for decorating (a.k.a. “make it look pretty” section):
- Cherry tomatoes (sliced = instant flowers)
- Bell peppers (rainbow = major show-off vibes)
- Red onion slices (adds swirly drama)
- Fresh herbs: rosemary, parsley, basil, thyme
- Olives (black, green, whatever—just not the sad wrinkly ones at the back of the fridge)
- Seeds (sesame, sunflower, pumpkin—optional, but they scream “artisan bakery”)
Step-by-Step Instructions
- Mix the dough
In a big bowl, stir warm water, yeast, and a pinch of sugar. Wait 5 minutes until it’s bubbly. If nothing happens, your yeast is dead. Bury it and start over. - Add the essentials
Throw in flour, salt, and olive oil. Mix until it turns into sticky dough. Warning: it will cling to your fingers like a toddler that doesn’t want to go to school. - Knead it out
Plop dough on a floured surface and knead for 8–10 minutes. Think of it as a stress ball workout, but messier. - Let it chill (literally rise)
Put the dough back in the bowl, cover it with a towel, and let it rise for an hour. It should double in size. If it doesn’t, you probably need to check your yeast…again. - Prepare the canvas
Oil up a baking sheet or pan. Stretch dough to fit like you’re giving it a spa treatment. Don’t stress about it being perfect—rustic is “in.” - Decorate like a pro (or not)
Now for the fun part! Press your veggies, herbs, and seeds into the dough. Go artsy with flowers, landscapes, or stick figures if you’re feeling ironic. Just press them in gently so they don’t burn to ashes later. - Final rise
Cover the masterpiece and let it rest 20 more minutes. Meanwhile, preheat oven to 400°F (200°C). - Bake it, baby
Bake for 20–25 minutes until golden brown and smelling like heaven. - Admire, then devour
Let it cool slightly, snap your Instagram photo, then slice and enjoy your edible artwork.
Common Mistakes to Avoid
- Skipping the preheat: If you toss it in a cold oven, congrats, you’ve just invented weird flatbread.
- Overloading with toppings: Yes, more looks artsy, but too much and it’ll weigh down your dough like an overstuffed suitcase.
- Forgetting the salt: Salt = flavor. No salt = sad cardboard vibes.
- Burning your veggies: Press toppings in too shallow? They’ll crisp into charcoal. Too deep? They disappear into bread purgatory. Find the sweet spot.
Alternatives & Substitutions
- Flour swap: Whole wheat works if you’re feeling “healthy,” but honestly, white flour = fluffier bread.
- Yeast drama? Use baking powder + yogurt for a quick-rise cheat, though it won’t taste as legit.
- No fancy toppings? Even just rosemary + sea salt makes this a banger. Minimalism can be classy.
- Gluten-free gang: Use a good GF flour blend—but heads up, it won’t rise quite as proudly. Still tasty, though.
FAQ about Decorated Focaccia Bread
Can I make this ahead of time?
Yep. You can prep the dough, let it rise, then refrigerate overnight. Next day, boom—bread art party.
Do I have to decorate it?
Technically no. But why pass up the chance to make carbs look like a Monet?
Can I freeze focaccia?
Absolutely. Slice, wrap, freeze. Reheat in the oven, not the microwave, unless you like sad, soggy bread.
Can I use margarine instead of olive oil?
Well, technically yes, but why hurt your soul like that? Olive oil = flavor and vibes.
What’s the best pan to use?
A rimmed baking sheet works best. Bonus: bigger canvas for your veggie art.
Do I need to be artistic?
Nope. Even a bunch of random herbs tossed on top looks fancy. Trust me, people will still clap.
How long does it last?
Focaccia is best fresh (hello, warm carbs), but it’ll last 2–3 days if wrapped up tight.
Related Recipes
- Easy Bacon Cream Cheese Doritos Recipe
- Quick Delicious Japanese Omurice Recipe
- Thai Peanut Chicken Creamy Savory Recipe
Final Thoughts about Decorated Focaccia Bread
Decorated focaccia bread is one of those magical recipes that looks way harder than it actually is. You get bread, you get art, and you get bragging rights all in one go.
So, stop overthinking and just do it. Grab some flour, raid your veggie drawer, and go full Bob Ross with carbs. You’ll impress friends, family, or just yourself when you slice into your gorgeous creation. And hey—if all else fails, it’s still bread. And bread never disappoints.
Now go make that edible masterpiece. You’ve earned it!
Decorated Focaccia Bread Ideas You Can Actually Make Recipe
Ingredients
- 4 cups all-purpose flour
- 1 packet 2 ¼ tsp active dry yeast
- 1 ½ cups warm water
- 1 tsp sugar
- 1 tsp salt
- ¼ cup olive oil plus more for greasing
- Cherry tomatoes bell peppers, red onion slices, olives (for decorating)
- Fresh herbs rosemary, basil, parsley for decorating
Instructions
- Dissolve yeast and sugar in warm water, let sit for 5–10 minutes until foamy.
- Mix flour, salt, and olive oil in a bowl, then add yeast mixture and knead into a soft dough.
- Place dough in an oiled bowl, cover, and let rise for 1 hour until doubled.
- Punch down dough, transfer to a greased baking pan, and stretch evenly.
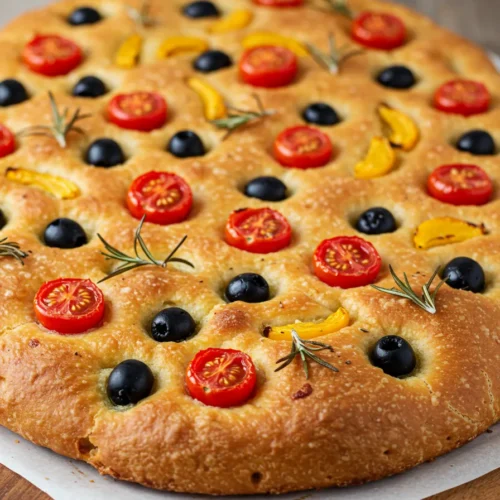
- Arrange vegetables and herbs on top to create decorative designs.
- Drizzle with olive oil and sprinkle with sea salt.
- Bake at 400°F (200°C) for 20–25 minutes until golden brown.
- Cool slightly before slicing and serving.
Notes
- Use colorful veggies like peppers, radishes, and cherry tomatoes for a vibrant look.
- Brush veggies lightly with olive oil so they don’t burn.
- This bread tastes best warm and fresh out of the oven.
DID YOU MAKE THIS EASY RECIPE?
If you have, then share it with us by sending a photo. We’re excited to see what you’ve made 🙂Printable Recipe Card
Want just the essential recipe details without scrolling through the article? Get our printable recipe card with just the ingredients and instructions.