So, you’re craving something ridiculously delicious but your inner couch potato is screaming, “ABSOLUTELY NO BAKING ALLOWED!”? Same, my friend. Same. You’ve stumbled upon the holy grail of lazy-day desserts. This isn’t just a recipe; it’s a life hack for when your sweet tooth stages a hostile takeover but your motivation has left the building. Get ready to make a pie so good, it’ll make you want to pat yourself on the back (and then immediately eat the whole thing).
Why This Recipe is Awesome
Let’s cut to the chase. This Oreo Peanut Butter Pie is the culinary equivalent of finding a $20 bill in your old jeans—pure, unadulterated joy with minimal effort. It’s so idiot-proof, I’m convinced a well-trained golden retriever could probably make it (though I don’t recommend sharing your chocolatey results with them). We’re talking a mere 15 minutes of “work,” zero oven required, and a final product that looks like you slaved away for hours. It’s the ultimate dessert for impressing people while secretly putting in the effort of a sloth on a Sunday.
Ingredients You’ll Need
Gather your squad. This is the easiest grocery list of your life.
- For the Crust:
- One (1) package of Oreos (about 36 cookies): The foundation of our dreams. Don’t you dare scrape the cream filling out. We need that glue.
- 6 tablespoons unsalted butter, melted: This is the cement that holds our crunchy dreams together.
- For the Glorious Filling:
- One (1) 8-ounce block of cream cheese, softened: Not rock-hard-from-the-fridge cold. Let it sit on the counter and contemplate its life for a bit.
- 1 cup creamy peanut butter: The smooth, kind that doesn’t have chunks. This is not the time for a crunchy surprise.
- 1 cup powdered sugar: Also known as “confectioner’s sugar” for fancy people. It sweetens the deal without any grittiness.
- One (1) 8-ounce tub of Cool Whip, thawed: The fluffy cloud that makes everything light and airy. You could whip your own heavy cream, but that sounds like effort, and we’ve already established we’re not about that life today.
- For the Topping (Optional but Highly Recommended):
- More Cool Whip: Always more.
- Crushed Oreos: For that “I meant to do that” messy-but-chic look.
- Chocolate syrup: Because why not?
Step-by-Step Instructions
- Pulverize Your Feelings (and the Oreos). Dump the entire package of Oreos (creams and all!) into a food processor. Blitz them into a fine, black dust. No food processor? No problem! Throw them in a sturdy zip-top bag and channel your inner Hulk. Whack them with a rolling pin until they are thoroughly crushed. It’s great for stress relief.
- Butter Up. Pour your beautiful black cookie crumbs into a bowl and drizzle the melted butter over them. Mix it up until it looks like wet sand and every last crumb is feeling buttery and loved.
- Form the Foundation. Dump your buttery Oreo sand into a 9-inch pie dish. Press it firmly and evenly into the bottom and up the sides. A flat-bottomed glass or measuring cup works wonders here for getting it nice and tight. Pop this masterpiece in the fridge to chill while you make the magic.
- The Fluffening. In a large bowl, beat the softened cream cheese with a hand mixer (or a whisk and some serious elbow grease) until it’s smooth and lump-free. Add in the peanut butter and powdered sugar and beat again until it’s one beautifully unified, delicious beige blob.
- Fold in the Cloud. Now, gently fold in the thawed Cool Whip. This is not a mixing battle—be gentle! Use a spatula and fold until no white streaks remain. You want to keep all that airy fluffiness intact.
- Assemble the Beast. Pull your crust out of the fridge. Scrape all that peanut butter fluff into the crust and spread it out evenly. Make swoops and swirls with your spatula. It doesn’t have to be perfect; it’s homemade, and that’s the charm!
- The Final Countdown. This is the hardest part: WAITING. Cover the pie with plastic wrap and shove it into the fridge for at least 4 hours, but preferably overnight. This lets the flavors get to know each other and the filling set up perfectly.
- Devour. Once it’s set, top with more Cool Whip, crushed Oreos, and a drizzle of chocolate syrup. Slice, serve, and accept your compliments with a humble, “Oh, this old thing? It was nothing.”
Common Mistakes to Avoid
- Using brick-hard cream cheese: Your mixer will hate you, you’ll get lumpy filling, and you’ll probably curse my name. Just let it soften. I promise it’s worth the 30 minutes of patience.
- Not crushing the Oreos enough: Big, chunky crumbs will make a crust that falls apart when you slice it. We’re going for a fine, packable sand consistency.
- Mixing the Cool Whip like a maniac: Folding is not a suggestion. If you beat the life out of the Cool Whip, your filling will be dense and sad, not light and joyful. Be nice to the fluff.
Alternatives & Substitutions
- Gluten-Free? Use your favorite gluten-free chocolate sandwich cookies (like Glutino or Joe-Joe’s).
- Not a Peanut Butter Fan? (First of all, are you okay?) You can swap it for an equal amount of Nutella for a purely chocolate experience.
- Cool Whip Hatred? You can use an equal amount of freshly whipped heavy cream. Just whip 1 ½ cups of heavy cream with a tablespoon of sugar until you get stiff peaks, then fold it in.
- Want a Twist? Add some mini chocolate chips to the filling for a little extra texture.
FAQ
How long does this pie last in the fridge?
Well, it’s never lasted more than 48 hours in my house, but technically, it’s good for 3-4 days. Keep it covered so it doesn’t absorb any fridge smells (nobody wants onion-flavored pie).
Can I freeze this Oreo peanut butter pie?
Absolutely! Wrap it tightly in a few layers of plastic wrap. It’ll keep for a month or two. Thaw it in the fridge overnight before you serve. It’s like a delicious emergency dessert waiting to happen.
My crust is too crumbly! What did I do wrong?
You probably needed a bit more butter. The mixture should hold together when you pinch it. If it doesn’t, add another tablespoon of melted butter and try again.
Can I use a different kind of cookie?
Go for it! Golden Oreos (and vanilla pudding) would be a fantastic vanilla version. Graham crackers or Nilla Wafers would work great too, though you might need to adjust the butter slightly.
Do I have to use a pie dish?
Nope! A 9×9 square pan, a springform pan, or even just a regular ol’ baking dish will work. You’re just making delicious layers; the shape is just a suggestion.
Related Recipes;
- Dreamy Vanilla Cupcakes Recipe
- Dreamy Peach Cobbler Recipe: Easy to Make at Home
- Apple Pie Recipe
- Pumpkin Spice Muffins Recipes
Final Thoughts
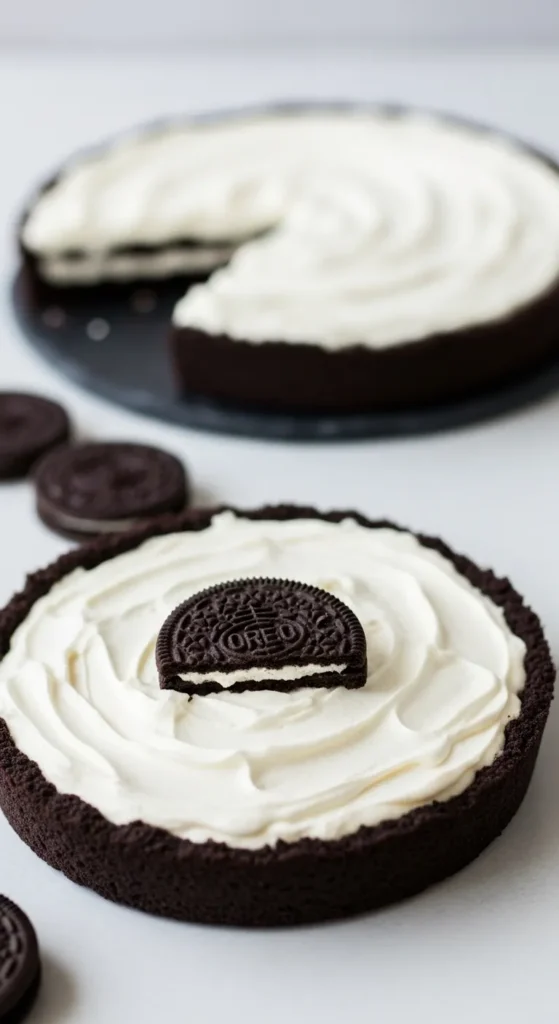
Easy No-Bake Oreo Pie is the definition of effortless indulgence—with a crunchy Oreo crust, a creamy cookies-and-cream filling, and absolutely no oven required. It’s rich, cool, and decadent, making it the perfect dessert for warm days, last-minute get-togethers, or when you just want something seriously satisfying without the hassle.
Each bite delivers that classic Oreo flavor in a chilled, velvety form that’s impossible to resist.
Simple, sweet, and sure to impress—this pie is a no-bake win every time.
Tip: Let it chill for a few hours (or overnight) for the perfect slice, and top with whipped cream and extra Oreos for maximum wow factor!
Printable Recipe Card
Want just the essential recipe details without scrolling through the article? Get our printable recipe card with just the ingredients and instructions.

