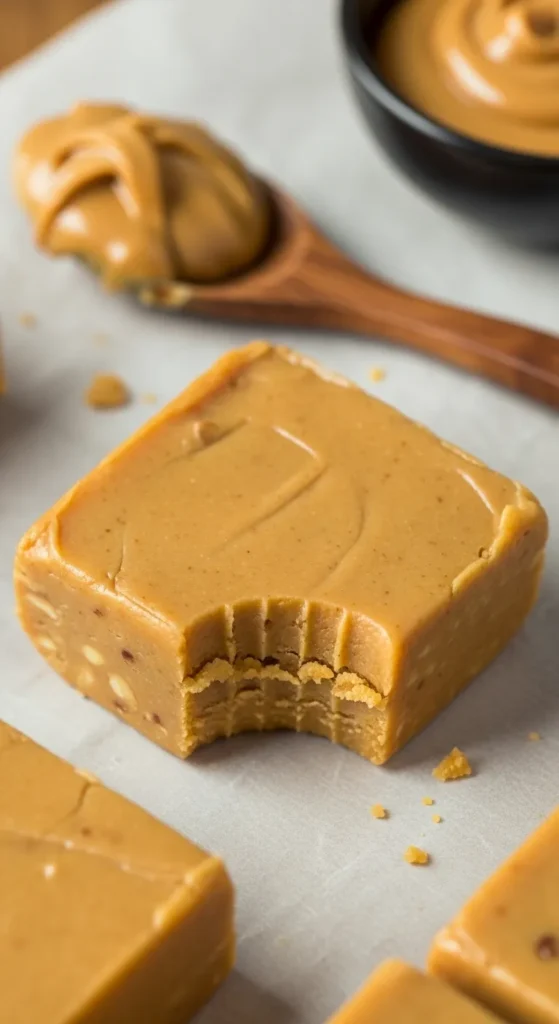
So you’re staring into your pantry, dreaming of something sweet, peanut buttery, and absolutely not requiring you to turn on the oven? Same, friend. No-bake desserts are like the cool kids of the kitchen world—they don’t make a fuss, they don’t need heat, and they still deliver the ultimate “treat yo’ self” vibes. This no-bake peanut butter fudge is basically the superhero of quick sweets. Smooth, creamy, with that melt-in-your-mouth peanut butter punch—and it’s done before you’ve even decided what movie to binge.
Why This Recipe is Awesome
Here’s the tea: this recipe is ridiculously simple and nearly foolproof. Like, even if your usual baking skills are “heat things up and hope for the best,” you’ll nail this. No oven? No problem. No fancy equipment? Nada. Plus, it uses just a handful of pantry staples you probably have right now. This fudge is rich, creamy, and just sweet enough to satisfy your sugar cravings without sending you into a sugar coma. And since it’s no-bake, it’s perfect for when it’s too hot to cook or just when you want maximum treat with minimum effort.
Basically, it’s like peanut butter fudge for people who want to feel fancy but without the hassle. You’re welcome.
Ingredients You’ll Need
Ready to raid your kitchen? Here’s the squad you’ll want to call together:
- 1 cup smooth peanut butter (chunky? No judgment, but smooth wins here)
- 1/2 cup unsalted butter (room temperature, because cold butter is a pain)
- 2 cups powdered sugar (yes, the fluffy magic dust)
- 1 teaspoon vanilla extract (because vanilla just gets along with everything)
- Optional pinch of salt (to balance the sweetness like a boss)
- Optional: 1 cup semi-sweet chocolate chips (for a peanut butter-chocolate remix)
Step-by-Step Instructions
- Line an 8×8-inch pan with parchment paper—this is your fudge’s throne. Make sure the paper hangs over the sides so you can easily lift your fudge out later. Clean-up points right here.
- In a medium microwave-safe bowl, melt the butter and peanut butter together. Use 30-second bursts in the microwave and stir in between until silky smooth. Microwave avoiders can melt gently on the stove too.
- Add the vanilla extract and a pinch of salt (optional but do it, trust me). Stir that luscious mixture until it looks like peanut butter dreams.
- Slowly add the powdered sugar—bit by bit—stirring after each addition. You want a thick dough-like consistency, not runny. Tip: Use a sturdy spoon or spatula unless you want a sugar dust explosion.
- (Optional but highly recommended) Fold in the chocolate chips. They’ll melt slightly into that warm fudge and get all gooey and dreamy.
- Pour mixture into your lined pan. Smooth it out evenly with the back of your spatula or spoon. If your fudge needs a little smoothing boost, dampen your spatula slightly.
- Pop the pan into the fridge and chill for at least 2 hours, or until firm (if you’re impatient like me, 1 hour might do, but longer is tastier).
- Once set, use the parchment paper edges to lift the fudge out, cut into squares, and get ready to obliterate your snack stash.
Common Mistakes to Avoid
- Not lining your pan: Hate when your fudge sticks like it’s glued to the pan? Yeah, use parchment paper.
- Skipping the chilling time: Patience, young grasshopper. Fudge needs to chill or it’ll turn into peanut butter mush.
- Adding all the powdered sugar at once: Your arms will hate you. Add slowly, or prepare to stir forever.
- Microwaving peanut butter too long: Burnt peanut butter = bitter disappointment. Warm gently!
- Using chunky peanut butter—it’s possible, but beware, texture will totally change. Chunky butters can make fudge feel… a little odd.
Alternatives & Substitutions
- No butter? Swap in coconut oil for a slightly tropical twist. Slightly less creamy, but still very good.
- No powdered sugar? You could grind granulated sugar, but it takes forever and you might lose that melt-in-your-mouth vibe.
- Chunky peanut butter fan? Go for it! The texture might be rustic but peanut chunks = extra crunch karma.
- Want vegan fudge? Use vegan butter and make sure your chocolate chips are dairy-free. Easy peasy.
- No vanilla extract? Skip it, but the fudge loses a bit of its charm.
- Chocolate-free? No worries—this fudge is bomb without it. Just skip the chips and focus on peanut power.
FAQ (Frequently Asked Questions)
-
Can I use natural peanut butter?
You can, but since it’s oilier, your fudge might be a bit softer or oily. Chill it longer or add a bit more powdered sugar.
-
How long does this fudge last?
In the fridge, up to 2 weeks—if it lasts that long, that is.
-
Can I freeze it?
Yep! Wrap tightly and freeze for up to 3 months. Thaw in the fridge before serving.
-
Can I use crunchy peanut butter?
Sure, but be ready for texture changes. Chunky bits = surprise party in every bite.
-
Is this recipe allergen-friendly?
Nope. Peanut butter is peanut butter. Look for specially made allergy-friendly alternatives if needed.
-
Can I double the recipe?
Absolutely—just double everything and use a bigger pan.
-
Do I really need to melt the peanut butter and butter together?
Yes, for silky smooth fudge. Otherwise, you’ll get chunks of butter or peanut butter lumps. No one wants that.
Related Recipes:
- 5 Autumn Dinner Recipes That Are Cozy and Easy
- 5 Fall Pie Crust Ideas That Turn Desserts
- 5 Holiday Brunch Ideas for Festive Gatherings
- Cozy Guide to Cooking Autumn Vegetables Right
Final Thoughts
And there you have it: ultra-simple, no-bake peanut butter fudge that’s creamy, dreamy, and ready to rock your snack game at a moment’s notice. No stressing, no fancy gadgets, just sweet satisfaction. Next time the craving hits or you need a quick crowd-pleaser, whip this out and bask in your effortless kitchen hero status.
Go ahead, treat yourself or share with your pals (or don’t, and just act like you meant to make a single-serving batch). Either way, you’ve earned a moment of pure peanut butter bliss. Happy munching!
Printable Recipe Card
Want just the essential recipe details without scrolling through the article? Get our printable recipe card with just the ingredients and instructions.

