Hey there, fellow pie enthusiast! Picture this: the leaves are crunching underfoot, your kitchen smells like cinnamon heaven, and you’re about to wow everyone with a dessert that looks like it belongs in a gallery. If you’re tired of plain old pie crusts that scream “boring,” these five fall-inspired ideas will amp up your baking game. Who wouldn’t want to impress at Thanksgiving with crusts that double as art? Let’s chat about how you can elevate those apple, pumpkin, or pecan pies without breaking a sweat—trust me, even if you’re a newbie baker, these are doable and downright fun.
1. Autumn Leaf Cutout Crust
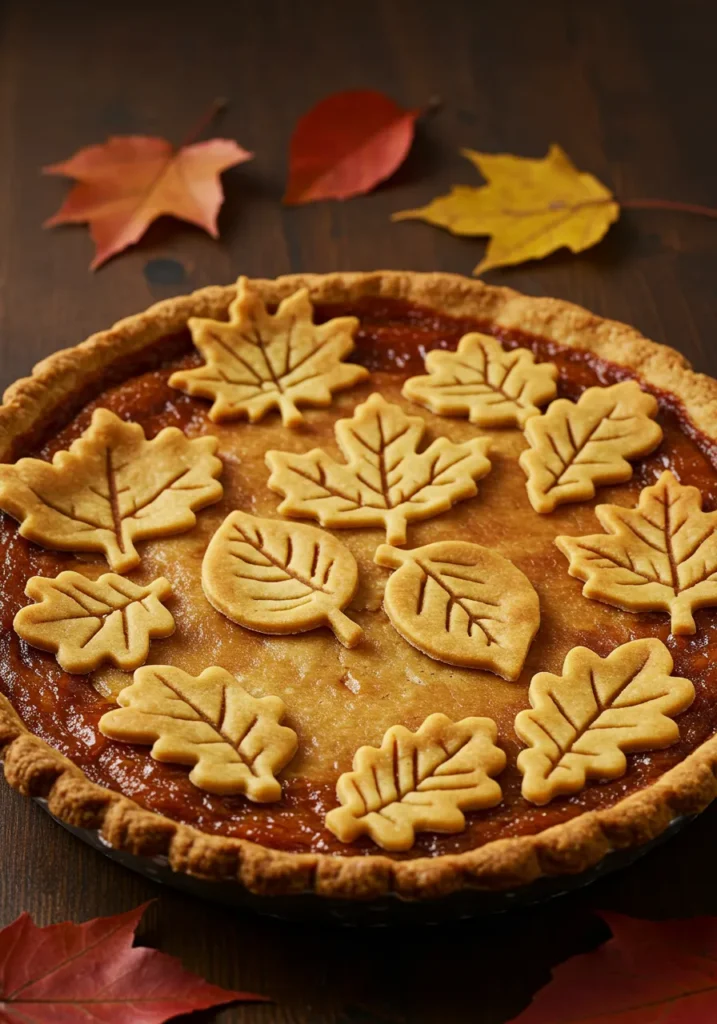
Kick off your fall baking with this showstopper that mimics a pile of colorful leaves on your pie. You carve out leaf shapes from extra dough and layer them for a rustic, forest-floor vibe—perfect for that apple pie craving.
Ingredients
- 2 cups all-purpose flour (plus extra for rolling)
- 1 teaspoon salt
- 1 tablespoon sugar
- 1 cup cold unsalted butter, cubed
- 4-6 tablespoons ice water
- Food coloring in red, orange, and yellow (gel works best)
- Egg wash (1 egg beaten with 1 tablespoon water)
Step-by-Step Instructions
- Mix flour, salt, and sugar in a bowl.
- Cut in the butter until the mixture resembles coarse crumbs—use your fingers or a pastry cutter.
- Add ice water one tablespoon at a time until the dough just holds together.
- Divide the dough into three parts and tint each with a different fall color.
- Roll out the main dough to fit your pie pan, fill with your chosen filling, and chill.
- Roll out the colored doughs thinly, then use leaf-shaped cookie cutters to punch out shapes.
- Arrange the leaves overlapping on top of the filling, brush with egg wash, and bake at 375°F for 40-45 minutes until golden.
Final word
This crust bursts with vibrant hues that scream autumn, and the flaky texture pairs perfectly with tart fillings. I once tried it on a pumpkin pie for a potluck, and folks snapped pics before slicing—total win. Plus, it’s forgiving if your leaves aren’t perfect; the messier, the more artistic it looks, IMO.
2. Braided Harvest Edge Crust
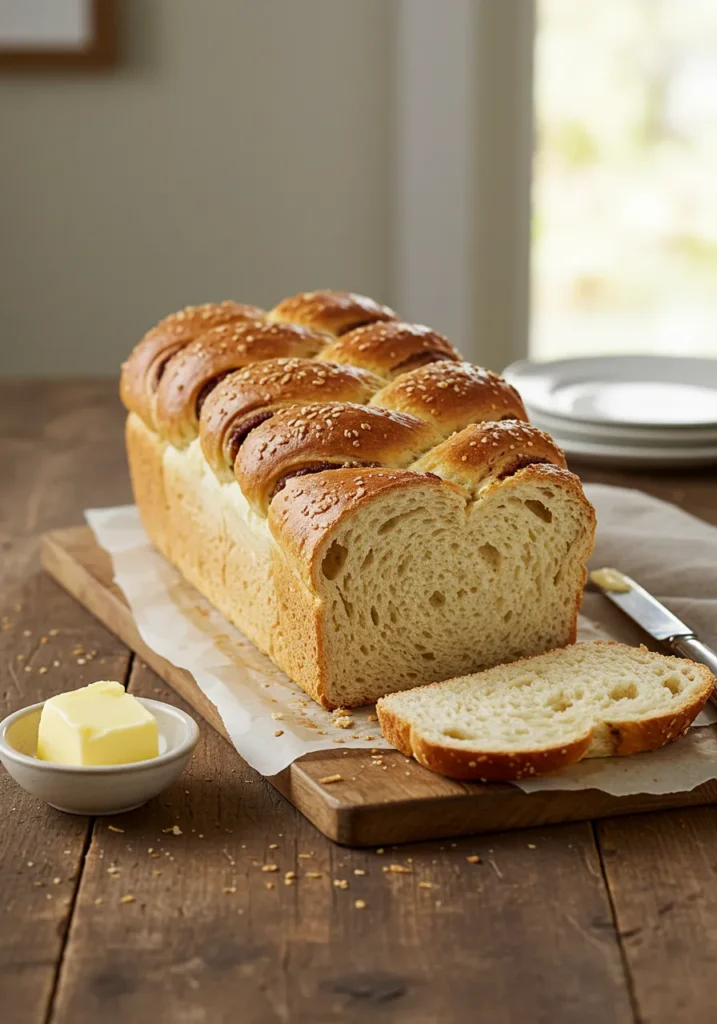
Nothing says “cozy fall gathering” like a braided crust edge that hugs your pie like a warm scarf. You weave strips of dough for a textured border that’s as tasty as it is pretty—ideal for pumpkin or sweet potato pies.
Ingredients
- 2 1/2 cups all-purpose flour
- 1 teaspoon salt
- 2 teaspoons cinnamon (for that fall kick)
- 1 cup cold shortening, cubed
- 6-8 tablespoons ice water
- Optional: turbinado sugar for sprinkling
Step-by-Step Instructions
- Combine flour, salt, and cinnamon in a large bowl.
- Work in the shortening until pea-sized bits form.
- Stir in ice water gradually to form a dough ball—don’t overmix!
- Roll out two-thirds of the dough for the bottom crust, place in the pan, and add filling.
- Roll out the remaining dough into thin strips about 1/2-inch wide.
- Braid three strips together, repeat to make enough for the edge, and press onto the rim.
- Crimp gently, sprinkle with sugar if you like, and bake at 400°F for 10 minutes, then reduce to 350°F for 30-35 more.
Final word
The braid adds a chewy, spiced crunch that elevates any filling without overwhelming it. Last fall, I swapped cinnamon for nutmeg on a whim—big mistake, it tasted too eggnoggy. Stick to the classics here, and you’ll have a pie that looks pro-level but takes zero fancy tools.
3. Stamped Acorn and Pumpkin Design Crust
Get crafty with this one: you stamp fall motifs right into the dough for a pie that tells a seasonal story. Think tiny acorns and pumpkins etched on top—super cute for pecan pies or anything nutty.

Ingredients
- 2 cups flour
- 1/2 teaspoon salt
- 1 tablespoon brown sugar (for subtle warmth)
- 3/4 cup cold butter, diced
- 5 tablespoons cold milk (or water)
- Cocoa powder or cinnamon for dusting stamps
- Small cookie stamps or DIY cutters shaped like acorns/pumpkins
Step-by-Step Instructions
- Blend flour, salt, and brown sugar.
- Rub in butter until crumbly.
- Mix in milk to bind the dough—knead lightly if needed.
- Roll out for the bottom crust, fit into the pan, and fill.
- Roll out top dough slightly thicker than usual.
- Dust stamps with cocoa or cinnamon, press designs randomly into the dough.
- Drape over filling, slit vents, and bake at 375°F for 35-40 minutes until designs crisp up.
Final word
Those stamped details pop after baking, giving your pie a whimsical, handcrafted feel that’s pure fall magic. I stamped mine too deeply once and ended up with leaky filling—lesson learned, keep it light! It’s a quick way to personalize, and kids love helping with the stamping part. 🙂
4. Marbled Spice Swirl Crust
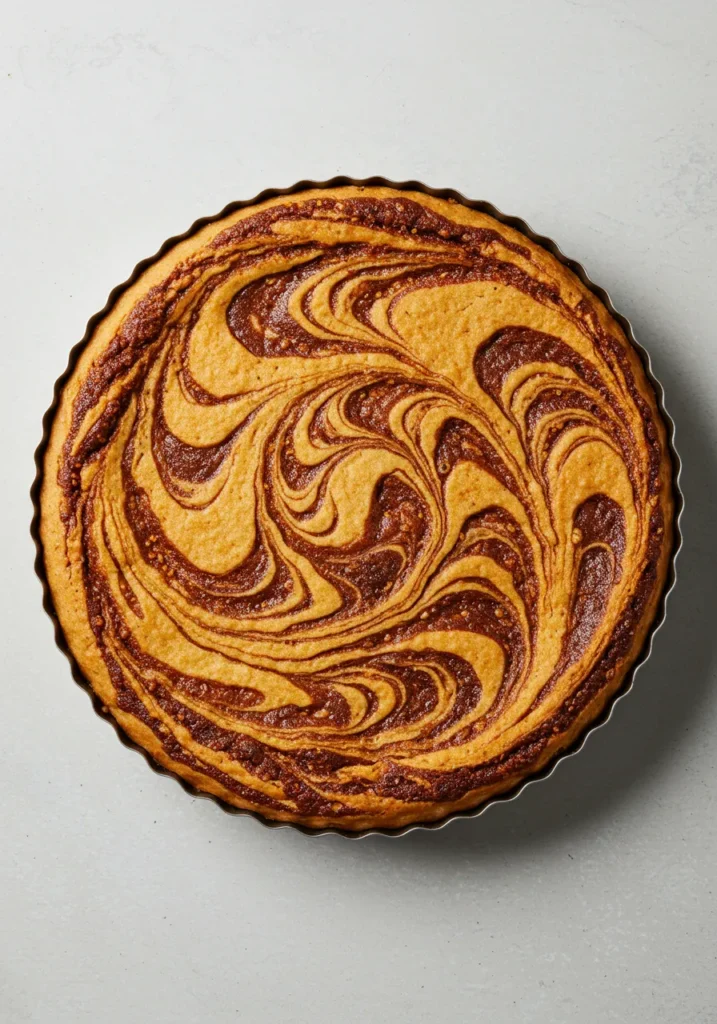
Swirl in fall spices for a crust that’s visually stunning and flavor-packed, like a tie-dye but edible. You marble different spiced doughs together for a hypnotic pattern—great for berry or pear pies.
Ingredients
- 2 1/4 cups flour, divided
- 1 teaspoon salt
- 1 cup cold lard or butter, cubed
- 1 teaspoon each of cinnamon, ginger, and nutmeg
- 4-6 tablespoons ice water
- Food coloring in earth tones (optional for extra swirl)
Step-by-Step Instructions
- Split flour into three bowls, add salt to one (plain), cinnamon to another, and mix ginger/nutmeg in the third.
- Cut equal parts butter into each bowl until crumbly.
- Add water to each to form three doughs—tint if desired.
- Roll out the plain dough for the base, add filling.
- Roughly combine the spiced doughs, roll out with some twisting for marbling.
- Place on top, trim edges, and bake at 425°F for 15 minutes, then 350°F for 25-30 more.
- Watch the swirls brown unevenly for that artistic effect.
Final word
The marbling infuses subtle spice throughout, making each bite a flavor adventure. FYI, I overdid the ginger once and it bit back—balance is key. This technique hides imperfections too, so if your rolling skills are meh, no one notices in the pretty chaos.
5. Rustic Twig and Berry Decor Crust
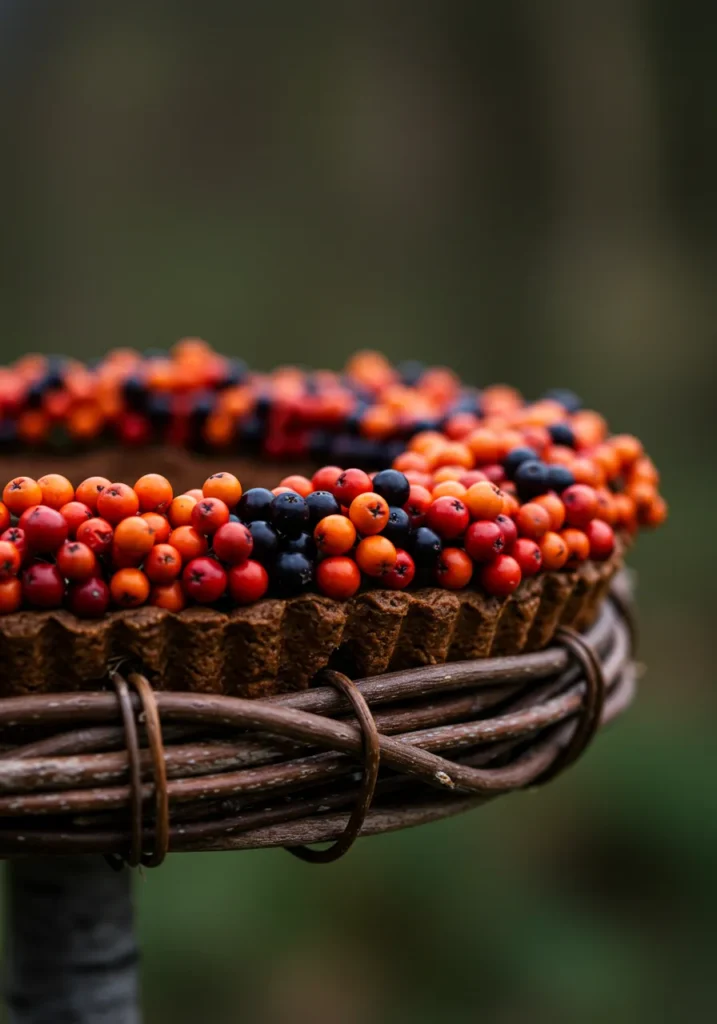
Channel woodland vibes with this crust topped with dough “twigs” and berry cutouts for a pie that looks freshly foraged. You sculpt simple shapes for a freeform, artistic top—spot-on for cranberry or mixed fruit pies.
Ingredients
- 2 cups whole wheat flour (for rustic texture)
- 1/2 teaspoon salt
- 1 tablespoon maple syrup (hello, fall sweetness)
- 3/4 cup cold butter, in pieces
- 4-5 tablespoons cold water
- Dried cranberries or raisins for embedding
- Sanding sugar for sparkle
Step-by-Step Instructions
- Stir together flour, salt, and maple syrup.
- Incorporate butter until the mix is sandy.
- Drizzle in water to form dough—chill for 30 minutes.
- Roll out bottom crust, line pan, and fill.
- From remaining dough, roll thin ropes for “twigs” and cut small berry shapes.
- Arrange twigs branching out, dot with berries (press in real dried ones if you want), sprinkle sugar.
- Bake at 375°F for 40 minutes until the decor crisps and browns.
Final words
This crust nails that homemade, from-the-forest aesthetic with a sweet-tangy twist from the embedded berries. I added too many twigs last time and it got overcrowded—less is more for elegance. It’s therapeutic to shape, and the whole wheat adds a nutty depth that screams autumn comfort. :/
There you have it—five fall pie crust ideas that transform your desserts from everyday to artistic wonders. These tricks pack flavor, fun, and flair without needing pro skills, so grab your rolling pin and get creative. Which one will you tackle first? Your fall table (and Instagram feed) will thank you.
Related Recipes
- 5 Holiday Brunch Ideas for Festive Gatherings
- Cozy Guide to Cooking Autumn Vegetables Right
- Crave-Worthy Pumpkin Recipe
- Irresistible Spice Cake Recipe
Printable Recipe Card
Want just the essential recipe details without scrolling through the article? Get our printable recipe card with just the ingredients and instructions.

