So, you’re staring into the abyss of your freezer, hoping a magical, delicious dessert will suddenly materialize. I feel you. You want something gloriously tasty that doesn’t require a culinary degree or an entire afternoon to make. What if I told you that the solution to all your snack-time problems involves two of the greatest food groups ever invented: peanut butter and Nutella? Buckle up, my friend. We’re about to make your dream a frozen, creamy reality.
Why This Recipe is Awesome
Let’s cut to the chase. This recipe is the superhero of desserts. It requires zero baking, which means you can’t accidentally burn your kitchen down. It’s idiot-proof, even I didn’t mess it up, and I once tried to make toast in the microwave. You only need a handful of ingredients, most of which you probably already own. Plus, they look stupidly impressive. Bring these to a party and people will think you’re a pastry chef who has their life together. We’ll just keep the truth our little secret.
Ingredients You’ll Need
Gather your squad. This is the dream team that will come together to create frozen perfection.
- Chocolate Chips (1 cup): Semi-sweet is the classic move, but milk chocolate is also a solid choice. We’re not judging.
- Coconut Oil (1 tablespoon): This is our magic weapon for making the chocolate perfectly smooth and dippable. Don’t skip it, unless you enjoy clumpy chocolate disasters.
- Creamy Peanut Butter (½ cup): Not the natural, oily kind. We need the classic, shelf-stable, sugar-filled stuff for the right texture. This is no time to be healthy.
- Powdered Sugar (¼ cup): This sweetens the peanut butter filling and gives it a fantastic, fudge-like texture.
- Nutella (⅓ cup): The star of the show. Keep this away from any lurking spoons; we need it all for the recipe. Okay, maybe one spoonful for quality control.
- A Pinch of Salt: Trust me, this makes the sweet stuff pop.
Step-by-Step Instructions
Don’t panic. It’s easier than assembling IKEA furniture. Promise.
- Line a muffin tin with 8 paper or silicone liners. This prevents a tragic sticking situation later. No one wants to scrape their dessert out of a pan with a chisel.
- Create the chocolate base. In a microwave-safe bowl, combine the chocolate chips and coconut oil. Nuke it in 30-second bursts, stirring in between, until it’s melted and gloriously smooth. Let it cool for a minute.
- Spoon a small layer of the melted chocolate into the bottom of each liner. This is your foundation. Pop the whole tray into the freezer for about 10 minutes so it can set solid. Go set a timer so you don’t get distracted by cat videos.
- Make the peanut butter layer. While that’s chilling, wash that bowl and mix the peanut butter, powdered sugar, and that pinch of salt together. It will be thick and deliciously fudgy.
- Assemble the middle layer. Once the chocolate bases are firm, divide the peanut butter mixture between the cups. Press it down gently into an even layer. You can wet your fingers to stop it from sticking.
- Add the Nutella magic. Now, plop a small dollop of Nutella (about 2 teaspoons) right on top of the peanut butter layer and gently spread it out.
- Seal the deal. Re-melt your remaining chocolate if it has hardened, and pour it over the top of each cup, covering the Nutella completely.
- Freeze until firm. This is the hardest part: waiting. Give them at least 1-2 hours in the freezer to become perfectly solid and cup-like.
Common Mistakes to Avoid
Let’s learn from my errors so you don’t have to.
- Skipping the Coconut Oil: This isn’t a suggestion. It’s what keeps the chocolate from becoming a brittle, un-chewable mess. Use it.
- Using Natural Peanut Butter: That oily, separated kind will make your filling greasy and sad. Save it for your smoothies.
- Impatience: Don’t try to speed up the freezing process by putting the tray in the fridge. The fridge is for chilling, the freezer is for freezing. We need solid, not slightly firm. Patience, young grasshopper.
- Forgetting to Tap the Tray: After you add each chocolate layer, give the tray a few gentle taps on the counter. This gets rid of air bubbles and makes everything look super pro.
Alternatives & Substitutions
Don’t have something? Want to mix it up? You do you.
- Allergic to Peanuts? Swap the peanut butter for almond butter or sunflower seed butter. The result will be just as delicious.
- No Coconut Oil? A tiny bit of vegetable or canola oil can work in a pinch, but coconut oil is truly the best.
- Want a Crunch? Add some crushed graham crackers or pretzels to the peanut butter layer for a salty-sweet crunch.
- Dairy-Free? Use dairy-free chocolate chips and ensure your Nutella is a dairy-free alternative. Yes, they exist!
- Muffin Tin MIA? You can use a mini muffin tin for bite-sized cups, or even just drop spoonfuls on a parchment-lined baking sheet for more free-form clusters.
FAQ (Frequently Asked Questions)
Can I make these ahead of time?
Is the sky blue? Absolutely! These are the perfect make-ahead dessert. They’ll stay perfect in an airtight container in the freezer for up to 2 weeks… if you can resist them that long.
Do I have to use a microwave?
Nope! You can melt the chocolate and coconut oil in a heatproof bowl set over a pot of simmering water (a double boiler). It’s a bit more washing up, but it works like a charm.
Why is my chocolate seizing up?
This usually happens if a drop of water or steam gets into your melting chocolate. Keep everything completely dry. If it happens, sadly, there’s no going back. Start your chocolate layer over.
Can I use margarine instead of butter?
There’s no butter in this recipe, so you’re safe! But this is your friendly reminder that butter is almost always better.
How long do they take to thaw?
You don’t want them thawed, just slightly softened. Take them out of the freezer and let them sit on the counter for 3-5 minutes before eating. This gives you the perfect creamy-but-frozen texture.
Are these… healthy?
Let’s not ask questions we don’t want the answers to. They’re made with love. That’s a health food, right?
Related Recipes:
- Blueberry Muffins Recipe
- Strawberry Shortcake Recipe:
- Dreamy Vanilla Cupcakes Recipe
- Dreamy Peach Cobbler Recipe: Easy to Make at Home
Final Thoughts
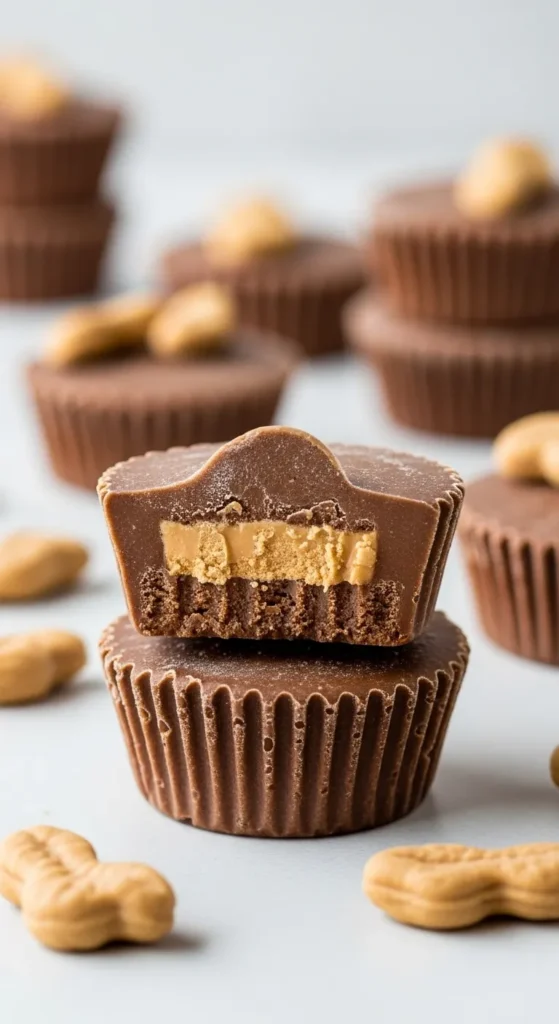
Frozen Peanut Butter Nutella Cups are the perfect no-bake treat—creamy, rich, and irresistibly satisfying. With layers of smooth peanut butter and luscious Nutella frozen into bite-sized cups, they offer that perfect mix of sweet, salty, and chocolatey goodness.
They’re incredibly easy to make, freezer-friendly, and dangerously addictive—ideal for summer snacking, post-dinner cravings, or whenever you need a quick hit of indulgence straight from the freezer.
Cold, creamy, and completely crave-worthy—these little cups pack big flavor in every frosty bite.
Tip: Sprinkle with sea salt, crushed nuts, or a drizzle of melted chocolate before freezing for an extra-special touch.
Printable Recipe Card
Want just the essential recipe details without scrolling through the article? Get our printable recipe card with just the ingredients and instructions.

