So, you’re trying to be good. You’ve sworn off sugar, bid a tearful farewell to carbs, and now your biggest enemy is a simple, persistent thought: cheesecake. Don’t you dare stare longingly at that bakery window. Put down the sad, sugar-free Jell-o cup. My friend, I’ve got you. What if I told you that in less than 20 minutes of active effort, you could be shoving a creamy, dreamy, no-guilt peanut butter cheesecake bite into your face? And that they are so stupidly easy, you could make them with one hand tied behind your back while watching your favorite show? Consider your craving officially solved.
Why This Recipe is Awesome
Let’s cut to the chase. This recipe is the culinary equivalent of finding a $20 bill in your winter coat pocket. It’s a brilliant little hack that makes you look like a kitchen wizard while requiring the effort of a mildly ambitious sloth.
First, it’s idiot-proof. I tested this while moderately distracted by a squirrel outside my window, and I still didn’t mess it up. No water bath, no fancy springform pan, no cracking—just mix, press, and freeze. Second, they are seriously keto. We’re talking about 3g net carbs per blissful bite, meaning you can indulge without your body throwing a carb-fueled tantrum. And finally, they are satisfyingly rich. One or two of these decadent little guys will actually shut down your dessert cravings instead of making them louder. It’s like magic, but with more cream cheese.
Ingredients You’ll Need
Gather your squad. This is a no-judgment zone, so if your almond flour is looking a little dusty, we’ve all been there.
For the Crust:
- 1 ½ cups Almond Flour: The sturdy, gluten-free base that gives our bites a cookie-like crunch.
- ⅓ cup Erythritol (or your favorite granulated keto sweetener): The sweet, sweet lies that fool your taste buds into thinking this is the real deal.
- ⅓ cup Natural Peanut Butter (creamy is best): The star of the show. Make sure it’s the kind where the oil separates, because we’re not about that added sugar life.
- 5 tbsp Unsalted Butter, melted: Because butter makes everything better. It’s just science.
For the Filling:
- 16 oz Cream Cheese, fully softened: This is non-negotiable. Take it out hours before. Don’t you dare try to microwave it into submission.
- 1 cup Creamy Peanut Butter: Yes, more. We are not peanut butter-shy here.
- ⅔ cup Powdered Erythritol: The powdered version dissolves like a dream and avoids any weird granular texture.
- 1 tsp Vanilla Extract: The flavor wingman that makes everything taste more expensive.
- ⅓ cup Heavy Cream: This is what gives us that luxuriously creamy, pipe-able texture.
Step-by-Step Instructions
- Conquer the Crust: In a medium bowl, throw in your almond flour, granulated sweetener, peanut butter, and melted butter. Mix it with a fork until it looks like wet sand and starts to clump together in your hands. If it seems too dry, add a teensy bit more melted butter. Too wet? A sprinkle more almond flour.
- Press Your Power: Get your mini muffin pan ready (no need to grease it!). Scoop about a tablespoon of the crust mixture into each cup. Now, use something small and flat—like a shot glass or the bottom of a measuring spoon—to press the crust down firmly and evenly. This is your foundation. Make it strong.
- Create the Cloud: In a large bowl, beat the softened cream cheese with an electric hand mixer until it’s completely smooth and lump-free. This is your chance to take out any aggression. Add the peanut butter, powdered sweetener, and vanilla. Beat it again until it’s a beautiful, homogeneous beige blob.
- Get Fluffy With It: Pour in the heavy cream. Now, beat it on medium-high for 1-2 minutes. Watch as it transforms from a thick mixture into a light, fluffy, and spreadable peanut butter cloud. Taste it. Go on, I dare you. Try not to eat it all with a spoon.
- Assemble Your Army: You have two choices here. You can be fancy and pipe the filling onto each crust using a piping bag or a zip-top bag with the corner snipped off. Or, you can be like me and just use two spoons to dollop it on. No one is judging. Pile it high!
- The Big Chill: Carefully transfer the pan to your freezer. Let them set for at least 2-3 hours, or until they are completely firm to the touch. This is the hardest part: waiting.
- Pop & Store: Once they’re frozen solid, pop them out of the pan. They should come out easily. Store all these little heroes in an airtight container in the freezer. They are best enjoyed by letting them thaw for 5-10 minutes on the counter before devouring.
Common Mistakes to Avoid
Let’s learn from the imagined failures of others, shall we?
- Using Cold Cream Cheese: This is the #1 cause of lumpy filling. Lumps are for mashed potatoes, not cheesecake. Plan ahead and let it get to room temperature. I believe in you.
- Not Pressing the Crust: A loose, crumbly crust will fall apart when you bite into it. Press it down like you’re trying to prove a point.
- Skipping the Freeze Time: Impatience leads to soup. Freezing is what gives these their perfect biteable texture. Don’t rush the process!
- Using the Wrong Peanut Butter: If you use a commercial brand like Skippy or Jif with added sugar and hydrogenated oils, it will throw off the carbs, the texture, and the flavor. Stick to natural, sugar-free peanut butter.
Alternatives & Substitutions
Allergies or just out of an ingredient? No panic.
- Not a Peanut Fan? Swap the peanut butter for an equal amount of almond butter. It’s just as delicious and keeps it keto.
- Dairy-Free? Use dairy-free cream cheese and butter (like Miyoko’s or Kite Hill). For the heavy cream, full-fat canned coconut cream is a perfect substitute. Just don’t shake the can—scoop out the solid cream from the top.
- Nut-Free? For the crust, replace the almond flour with sunflower seed flour. Just be aware it can turn a slight greenish tint when baked or frozen (it’s a harmless chemical reaction!), but it tastes great.
- Want a Chocolate Hit? Add 2 tbsp of unsweetened cocoa powder to the crust mixture. Or, melt some sugar-free dark chocolate and drizzle it over the top of the finished bites.
FAQ
Can I make these as one big cheesecake?
Sure, but then you lose the built-in portion control of the bites. And who are we kidding? “Portion control” means “I ate one row of the big cheesecake.” To do it, press the crust into an 8×8 pan and spread the filling on top. Freeze until firm, then slice into bars.
How long will they keep in the freezer?
In an airtight container, they are happy campers for up to 2-3 months. Not that they’ll last that long.
My filling is too runny! What did I do?
You probably didn’t beat it long enough after adding the cream, or your cream cheese wasn’t thick enough. Pop the whole mixture into the fridge for 30 minutes to firm up a bit before dolloping onto the crusts.
Can I use a different sweetener?
Absolutely. Any granulated keto sweetener works for the crust (monk fruit, allulose, etc.). For the filling, a powdered version is crucial for texture. If you only have granulated, give it a whirl in a clean coffee grinder or high-powered blender to powder it first.
Are these… healthy?
“Healthy” is a relative term. But they are high in fat, low in carbs, and free from sugar and grains. So in the world of decadent desserts, they’re a way better choice that fits a keto lifestyle. Enjoy them guilt-free!
Related Recipes:
- Mango Sorbet Recipe That’ll Blow Your Mind
- Pineapple Upside Down Cake Recipe
- Pineapple Coconut Cream Tart Recipe: Delicious & Crazy Easy
- Refreshing Pineapple Sorbet Recipe – Cool & Tropical
Final Thoughts:
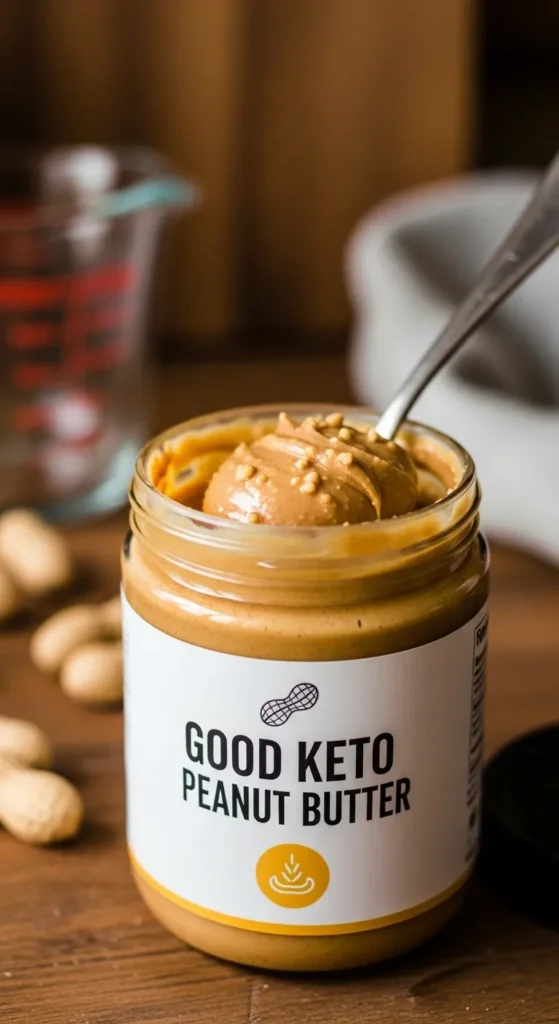
Good keto peanut butter is all about keeping things simple, natural, and low-carb. With no added sugar and plenty of healthy fats, it’s a pantry staple for anyone living the keto lifestyle. Whether you spread it on bread, mix it into desserts, or enjoy it straight from the jar, peanut butter proves that keto-friendly eating can be both satisfying and delicious.
Printable Recipe Card
Want just the essential recipe details without scrolling through the article? Get our printable recipe card with just the ingredients and instructions.

