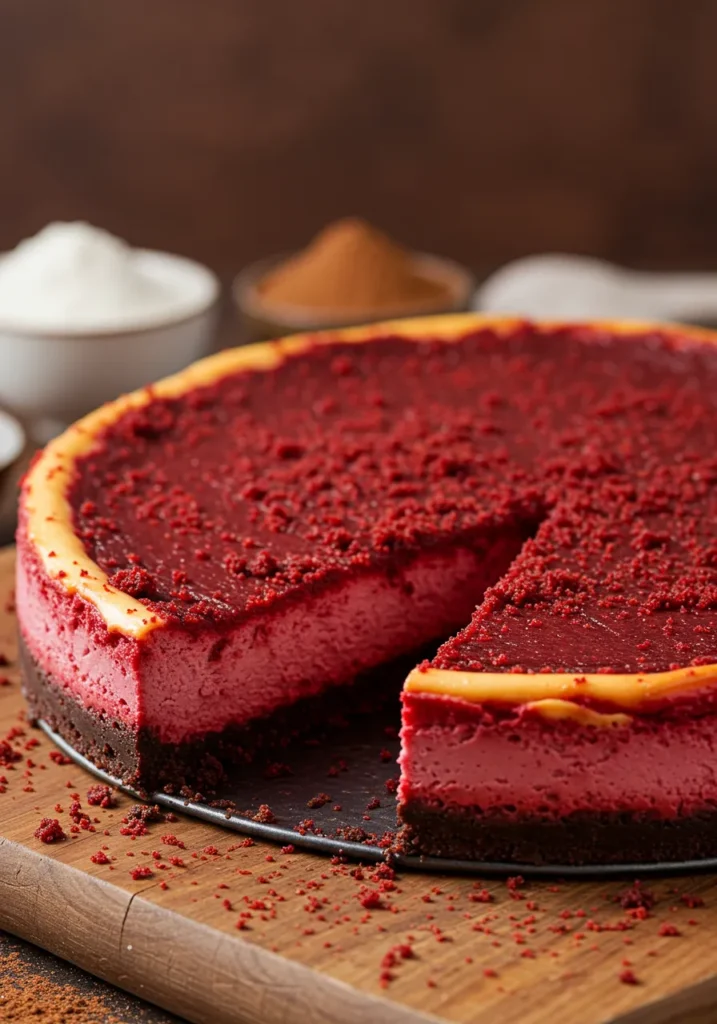
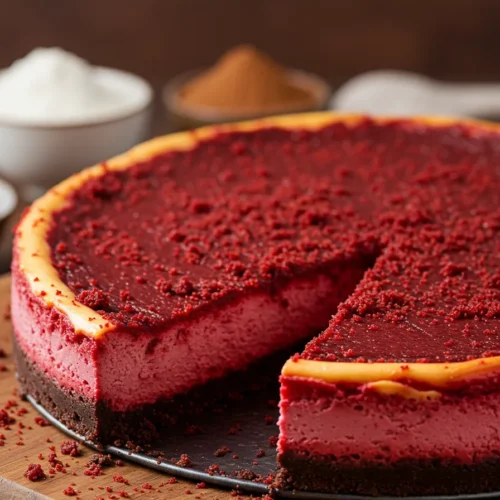
Alright, let’s get real — who actually chooses between red velvet cake and cheesecake? Not me. I mean, if you’re going to indulge, why not go all out and have them both in one glorious, creamy, and slightly over-the-top dessert? That’s exactly what this homemade red velvet cheesecake recipe delivers.
If you’ve ever drooled over those fancy bakery cheesecakes but thought they were impossible to make at home, don’t worry. I’ve got your back (and your sweet tooth 😉). So, tie your apron, preheat your oven, and let’s whip up a dessert that’ll make your friends think you’re some kind of kitchen wizard. Spoiler: it’s way easier than it looks.
What Makes Red Velvet Cheesecake So Special?
Ever wondered why red velvet cheesecake is such a crowd-pleaser? Here’s the deal:
It’s basically the best of both worlds — the rich, moist cocoa-flavored cake with that dramatic red hue, layered with creamy, tangy cheesecake.
Oh, and don’t forget the cream cheese frosting that ties it all together. Chef’s kiss.
Here are a few reasons why this dessert rocks:
- Showstopper appearance: That deep red color with creamy white layers looks stunning.
- Perfect balance of flavors: Slightly tangy, sweet, and chocolaty.
- Texture heaven: You’ve got moist cake, smooth cheesecake, and fluffy frosting all in one bite.
- Instagram-worthy: Yeah, let’s be honest — it photographs like a dream.
So basically, it’s the Beyoncé of desserts. Enough said.
Ingredients You’ll Need for Homemade Red Velvet Cheesecake
Here comes the not-so-secret shopping list. Don’t panic — nothing here is weird or impossible to find.
For the Cheesecake Layer:
- 16 oz (450g) cream cheese, softened
- ½ cup granulated sugar
- 1 tsp vanilla extract
- 2 large eggs
For the Red Velvet Cake Layers:
- 2 ½ cups all-purpose flour
- 1 ½ cups granulated sugar
- 1 tsp baking soda
- 1 tsp salt
- 1 tsp cocoa powder
- 1 ½ cups vegetable oil
- 1 cup buttermilk, at room temp
- 2 large eggs
- 2 tbsp red food coloring
- 1 tsp vanilla extract
- 1 tsp white vinegar
For the Cream Cheese Frosting:
- 8 oz (225g) cream cheese, softened
- ½ cup unsalted butter, softened
- 4 cups powdered sugar
- 1 tsp vanilla extract
Step-by-Step Guide: Bake Like a Pro (Even If You’re Not)
Now the fun part. Follow these steps, and you’ll pull off a dessert that’ll make everyone think you secretly trained at Le Cordon Bleu. FYI, you didn’t — and that’s our little secret. 🙂
Step 1: Bake the Cheesecake Layer
This step comes first because the cheesecake layer needs to chill before stacking.
- Preheat your oven to 325°F (163°C).
- Line the bottom of a springform pan with parchment paper.
- In a bowl, beat the cream cheese, sugar, and vanilla until smooth.
- Add the eggs one at a time, mixing on low speed until just combined.
- Pour the mixture into the pan and bake for about 45-50 minutes, or until set.
- Cool completely, then chill in the fridge for at least 2 hours (overnight is better).
Step 2: Make the Red Velvet Cake Layers
While the cheesecake chills, let’s tackle the cake.
- Preheat oven to 350°F (177°C).
- Grease and flour two 9-inch round cake pans.
- In a large bowl, sift together flour, sugar, baking soda, salt, and cocoa powder.
- In another bowl, whisk together oil, buttermilk, eggs, food coloring, vanilla, and vinegar.
- Gradually combine the wet and dry ingredients, mixing just until smooth.
- Divide the batter evenly between the two pans and bake for 30 minutes, or until a toothpick comes out clean.
- Let the cakes cool completely.
Step 3: Whip Up That Frostin
Because what’s red velvet without that luscious frosting?
- Beat the cream cheese and butter until creamy.
- Gradually add the powdered sugar, mixing until fluffy.
- Beat in the vanilla extract. Done.
Step 4: Assemble Like a Boss
You’ve baked everything — now comes the magic moment.
- Place one red velvet cake layer on your serving plate.
- Carefully place the cheesecake layer on top. (Pro tip: chill the cheesecake enough so it’s firm and doesn’t fall apart.)
- Place the second red velvet cake layer over the cheesecake.
- Frost the entire cake generously with the cream cheese frosting.
- Decorate however you want — sprinkles, crumbs from trimmed cake edges, or just leave it classy.
Take a step back. Admire your work. Take a photo. Brag. Then eat.
Tips & Tricks for the Best Results
Alright, you’re almost there. But here are some personal tips to make this dessert even more impressive.
Chill Everything
Seriously. Chill the cheesecake, chill the cakes, chill yourself if you’re getting impatient. Cold layers stack much easier.
Don’t Overmix
Especially the cake batter. Unless you enjoy chewy cake (spoiler: no one does).
Use a Serrated Knife
When cutting, use a serrated knife and wipe it clean between slices for those perfect Instagram-worthy layers.
Make Ahead
You can bake the cake and cheesecake layers a day ahead and frost the next day. Saves your sanity.
Why Make It at Home Instead of Buying?
Let’s address the big question: why bother?
Well:
- You control the quality of ingredients — no weird additives.
- You save money (those bakery cakes aren’t cheap).
- You get bragging rights.
- You can tweak the sweetness, tanginess, and even the size to your liking.
Honestly, IMO, nothing beats the pride of slicing into your own gorgeous creation. Plus, who’s going to tell you not to lick the frosting? Exactly.
Common Mistakes to Avoid
We all make mistakes — but let’s try to avoid these, shall we?
- Overbaking the cheesecake: It should still jiggle a little in the center when done.
- Not chilling long enough: Rushing this step leads to messy layers.
- Too much food coloring: Unless you’re into radioactive red… keep it reasonable.
- Skimping on frosting: There’s no such thing as “too much frosting.” Fight me on this. 😉
Serving Suggestions
Okay, you made it. Now what?
- Serve chilled for clean, neat slices.
- Pair with a cup of coffee or a glass of milk.
- Garnish with fresh berries or a dusting of cocoa powder for a fancy touch.
- Or just eat straight from the plate with a fork. No judgment here. 😎
Can You Customize It?
Oh, absolutely. This recipe is flexible enough for a little creativity.
- Swap the frosting: Go with whipped cream instead of cream cheese if you’re feeling rebellious.
- Mini versions: Use cupcake tins for adorable mini cheesecakes.
- Different colors: Feeling wild? Try blue velvet or even ombré layers.
Basically, you do you.
Related Recipes
Final Thoughts about Homemade Red Velvet Cheesecake
There you have it — a foolproof, stunning, and downright delicious homemade red velvet cheesecake recipe. Not only will it impress everyone at your next gathering, but you’ll also secretly feel like a baking rockstar (because you are).
So what are you waiting for? Grab those ingredients, crank up your favorite playlist, and get baking. Trust me — this dessert is worth every single calorie.
Oh, and when your friends ask where you bought it, just smirk and say, “Oh, this? Just something I whipped up.” 😉
Happy baking! 🎂
If you give this recipe a try, let me know how it turns out — and feel free to send me a slice (just kidding… kind of).
Homemade Red Velvet Cheesecake Recipe
Ingredients
- 1 ½ cups chocolate cookie crumbs
- ¼ cup unsalted butter melted
- 3 8 oz cream cheese blocks, softened
- 1 cup granulated sugar
- 3 large eggs
- 1 cup sour cream
- ¼ cup buttermilk
- 2 tbsp cocoa powder
- 1 tsp vanilla extract
- 1 tbsp red food coloring
- ½ tsp vinegar
Instructions
- Preheat oven to 325°F (163°C).
- Mix cookie crumbs with butter, press into a 9-inch springform pan.
- Beat cream cheese and sugar until smooth.
- Add eggs one at a time, mixing gently.
- Stir in sour cream, buttermilk, cocoa, vanilla, food coloring, and vinegar until combined.
- Pour over crust and smooth the top.
- Bake 60–65 mins until edges are set and center is slightly jiggly.
- Turn off oven, crack door, and cool cheesecake inside for 1 hr.
- Chill in fridge at least 4 hrs or overnight before serving.
Notes
- For a marbled effect, swirl extra red velvet batter on top before baking.
- Use room-temperature ingredients for the smoothest texture.
DID YOU MAKE THIS EASY RECIPE?
If you have, then share it with us by sending a photo. We’re excited to see what you’ve made 🙂Printable Recipe Card
Want just the essential recipe details without scrolling through the article? Get our printable recipe card with just the ingredients and instructions.

