Making your own homemade strawberry jam is a wonderful way to capture the fresh, sweet flavor of strawberries all year round. This easy strawberry jam recipe uses just a few simple ingredients—fresh strawberries, sugar, and lemon juice—to create a delicious spread without any added pectin. Whether you have an abundance of fresh berries from the farmer’s market or want to preserve the taste of summer, this recipe is perfect for beginners and experienced cooks alike.
Strawberry jam is a classic favorite that brightens up breakfasts, snacks, and desserts. When you make it yourself, you control the sweetness and texture, avoiding preservatives and artificial flavors. This homemade jam is naturally thickened by the fruit and sugar, with lemon juice adding a hint of tartness and helping with preservation. Plus, it’s incredibly satisfying to watch the berries transform into a luscious, ruby-red jam bubbling on your stovetop.
Ingredients You’ll Need
- 2 pounds fresh strawberries, washed and hulled
- 2 cups granulated sugar
- 2 tablespoons fresh lemon juice (about 1 lemon)
- Optional: 1 teaspoon lemon zest for extra brightness
These simple ingredients are all you need for a classic strawberry jam that’s sweet, tangy, and spreadable. Using fresh, ripe strawberries ensures the best flavor and natural sweetness.
Step-by-Step Instructions:
1. Prepare the Strawberries
Start by washing your strawberries thoroughly under cold water. Remove the green stems and cut the berries into halves or quarters depending on their size. For chunkier jam, keep larger pieces; for smoother jam, chop smaller or mash slightly.
2. Combine Ingredients in a Pot
Place the prepared strawberries in a large, heavy-bottomed pot. Add the granulated sugar and lemon juice. If using, add lemon zest for a fresh citrus note. Stir everything gently to combine.
3. Macerate the Fruit
Let the strawberry mixture sit for about 30 minutes at room temperature. This resting period allows the sugar to draw out the juices from the berries, creating a natural syrup that makes cooking faster and enhances flavor.
4. Cook the Jam
Turn the stove to medium heat and bring the strawberry mixture to a boil, stirring frequently to prevent sticking or burning. Once boiling, reduce heat to medium-low and let it simmer. Stir occasionally and skim off any foam that forms on the surface.
5. Check for Jam Consistency
After about 20-30 minutes of simmering, the jam should start to thicken. To test if it’s ready, place a small spoonful on a chilled plate and run your finger through it. If the jam wrinkles and doesn’t flood back together, it’s done. Alternatively, the jam reaches the perfect set point at 220°F (104°C) if you use a candy thermometer.
6. Blend or Leave Chunky
If you prefer a smooth jam, you can use an immersion blender or transfer the jam to a food processor and pulse until you reach your desired texture. Otherwise, leave it chunky for a rustic feel.
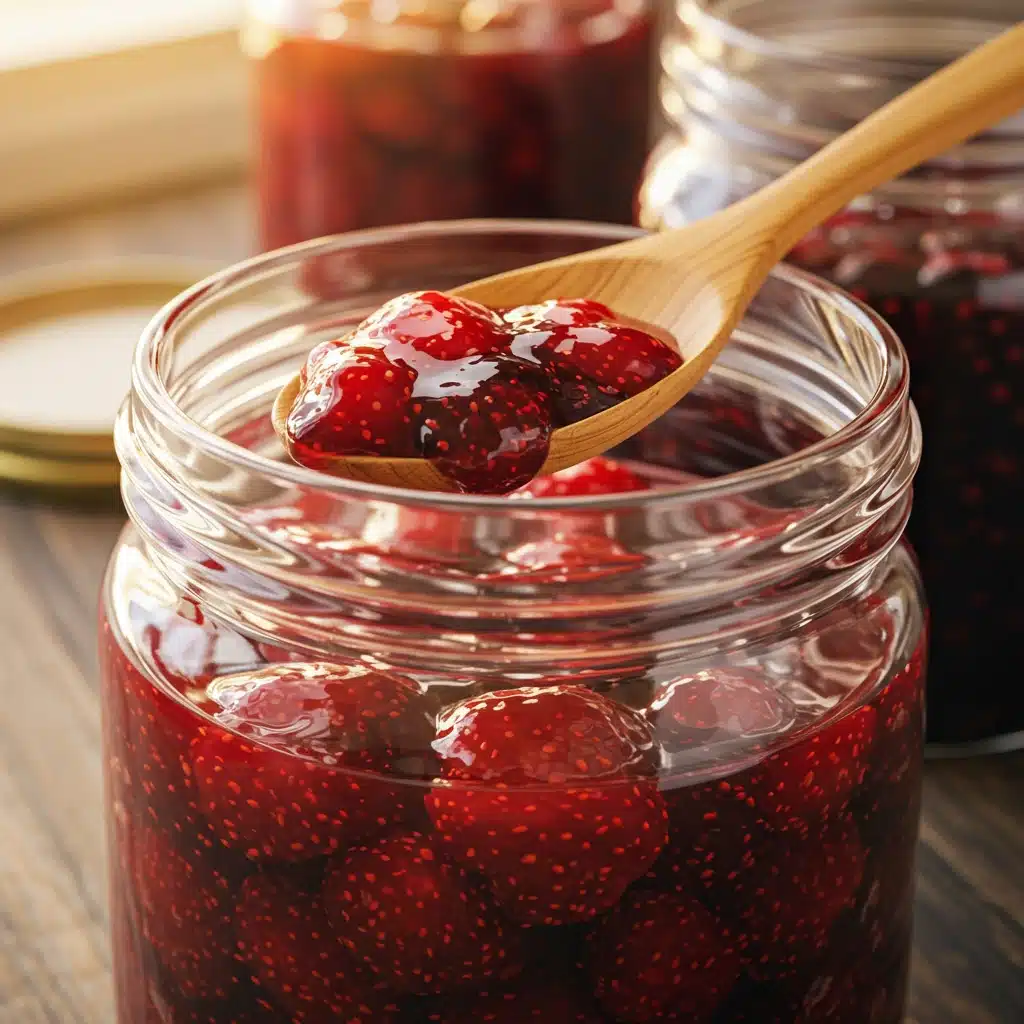
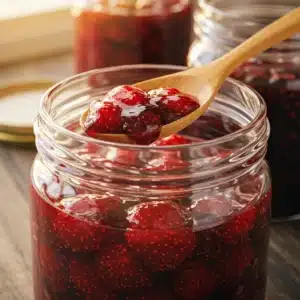
7. Jar and Cool
Pour the hot jam into sterilized jars, leaving about 1/4 inch of headspace. Seal tightly with lids and let cool to room temperature. Store in the refrigerator and use within 2-3 weeks, or freeze for longer storage.
Tips for Perfect Homemade Strawberry Jam
- Use ripe, fresh strawberries: The sweeter and fresher the berries, the better the jam.
- Keep the sugar ratio equal: For every pound of strawberries, use about a cup of sugar. This helps the jam thicken naturally.
- Lemon juice is key: It balances sweetness and helps the jam set.
- Avoid rushing: Let the jam simmer slowly to develop flavor and thickness without burning.
- Sterilize jars: Clean, sterilized jars help keep your jam fresh longer.
- Skim foam: Removing foam makes your jam clearer and improves texture.
- Adjust sweetness: Taste the jam near the end and add more sugar or lemon juice if needed.
Variations to Try
- Mixed Berry Jam: Add raspberries or blueberries for a berry blend.
- Vanilla Strawberry Jam: Stir in a teaspoon of vanilla extract after cooking.
- Spiced Jam: Add a cinnamon stick or a pinch of ground ginger while simmering.
- Low Sugar Version: Reduce sugar by half but expect a softer set and shorter shelf life.
- Chunky vs Smooth: Customize the texture by mashing or blending as you prefer.
Why Make Homemade Strawberry Jam?
Making your own jam is rewarding and lets you enjoy the pure taste of strawberries without additives. It’s a great way to use up fresh berries, especially during peak season. Homemade jam also makes a thoughtful gift or a delicious addition to your pantry. Plus, it’s simple enough for beginners and can be made in under an hour.
Serving Suggestions
- Spread on toast, bagels, or English muffins for breakfast.
- Swirl into yogurt or oatmeal for a fruity boost.
- Use as a topping for ice cream, pancakes, or cheesecake.
- Mix into salad dressings or glazes for a sweet twist.
- Pair with cheese and crackers on a charcuterie board.
Try More Quick Recipes:-
- Avocado Grilled Cheese Sandwiches
- My Easy Peach Fluff Salad Recipe
- Creamy Macaroni Salad
- Doritos Taco Salad
- Honeycrisp Apple and Feta Salad
FAQs
Q: Can I use frozen strawberries?
A: Yes, thaw them completely and drain excess juice before cooking.
Q: Do I need pectin for this jam?
A: No, this recipe relies on natural pectin in strawberries and sugar for thickening.
Q: How long does homemade jam last?
A: Refrigerated jam lasts about 2-3 weeks. For longer storage, freeze it.
Q: Can I can this jam for shelf storage?
A: Yes, but you’ll need to follow proper canning procedures to ensure safety.
Q: What if my jam is too runny?
A: Simmer it longer to reduce liquid or add a small amount of powdered pectin.
Final Thoughts
This homemade strawberry jam recipe is a simple, delicious way to enjoy fresh strawberries all year long. With just a few ingredients and easy steps, you can make a sweet, tangy jam perfect for spreading, baking, or gifting. The natural thickening from sugar and lemon juice means no need for pectin, keeping the recipe pure and straightforward.
Give this recipe a try during strawberry season or whenever you want a taste of summer. Homemade jam is not just food—it’s a little jar of happiness you can savor anytime.
Enjoy your homemade strawberry jam fresh from the stove and share the love with family and friends!
Homemade Strawberry Jam Recipe – Easy & Delicious
Ingredients
Main Ingredients:
- 2 lbs fresh strawberries hulled and roughly chopped
- 4 cups granulated sugar
- ¼ cup fresh lemon juice about 1 large lemon
- 1 1.75 oz package fruit pectin (optional, for thicker jam; e.g., Sure-Jell)
Optional Add-Ins:
- 1 tsp vanilla extract for a subtle warmth
- ½ tsp lemon zest for extra brightness
Instructions
- Prepare the strawberries: Hull and chop strawberries, then place in a large, heavy-bottomed pot. Mash lightly with a potato masher to release some juices.
- Add pectin (if using): If using pectin for a firmer set, stir in pectin with the strawberries and bring to a full rolling boil over high heat, stirring constantly.
- Add sugar and lemon juice: Stir in sugar and lemon juice (and optional vanilla or lemon zest). Bring to a boil, stirring frequently to dissolve sugar. Once boiling, cook for 10-15 minutes, stirring occasionally, until the jam thickens and reaches 220°F (gel stage) or passes the spoon test (jam coats the back of a spoon and holds a line when you run a finger through it).
- Test the jam: To check readiness, place a small plate in the freezer for 5 minutes. Spoon a small amount of jam onto the chilled plate; if it wrinkles when pushed with a finger, it’s ready. If not, cook for 2-3 more minutes and retest.
- Prepare for canning (optional): While jam cooks, sterilize jars and lids by boiling in water for 10 minutes. Keep warm until ready to fill.
- Fill jars: Ladle hot jam into sterilized jars, leaving 1/4-inch headspace. Wipe jar rims clean, place lids on, and screw on bands until fingertip-tight.
- Process jars (optional): Place jars in a boiling water canner and process for 10 minutes (adjust for altitude if needed). Remove jars and let cool for 12-24 hours. Check seals; lids should not flex when pressed.
- Store or serve: If not canning, cool jam to room temperature, then refrigerate. Serve on toast, scones, or as a dessert topping.
Notes
- Storage: Store unprocessed jam in an airtight container in the refrigerator for up to 3 weeks or freeze for up to 6 months. Canned jam lasts up to 1 year in a cool, dark place; refrigerate after opening.
- Substitutions: Reduce sugar to 3 cups for a less sweet jam, but note it may affect texture. Use bottled lemon juice for consistent acidity if canning.
- No Pectin Option: Skip pectin for a softer, spreadable jam; cook longer (15-20 minutes) to reach the gel stage.
- Prevent Burning: Stir frequently and use a heavy-bottomed pot to avoid scorching. Lower heat if jam bubbles too vigorously.
- Canning Safety: Ensure jars are properly sealed; discard any with loose lids or signs of spoilage (e.g., mold, off odors).
DID YOU MAKE THIS EASY RECIPE?
If you have, then share it with us by sending a photo. We’re excited to see what you’ve made:-)Printable Recipe Card
Want just the essential recipe details without scrolling through the article? Get our printable recipe card with just the ingredients and instructions.