So, you’ve looked at that tiny, overpriced bottle of vanilla extract at the store and thought, “There has to be a better way.” My friend, you are absolutely right. What if I told you that making your own is almost as easy as forgetting to take the trash out? And about a million times more rewarding. All it takes is two ingredients, a jar, and a little bit of patience (the hardest ingredient of all, IMO).
Why This Recipe is Awesome
Let’s cut to the chase. This recipe is idiot-proof. I’ve made it while simultaneously burning toast and answering work emails. If I can do it, so can you. Beyond its sheer simplicity, the final product is a flavor bomb that will make your baked goods, coffees, and smoothies taste like they were made by a pastry chef who also tells great jokes. Store-bought vanilla can’t compete. It’s often weak, sometimes artificially flavored, and always overpriced. This DIY version is potent, pure, and makes you look like a domestic goddess (or god) with minimal effort. It’s the culinary equivalent of a mic drop.
Ingredients You’ll Need
Gathering your supplies is the first step to glory. Here’s your shopping list:
- High-Quality Vodka (1 cup): This is your extraction liquid. You don’t need a fancy, top-shelf bottle that you’d sip on, but don’t grab the paint-thinner-cheap stuff either. A decent, mid-range, neutral-flavored vodka is perfect. The vanilla beans are the star; the vodka is just the vehicle.
- Vanilla Beans (5-6 plump beans): This is non-negotiable. You want Grade B Bourbon Madagascar vanilla beans. “Grade B” sounds worse, but it’s actually better for extract! They are a little drier and more concentrated in flavor, which is exactly what we want. And “plump” is the key word—they should be flexible and oily, not brittle and sad.
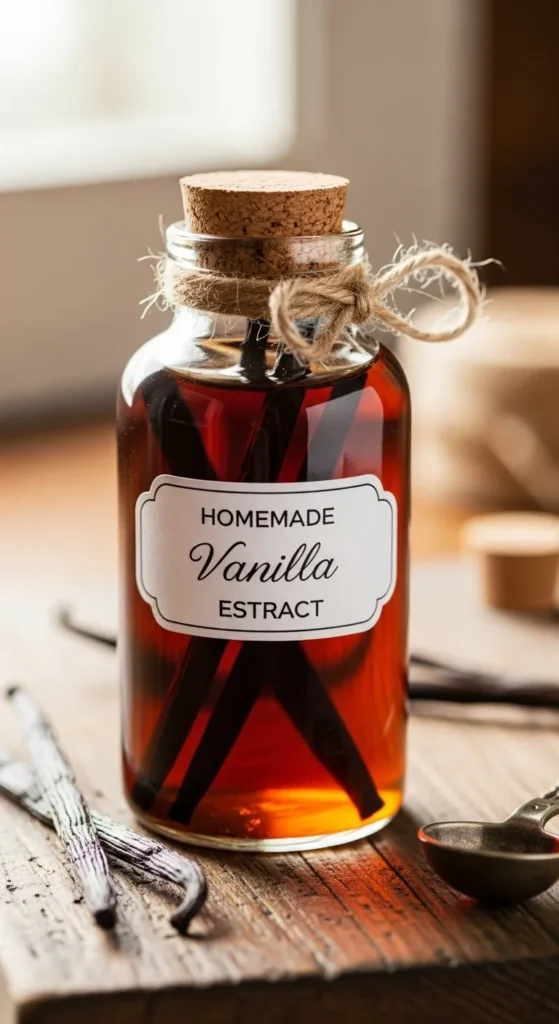
- A Glass Jar with a Tight-Sealing Lid (1 pint size): Mason jars are your best friend here. Make sure it’s impeccably clean. We’re making vanilla, not science experiments (well, maybe a little).
Step-by-Step Instructions
Ready? Let’s do this. The whole active process will take you about 5 minutes. Seriously.
- Prep Your Beans. Lay a vanilla bean flat on a cutting board. Using a sharp paring knife, slice it right down the middle lengthwise, but don’t cut it all the way in half. You just want to split it open to expose the glorious, fragrant caviar inside (those tiny black specks).
- Stuff Your Jar. Curl each split bean up and lovingly place it into your clean glass jar. If the beans are too long, you can cut them in half to make them fit better. There’s no wrong way, as long as they get in there.
- The Vodka Pour. Now, pour your entire cup of vodka over the beans in the jar. You want the vodka to completely submerged them. If a bean is sticking out, it could grow mold, and we are not in the business of making fuzzy vanilla.
- Seal It and Forget It. Screw the lid on tightly. Give the jar a good, vigorous shake. Now, find a cool, dark place for it—a kitchen cupboard is perfect. This is where the patience comes in. You’ll need to let it hang out for at least 8 weeks, but 6-12 months is even better. Shake the bottle every week or two when you remember. Think of it as a tiny, delicious science project brewing in your cupboard.
Common Mistakes to Avoid
- Using Crummy Beans: This is the #1 mistake. If your beans are dry, dusty, and smell like nothing, your extract will taste like nothing. Invest in good beans from a reputable source. Your nose is your best tool—they should smell incredible.
- Peeking Too Often: I get it, you’re excited. But don’t open the jar every week to smell it. You’re letting the precious volatile compounds (aka the flavor) escape! Seal it and let it do its thing.
- Using the Wrong Alcohol: Rum or bourbon can be fun for a flavored variation, but for your first, classic batch, stick with a neutral vodka. It provides a clean slate for the vanilla flavor to truly shine.
Alternatives & Substitutions
The beauty of this method is its flexibility. Once you’ve mastered the basic, you can get creative.
- No Vodka? No problem. You can use a white rum for a slightly richer, caramel-like undertone. Bourbon will give it a deep, oaky, and boozy flavor that’s incredible in things like pecan pie and whiskey-based cocktails.
- Want a Blend? Try using a mix of vanilla beans! Toss in a Tahitian vanilla bean (known for its floral, cherry-chocolate notes) with your Madagascar beans for a complex, custom blend.
- Strength & Volume: As you use your extract, you can top up the jar with more vodka. The beans will keep infusing for a long, long time. Eventually, even after a year, you can strain out the beans and use the pods to make vanilla sugar!
FAQ
1. How long does homemade vanilla extract take to be ready?
It usually takes at least 6–8 weeks for the flavors to fully develop, but the longer it sits, the richer the flavor becomes.
2. What type of alcohol is best for making vanilla extract?
Vodka is the most common because it has a neutral flavor, but rum, bourbon, or brandy can also be used for a unique twist.
3. How long does homemade vanilla extract last?
When stored properly in a cool, dark place, it can last indefinitely. The flavor may even deepen over time.
4. Do I need to refrigerate vanilla extract?
No, vanilla extract should be stored at room temperature in a dark glass bottle or airtight container.
Related Recipes;
- 3-Ingredient Lemon Bars: Quick & Easy Dessert Recipe
- Oreo Truffles: Easy No-Bake Chocolate Dessert Bites
- 3-Ingredient Peanut Butter Cookies: Quick & Easy Recipe
- Creamy 3-Ingredient Banana Ice Cream: Easy Homemade Treat
Final Thoughts
And that’s it! You are now officially a vanilla extract alchemist. You’ve unlocked a secret superpower that will elevate everything you bake. The hardest part is waiting, but trust me, it is so worth it. Now go impress someone—or, more importantly, yourself—with your newfound patience and prowess. You’ve earned a batch of cookies made with your very own vanilla.
Printable Recipe Card
Want just the essential recipe details without scrolling through the article? Get our printable recipe card with just the ingredients and instructions.

