So, you’re staring into the pantry, hoping something magically delicious will appear. All you see is a packet of Oreos and a jar of Nutella staring back. Sounds familiar? What if I told you that those two lonely ingredients are about 15 minutes away from becoming the most decadent, gooey, melt-in-your-mouth dessert of your dreams? Stop staring. Let’s make some magic.
Why This Recipe is Awesome
Let’s cut to the chase. This recipe is the culinary equivalent of a cheat code. It requires zero baking skills, minimal effort, and delivers maximum “OMG did you make these?!” reactions. It’s the perfect solution for when a chocolate emergency strikes, you need a last-minute dessert, or you just really, really deserve a treat. Plus, it’s basically foolproof. If you can operate a muffin tin, you’ve already won.
Ingredients You’ll Need
Gather your squad. You probably have most of this already, which is the beauty of it.
- 1 package (36 cookies) of Oreos: The foundation of our operation. Don’t even think about the reduced-fat kind; we’re committed to the cause.
- 1/2 cup (1 stick) of unsalted butter: Melted. This is the glue that holds our crunchy dream together.
- 1 jar of Nutella: Or any other chocolate-hazelnut spread. You’ll need about 1 1/2 cups. You’ll also need some for sneaking spoonfuls while you work—chef’s privilege.
- 1 large egg: This is the secret agent that helps the filling set just enough while staying gloriously lava-like.
- A pinch of salt: To make all the chocolate flavors pop. Trust me on this.
- Optional, for serving: Vanilla ice cream. This is non-optional if you want to achieve dessert nirvana.
Step-by-Step Instructions
Let’s get down to business. Preheat your oven to 350°F (175°C). Grease a 24-cup mini muffin tin really well. I’m talking non-stick spray, butter, whatever your preferred method is. Do not skip this, or you’ll have a delicious, crumbly mess on your hands.
- Pulverize the Oreos. Dump all the Oreos (yes, the whole cookie, cream filling and all) into a food processor. Blitz them into fine, black crumbs. No food processor? No problem! Throw them in a zip-top bag and channel your inner frustration by going at them with a rolling pin.
- Create the crust. Pour those beautiful dark crumbs into a bowl. Pour the melted butter over them and mix until it looks like wet sand and holds together when you pinch it.
- Form the cups. Scoop about a tablespoon of the crumb mixture into each muffin cup. Use your fingers or a small spoon to press the crumbs firmly into the bottom and up the sides, creating a little cup shape. This is your edible container for molten joy.
- Whip up the lava. In another bowl, whisk together the Nutella, egg, and that pinch of salt until it’s smooth and gloriously shiny. It should look like the most luxurious chocolate pudding you’ve ever seen.
- Fill ‘er up. Spoon the Nutella mixture into each Oreo cup, filling them almost to the top. Don’t overfill, you saucy minx!
- Bake to perfection. Pop the tin in the oven for 8-10 minutes. You’re looking for the edges to look set, but the centers should still be jiggly. This is the lava secret! Do NOT overbake them.
- Cool (a little) and devour. Let them cool in the tin for about 5 minutes. This is the hardest part. Then, carefully run a knife around the edges and use a spoon to lift them out. Serve immediately, ideally with a scoop of cold vanilla ice cream melting on top.
Common Mistakes to Avoid
- Skipping the greasing: These are sticky little devils. Grease that tin like you’re buttering up a used car salesman.
- Overbaking: Set a timer! I mean it. These are not a “wait until they look done” situation. Ten minutes max. You want that lava center, not a chocolate hockey puck.
- Using a full-size muffin tin: You can, but you’ll get fewer bites and the crust-to-lava ratio will be off. The mini tin is perfect for a pop-in-your-mouth experience.
- Trying to remove them immediately: They need a few minutes to firm up just enough to handle. Impatience leads to broken bites and sadness.
Alternatives & Substitutions
No Nutella? No problem (well, a small problem, but we can work around it).
- Peanut Butter Lava: Use a creamy peanut butter instead. Maybe mix in a tiny bit of powdered sugar to mimic the sweetness.
- Cookie Butter Lava: Biscoff spread would be absolutely insane here.
- Dairy-Free?: Use vegan butter and a dairy-free chocolate hazelnut spread. The Oreos are already accidentally vegan!
- Gluten-Free?: Use your favorite gluten-free chocolate sandwich cookies (like Glutino or K-Toos) and ensure your other ingredients are certified GF.
- Add-Ins: Feel like getting fancy? Place a single raspberry or a few chocolate chips in the bottom of the Oreo cup before adding the Nutella filling.
FAQ
Can I make these ahead of time?
You can prepare the cups and filling separately and keep them in the fridge for a few hours before assembling and baking. But they are truly best served warm and fresh from the oven.
How do I store leftovers?
Leftovers? That’s adorable. If you somehow have any, let them cool completely and store them in an airtight container in the fridge for up to 3 days. They’ll lose their lava magic but will still taste amazing.
Can I freeze them?
Absolutely! Freeze the baked and cooled bites on a parchment-lined tray, then transfer to a freezer bag. Reheat straight from the freezer in the microwave for 20-30 seconds for a quick lava fix.
My lava didn’t lava. What happened?
You probably overbaked them. Remember, the centers need to be jiggly! They continue to set a bit as they cool. Next time, shave a minute or two off the baking time.
Is the egg necessary?
It gives the filling structure and that perfect lava texture. I haven’t tested an egg-free version, but a flax egg might work, though the texture will be different.
Can I use a different cookie?
Go for it! Golden Oreos would be delicious with a vanilla or butterscotch filling. Get weird with it.
Related Recipes:
- Blueberry Muffins Recipe
- Strawberry Shortcake Recipe:
- Dreamy Vanilla Cupcakes Recipe
- Dreamy Peach Cobbler Recipe: Easy to Make at Home
Final Thoughts
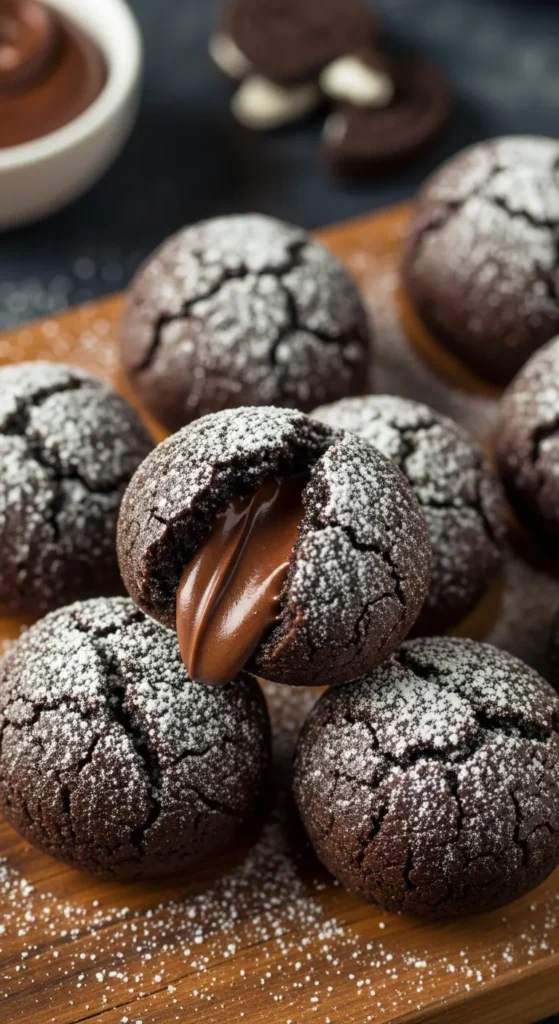
Oreo Nutella Lava Bites are pure dessert decadence in miniature form—crispy on the outside, molten and gooey on the inside, with layers of chocolatey goodness in every bite. The crushed Oreos bring that familiar cookies-and-cream crunch, while the warm, flowing Nutella center makes these bites irresistibly rich.
They’re quick to make, fun to eat, and guaranteed to wow anyone lucky enough to snag one. Whether served warm with ice cream or devoured straight from the oven, these lava bites are a chocolate lover’s dream come true.
Messy, melty, and completely magical—these are the kind of treats that never last long.
Tip: Best enjoyed warm for maximum lava effect. Want to take it up a notch? Add a sprinkle of sea salt or a scoop of vanilla ice cream.
Printable Recipe Card
Want just the essential recipe details without scrolling through the article? Get our printable recipe card with just the ingredients and instructions.

