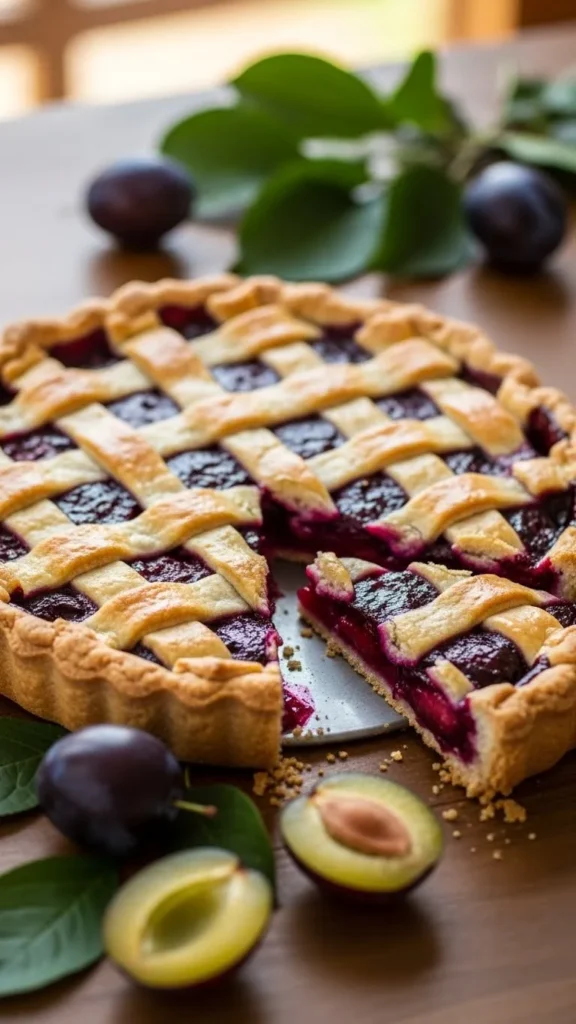
So you’ve got a bunch of plums sitting on your counter, giving you the stink eye because they’re about to turn into expensive compost, right? Well, plot twist—today’s the day you turn those purple beauties into something that’ll make your taste buds do a happy dance. This plum pie is about to become your new favorite way to use up fruit (and show off a little).
Why This Recipe is Awesome
Listen, I’m not gonna sugarcoat it (well, except literally in the pie)—this recipe is ridiculously foolproof. Even if you’re the type who burns water, you can nail this one. The plums do most of the heavy lifting with their natural sweetness and gorgeous color, while you just play the role of “person who throws things in a pan and takes credit.”
Plus, plum pie is like the cool, mysterious cousin of apple pie. It’s got that perfect balance of tart and sweet that makes people go “Hmm, what IS this?” in the best possible way. And here’s the kicker—it’s way less fussy than most fruit pies. No peeling, no pre-cooking filling, no drama.
Ingredients You’ll Need
For the crust (or just buy one, no judgment):
- 2½ cups all-purpose flour
- 1 tsp salt
- 1 cup cold butter, cubed (the colder, the better—think Antarctica vibes)
- 6-8 tbsp ice water
For the filling (the star of the show):
- 3 lbs ripe plums, pitted and sliced (about 8-10 plums)
- ¾ cup granulated sugar (adjust if your plums are super sweet or super sour)
- 3 tbsp cornstarch or flour
- 1 tsp vanilla extract
- ½ tsp cinnamon
- ¼ tsp salt
- 2 tbsp butter, cut into small pieces
- 1 egg, beaten (for that golden, Instagram-worthy crust)
Step-by-Step Instructions
- Preheat your oven to 425°F (220°C). Yes, you actually need to do this first. I know, I know—who has time? But trust me on this one.
- Make your crust (or unwrap the store-bought one like a champion). Mix flour and salt, cut in cold butter until it looks like coarse crumbs, then slowly add ice water until the dough comes together. Don’t overthink it.
- Roll out half the dough and press it into your 9-inch pie pan. If it tears, just patch it up—nobody’s judging your patchwork skills here.
- Mix your filling ingredients in a large bowl. Toss those gorgeous plum slices with sugar, cornstarch, vanilla, cinnamon, and salt. The mixture might look a little dry, but the plums will release their juices as they bake.
- Dump the filling into your crust and dot with butter pieces. Roll out the top crust and place it over the filling. Crimp the edges however you want—rustic is totally in right now.
- Cut a few slits in the top crust for steam to escape. Brush with beaten egg for that golden finish that makes everything look professional.
- Bake for 45-50 minutes until the crust is golden and you can see the filling bubbling through those slits. If the edges brown too quickly, cover them with foil.
- Cool completely before slicing. I know this is torture, but hot pie filling is basically molten lava, and nobody wants that drama.
Common Mistakes to Avoid
Skipping the cornstarch or flour: Your pie will turn into plum soup. Delicious, but not what we’re going for here.
Using underripe plums: They won’t break down properly and you’ll end up with chunks of disappointment instead of jammy goodness.
Overmixing the crust: This isn’t bread dough—gentle hands make flaky crusts. Channel your inner zen master.
Not venting the top crust: Steam needs somewhere to go, or your beautiful pie will turn into a soggy mess underneath a perfect-looking top.
Cutting into it too early: I get it, the anticipation is real. But let it cool for at least 2 hours unless you want plum lava burns.
Alternatives & Substitutions
No cornstarch? Use flour instead—about 4 tablespoons should do it. It won’t thicken quite as much, but it’ll work.
Hate making crust? Store-bought is perfectly fine. Life’s too short to feel guilty about convenience, IMO.
Want to mix up the spices? Try cardamom instead of cinnamon, or add a pinch of ginger. Nutmeg works too if you’re feeling fancy.
Different fruit? This recipe works great with pears, peaches, or even a mix of stone fruits. Just adjust the sugar based on how sweet your fruit is.
Dairy-free? Swap the butter for vegan butter or coconut oil. The texture will be slightly different, but still delicious.
FAQs
Can I make this pie ahead of time?
Absolutely! You can assemble it the night before and bake it fresh, or bake it completely and reheat slices in the oven. Just don’t expect it to stay crispy if you make it days ahead—physics is physics.
What if my plums are really tart?
Add more sugar, genius! Start with an extra ¼ cup and taste the mixture. Your taste buds are the boss here.
Can I freeze this pie?
Yep! Wrap it well and freeze for up to 3 months. Thaw overnight in the fridge and reheat in a low oven to crisp up the crust.
Do I really need to peel the plums?
Nope! The skins add color, nutrition, and save you a ton of time. Win-win-win situation right there.
What’s the best way to serve this?
Warm with vanilla ice cream is classic, but room temperature with whipped cream works too. Honestly, it’s pretty great on its own with a cup of coffee.
Can I use a different pan size?
Sure, but adjust your baking time. A deeper dish will need longer; a shallower one will bake faster. Just keep an eye on it.
Help! My bottom crust is soggy!
Next time, blind bake it for 10 minutes before adding filling. Also, make sure your oven is fully preheated and consider using a pizza stone or baking steel for extra bottom heat.
Final Thoughts
Look, you’ve got this. Making pie isn’t rocket science—it’s just fruit, sugar, and patience (okay, maybe the patience part is the hardest). This plum pie is going to make your kitchen smell amazing, use up those plums before they go bad, and give you serious bragging rights.
Don’t stress about perfection. Rustic is charming, and even if it looks a little wonky, it’s going to taste incredible. Now go impress someone—or yourself—with your new culinary skills. You’ve earned it!
Related Recipe
- Pumpkin Chai Muffins with Cozy Spice Flavor
- Pumpkin Donut Muffins Rolled in Cinnamon Sugar
- Pumpkin Muffins Cozy Recipe
Printable Recipe Card
Want just the essential recipe details without scrolling through the article? Get our printable recipe card with just the ingredients and instructions.

