So, you want to make something decadent that looks like you slaved for hours, but secretly requires almost zero actual cooking skill? My friend, you have come to the right place. Forget complicated patisserie courses; your path to chocolate glory is paved with… prunes. Yes, you read that right. Don’t give me that skeptical look until you’ve tried one.
Why This Recipe is Awesome
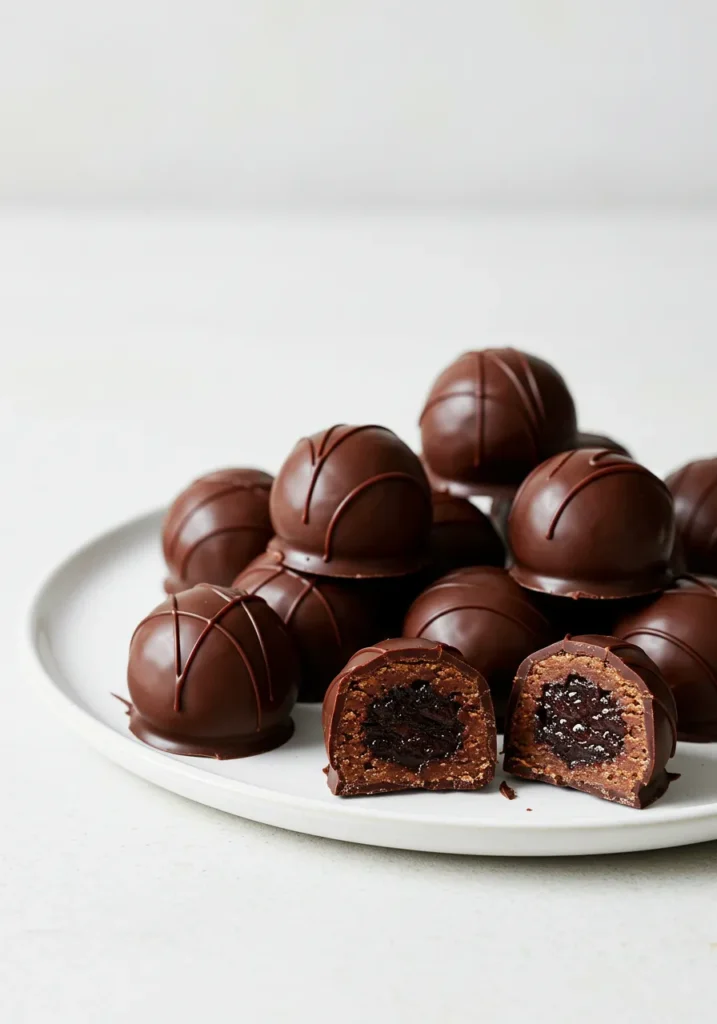
Let’s be real. This recipe is the culinary equivalent of a magic trick. You’re essentially mashing a few things together, rolling them in balls, and then dunking them in chocolate. The result? A sophisticated, rich, and chewy truffle that boasts a hidden, boozy surprise inside. They’re idiot-proof (I’ve tested this theory extensively), surprisingly elegant, and packed with fiber. See? You can even call them a health food. I won’t judge.
Ingredients You’ll Need for Prune-Stuffed Truffles
Gather your squad. This is a no-fuss operation.
For the Prune Filling:
- 200g pitted prunes: The squishy, sweet star of the show.
- 50g walnuts: For that essential crunch. Blitz them into a fine rubble.
- 2 tbsp rum, brandy, or orange juice: Boozy for the adults, juicy for the kids (or for you, if it’s a Tuesday afternoon).
- 1 tbsp cocoa powder: Because more chocolate is always the answer.
- 1-2 tbsp strong coffee, cooled: This is the secret weapon that makes everything taste deeper and richer.
For the Chocolate Coating & Decoration:
- 200g dark chocolate, chopped: Get the good stuff. It makes a difference, I promise.
- 1 tbsp coconut oil or butter: This is the pro-tip for getting a super shiny, snappy shell.
- Cocoa powder, crushed nuts, or desiccated coconut: For rolling. Because naked truffles are shy and need a coat.
Step-by-Step Instructions
- Wake Up the Prunes. If your prunes are looking a little dry and sad, give them a quick spa treatment. Plop them in a bowl, cover them with hot water, and let them soak for 10 minutes. Drain them thoroughly afterwards. Nobody wants a watery truffle.
- Blend Your Squad. Toss the plump, happy prunes, walnut rubble, your chosen liquid (rum for the win!), cocoa powder, and coffee into a food processor. Blitz it until it forms a sticky, uniform paste. No food processor? A sharp knife and some dedicated chopping will work, but channel your inner warrior—it’s a arm workout.
- Form the Truffle Centers. Pinch off small pieces of the mixture and roll them into small, bite-sized balls (about 2cm in diameter). Pop them on a tray lined with baking paper and shove them in the fridge for at least 30 minutes. This chilling step is non-negotiable—it prevents a truffle meltdown later.
- Create the Chocolate Shell. While the centers are chilling, melt your chocolate and coconut oil together. You can do this gently in a bowl over a pan of simmering water (a bain-marie, if you’re fancy) or in short bursts in the microwave. Stir until it’s gloriously smooth.
- The Dip. Now for the fun, messy part. Using a fork or two spoons, dunk each chilled prune ball into the melted chocolate. Swirl it around to coat it completely, let the excess drip off, and place it back on the baking paper tray.
- Accessorize Immediately. Before the chocolate sets, roll your truffles in your chosen topping. A light dusting of cocoa powder is the classic move, but crushed nuts add a fantastic texture.
- Set It and Forget It. Once all your truffles are coated and dressed, return the tray to the fridge for another 20-30 minutes, or until the chocolate shell is hard and snappy.
Common Mistakes to Avoid
- Skipping the Chill: Your fridge is your best friend here. Trying to dip a room-temperature prune ball is a recipe for a chocolatey puddle. Chill your centers. Always.
- Using Chocolate Chips: Chocolate chips are designed to not melt smoothly. They have additives to hold their shape. For a perfect, professional-looking coating, use a bar of good-quality chocolate that you chop yourself.
- Being a Perfectionist: So what if one truffle looks a little lopsided and another has a weird fingerprint? They’re homemade! It adds to their charm. Embrace the imperfection.
Alternatives & Substitutions
No walnuts? Almonds, pecans, or even hazelnuts will work beautifully.
Not a dark chocolate fan? Milk chocolate is a totally acceptable, sweeter alternative.
Out of coffee? Just use a tablespoon of water or more of your chosen liquid (rum, rum, rum).
Vegan? Ensure your dark chocolate is dairy-free and you’re golden.
The booze isn’t just for flavor—it also acts as a preservative. If you use juice, these guys are best eaten within a couple of days.
FAQS about Prune Stuffed Truffles
Can I make these truffles alcohol-free?
Absolutely! Just swap the rum or brandy for an equal amount of orange juice, apple juice, or even that leftover coffee. The flavor profile will be different but still delicious.
How long do these stuffed truffles last?
In an airtight container in the fridge, they’ll be happy for up to a week. If you used alcohol, they might even last a bit longer. They also freeze amazingly for up to 3 months.
My mixture is too sticky to roll! Help!
This means your mixture is a little too wet. Dust your hands with a little cocoa powder or icing sugar before rolling. It acts like edible gloves and prevents the mixture from sticking to you.
Why add coconut oil to the chocolate?
It thins the chocolate slightly, making it easier to dip and giving the finished shell a gorgeous, professional-looking shine and a satisfying “snap” when you bite into it.
Can I use a different dried fruit?
You can experiment! Dates are the most obvious substitute and would work exactly the same way. Figs could be fun too. Let your imagination run wild.
Related Recipes
Final Thoughts about Prune Stuffed Truffles
And there you have it. You’ve just created a dessert that is guaranteed to impress, with minimal effort and maximum payoff. These little flavor bombs are the perfect treat to have stashed in your fridge for a sweet hit, or to package up in a pretty box as a gift. Now go forth and conquer the world, one blissful, chocolate-covered bite at a time. You’re a chocolatier now. Act accordingly.
Printable Recipe Card
Want just the essential recipe details without scrolling through the article? Get our printable recipe card with just the ingredients and instructions.

