So, you’ve looked at a jar of store-bought jam and thought, “I bet I could make something that tastes less like sugar and more like… actual fruit.” Or maybe you just have a metric ton of raspberries and zero life plans. Either way, you’re in the right place. Let’s turn those beautiful berries into a jar of pure, spreadable joy that will make your toast weep with happiness.
Why This Recipe is Awesome
Let’s cut to the chase. This isn’t your grandma’s three-day, canning-intensive, “did I just create a science experiment?” ordeal. This raspberry jam recipe is idiot-proof, fast, and wildly rewarding. We’re talking about a condiment that transforms basic breakfasts into gourmet experiences. It’s the kind of thing you’ll casually mention at a brunch and then bask in the glow of impressed friends. “Oh, this? I just whipped it up this morning.” No big deal. The best part? It requires just a handful of ingredients and one pot. Your dishwasher will thank you.
Ingredients You’ll Need for Raspberry Jam
Gather your squad. This is all you need for a small batch of jam magic (about two cups). No weird, unpronounceable chemicals here.
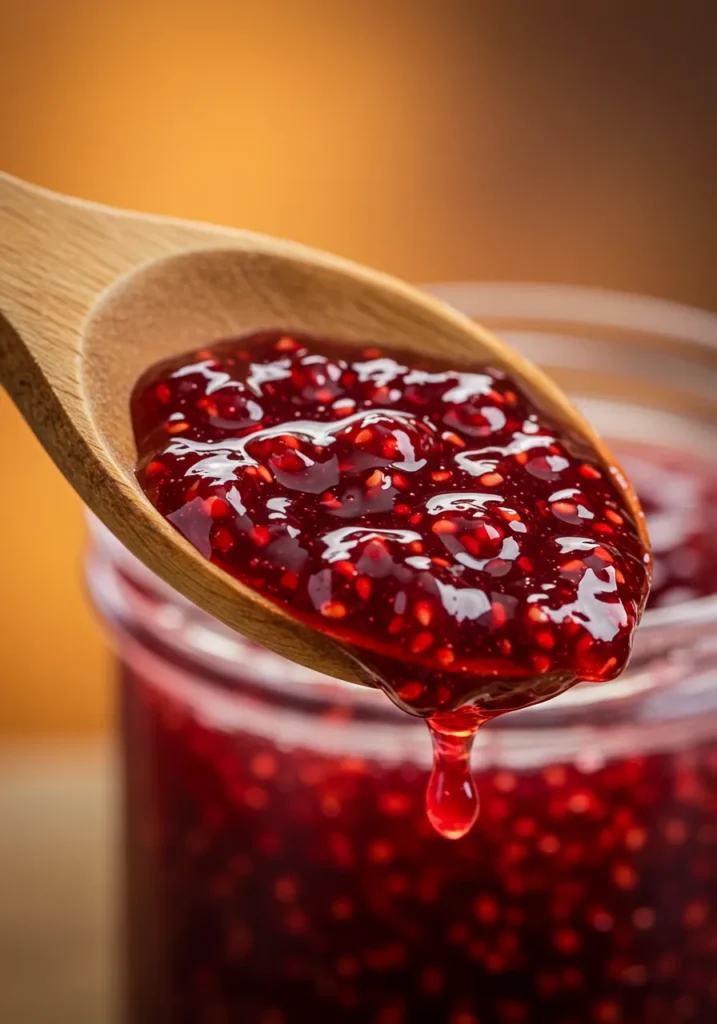
- 4 cups fresh raspberries: The star of the show. Frozen works in a pinch, too (see, we’re flexible!).
- 1 cup granulated sugar: This is the sweet-talking sidekick that also helps the jam set. Don’t freak out; you can adjust this a bit.
- 2 tablespoons lemon juice: The fresh-squeezed kind, please. This is the zingy maestro that balances the sweetness and helps with the pectin. Don’t you dare use that plastic lemon thing.
- 1 teaspoon lemon zest: Because we’re fancy like that. It adds a little extra sunshine.
- A pinch of salt: Trust me, it makes all the flavors pop. It’s the secret weapon.
Step-by-Step Instructions
- Mash Those Berries: Dump your raspberries into a medium-sized, heavy-bottomed pot. Grab a potato masher or a fork and get to work crushing them. How chunky you leave them is up to you. Want smoother jam? Mash thoroughly. Like some whole berries? Leave a few survivors.
- The Sugar Party: Add the sugar, lemon juice, lemon zest, and that all-important pinch of salt to the mashed berries. Give it all a good stir over low heat until the sugar has mostly dissolved. This should only take a few minutes. Pro tip: Don’t crank the heat to high yet! We’re not making raspberry caramel.
- The Boiling Point: Now, turn up the heat to medium-high and bring the mixture to a full, rolling boil. You’ll see big, foamy bubbles that don’t disappear when you stir. Let it do its thing for about 10-15 minutes, stirring frequently so it doesn’t scorch on the bottom. This is your arm workout for the day.
- The Plate Test: Here’s how you know it’s done. Place a small plate in your freezer at the start. When you think the jam is ready, drop a small spoonful onto the frozen plate. Wait a minute. Push the edge of the jam with your finger. If it wrinkles, it’s done! If it’s still runny, boil for another 2-3 minutes and test again.
- Cool It Down: Once it passes the wrinkle test, take the pot off the heat and let the jam cool for about 15-20 minutes. It will continue to thicken as it cools. This step is crucial if you want jam, not syrup.
- Jar It Up: Carefully pour your glorious, deep-red jam into a clean jar. Let it cool completely before putting the lid on and storing it in the fridge.
Common Mistakes to Avoid
- The Sugar Rush: Adding the sugar and then immediately blasting the heat. You’ll end up with a grainy, crystallized mess. Low and slow to start is the name of the game.
- The Scorched Earth Policy: Not stirring enough. That jam will stick to the bottom of your pot and burn faster than your motivation on a Monday morning. Stir frequently!
- The Impatience Play: Skipping the plate test. guessing is for gambling, not for jam-making. Just do the test. It takes 60 seconds and saves you from a runny disappointment.
- Jar-Jumping: Pouring piping hot jam into a jar and immediately sealing it. Let it cool down first! This is especially important if you’re using a glass jar to avoid thermal shock (a fancy term for “cracking”).
Alternatives & Substitutions
Playing with your food is encouraged.
- No Fresh Lemons? You can use bottled lemon juice in an emergency, but IMO, fresh is best. In a real pinch, a tablespoon of apple cider vinegar can provide a similar acidity.
- Want Less Sugar? You can try reducing the sugar to 3/4 cup, but be warned: sugar is a preservative. Less sugar means your jam won’t last as long in the fridge (maybe a week instead of two). It might also be a bit runnier.
- Mix It Up: Raspberries are friendly. Feel free to make a mixed berry jam by using 2 cups of raspberries and 2 cups of blackberries, strawberries, or blueberries.
- Add Some Flair: Throw in a sprig of fresh rosemary or a pinch of cinnamon during the boil for a gourmet twist. Just remember to fish the rosemary out before jarring!
FAQs about Raspberry Jam
Q1: Can I use frozen raspberries?
Absolutely! No need to thaw them first. Just toss the frozen berries right into the pot. The cooking time might be a minute or two longer.
Q2: How long does this jam last?
In a sealed container in the refrigerator, this homemade jam is good for about 2 weeks. If you want to can it for shelf-stable storage, you’ll need to follow a proper canning procedure with added pectin.
Q3: Why is my jam so runny?
You probably didn’t boil it long enough or skipped the plate test. It happens to the best of us. FYI, you can actually pour it back into the pot and boil it for a few more minutes to try and reduce it further.
Q4: Why is my jam too thick?
You might have boiled it a touch too long. No worries! Just stir in a little water, a teaspoon at a time, until it reaches your desired consistency.
Q5: Can I use a sugar substitute?
You can experiment with a no-sugar-needed pectin product like Pomona’s Pectin, which is designed for use with sugar alternatives. Swapping granulated sugar for a liquid sweetener or artificial packets in this exact recipe will likely end in a texture catastrophe.
Q6: Do I need to add pectin?
Nope! Raspberries are naturally high in pectin, especially when combined with lemon juice. This is a naturally set jam, which is one of the reasons it’s so brilliantly simple.
Related Recipes
Final Thoughts about Raspberry Jam
And there you have it. You are now the proud creator of something genuinely delicious. Slather it on toast, swirl it into yogurt, dollop it on ice cream, or—let’s be real—eat it straight from the jar with a spoon. No judgment here.
This isn’t just jam; it’s a little jar of victory. You took a handful of simple ingredients and made magic. Now go forth and spread the joy (pun 100% intended). You’ve earned it
Printable Recipe Card
Want just the essential recipe details without scrolling through the article? Get our printable recipe card with just the ingredients and instructions.

