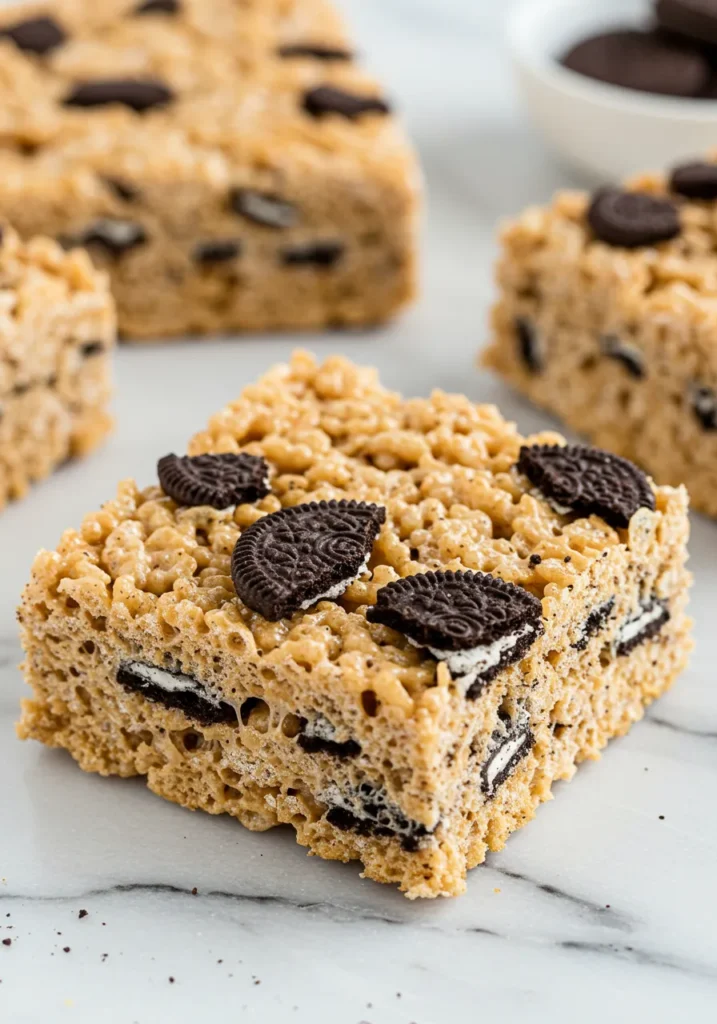
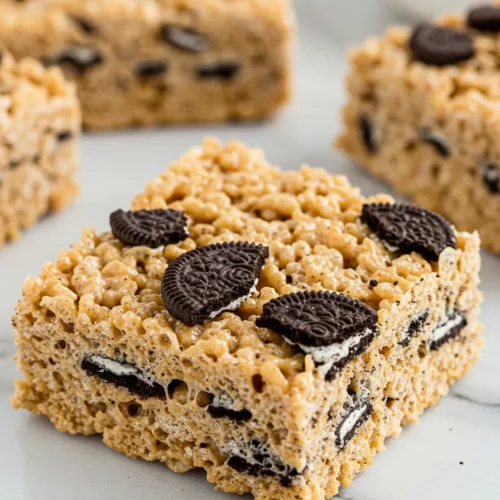
You know that feeling when you bite into a classic Rice Krispie treat and think, “Wow, this is good… but what if it was better?” Yeah, me too. That’s how I stumbled into this ridiculously good Rice Krispie Treats with Oreos recipe — and now, there’s no going back.
Because let’s be real: if you’re going to eat marshmallows, butter, and cereal smashed into one glorious square, you might as well toss in crushed Oreos and go full send. Right?
Grab a glass of milk and get comfy — I’m about to walk you through this dangerously addictive snack. And yes, I’ve eaten half a pan in one sitting. Don’t judge. 😉
What Makes Rice Krispie Treats with Oreos So Dang Irresistible?
If you’re wondering, “Why mess with a classic?” let me stop you right there.
Here’s the thing — regular Rice Krispie treats are already great, but adding Oreos turns them into a next-level dessert. Imagine the crunch of cereal, the gooey sweetness of marshmallows, and the creamy, chocolatey punch of Oreos all together. It’s like childhood and adulthood shook hands and decided to make magic.
So what’s the secret sauce here?
- Texture overload: You get soft + crunchy + chewy in every single bite.
- That Oreo flavor: A little cocoa, a little cream — basically dessert royalty.
- Crowd-pleaser status: Everyone loves them. Even your picky cousin who “doesn’t really do sweets” (eyeroll) asks for seconds.
FYI — these also make you look like a baking genius with minimal effort. Which, IMO, is the best kind of genius.
Ingredients You’ll Need (Spoiler: Nothing Weird)
One of the best things about this recipe? You probably already have all the ingredients chilling in your kitchen right now. No obscure powders or trips to a specialty store required.
Here’s your shopping (or pantry) list:
- 6 cups Rice Krispies cereal
- 16–20 Oreo cookies (crushed — but don’t obliterate them)
- 5 cups mini marshmallows (plus a handful extra for good luck)
- 4 tablespoons unsalted butter
- ½ teaspoon pure vanilla extract (optional but recommended — we’re fancy here)
- Pinch of salt (balances the sweetness, trust me)
Oh, and if you’re feeling extra: drizzle some melted white chocolate on top. Do it. Live your best life.
Step-by-Step Recipe: How to Make Rice Krispie Treats with Oreos
Alright, enough chit-chat — let’s get to the good stuff.
Step 1: Crush the Oreos
Place your Oreos in a zip-top bag and smash them with a rolling pin. You’re looking for a mix of chunks and crumbs — not fine dust. You want some pieces big enough to bite into, because what’s the point of Oreos if you can’t taste them?
Step 2: Melt the Butter & Marshmallows
In a big pot over medium heat, melt the butter first. Then toss in your marshmallows and stir until everything is smooth and gooey. Add the vanilla extract and pinch of salt here too.
Step 3: Mix Like You Mean It
Turn off the heat and quickly fold in your cereal. Stir until every piece is coated in marshmallow goodness. Now throw in your crushed Oreos and gently mix them in. Don’t overdo it or you’ll end up with Oreo dust and sadness.
Step 4: Transfer & Flatten
Pour the mixture into a greased 9×13-inch pan. Use a buttered spatula or wax paper to press it down evenly. Pro tip: don’t squish too hard — you want them to stay light and chewy.
Step 5: Cool & Slice
Let the pan cool for at least 30 minutes (if you can resist). Then cut into squares and enjoy. Or don’t cut them and just eat with a fork straight from the pan. No judgment.
Tips & Tricks to Nail This Recipe Every Time
You don’t have to follow these, but you’ll thank me later if you do:
- Use fresh marshmallows. Stale marshmallows melt into a sad, lumpy mess.
- Don’t overmix. Seriously. Stop stirring once the Oreos are incorporated.
- Work fast. The marshmallow starts to set quickly, so move like your snack depends on it (because it does).
- Grease everything. The pan, your spatula, even your hands. Sticky = not fun.
Ever wondered why your treats sometimes turn out hard as a rock? That’s because you packed them down too much or cooked the marshmallows too long. Keep it light, friends.
Why These Are Perfect for Literally Every Occasion
If you’re trying to convince yourself (or someone else) that these are worth making, let me help you out.
Potlucks & Parties
Show up with a plate of these at your next gathering, and you’ll instantly become everyone’s favorite person. No one ever complained about too many Oreos.
Late-Night Snacks
Because obviously. Midnight you deserves something better than sad granola bars.
Bake Sales
These sell out faster than you can say “marshmallow.” Plus, they’re cheap to make — win-win.
Gifts
Wrap a few in cute cellophane bags with a bow. Instant homemade gift that doesn’t suck.
Basically, if there’s food involved, these belong there.
Fun Variations to Keep Things Interesting
Once you’ve mastered the classic Oreo version, you can get creative. Why stop here?
- Mint Oreos: For a refreshing twist.
- Peanut Butter Oreos + drizzle of melted PB: You’re welcome.
- Golden Oreos: Lighter and vanilla-y, if you’re into that sort of thing.
- Double-Stuffed Oreos: Because more cream filling is never a bad idea.
- Add sprinkles or M&Ms: If you want them to look festive (or just because).
Honestly, the sky’s the limit. Have fun with it — worst case, you still end up with sugar and carbs. 🙂
How Do These Compare to Other Treats?
Look — I’m not here to throw shade at brownies or cupcakes (okay, maybe a little). But IMO, these Rice Krispie Treats with Oreos have some serious advantages:
- Easier to make: No baking, no fancy equipment.
- Faster: You’re done in under 30 minutes.
- More portable: No frosting to smear everywhere.
- Crowd-pleasing: Even picky eaters like them.
Ever tried carrying a tray of frosted cupcakes through a crowded room? Yeah. Not fun. These bad boys? No problem.
Storing & Freezing Your Treats
If you somehow don’t eat the entire pan in one sitting (teach me your ways), here’s how to store them:
- Room temp: Keep in an airtight container for up to 3 days.
- Fridge: They’ll last a little longer but get a bit harder.
- Freezer: Yep, you can freeze them! Just wrap individually and store in a zip-top bag for up to 6 weeks. Thaw at room temp when ready.
Pro tip: Don’t refrigerate unless you absolutely have to. Cold = hard and sad.
Common Mistakes to Avoid
Because I’ve made them all already (you’re welcome):
- Crushing the Oreos into powder instead of chunks.
- Letting the marshmallows burn.
- Pressing the mixture too firmly into the pan.
- Forgetting to grease your hands and getting stuck. Literally.
Learn from my (sticky) mistakes. 😉
Related Recipes
Final Thoughts: Just Make Them Already
So there you have it — the easiest, most addictive, Rice Krispie Treats with Oreos recipe you’ll ever need. They’re quick, they’re foolproof, and they’re guaranteed to make you look like a dessert wizard.
If you’ve been looking for a way to level up your snack game without spending hours in the kitchen, this is it. What are you waiting for? Grab your Oreos, your marshmallows, and go make yourself (and everyone around you) very, very happy.
And hey — if you end up eating half the batch before anyone else sees them? Same.
Ready to try it out? Got your own wild twist on the recipe? Drop a comment or send me a pic of your creation — I’d love to see how you Oreo-fy your treats. After all, sharing is caring… unless it’s the last piece. Then it’s every man for himself. 😉
✨ Happy snacking! ✨
Rice Krispies Treats with Oreos Recipe
Ingredients
- 6 cups Rice Krispies cereal
- 4 cups mini marshmallows
- ¼ cup unsalted butter
- 12 Oreo cookies roughly chopped
- 1 tsp vanilla extract
Instructions
- Grease a 9x13-inch pan and set aside.
- In a large pot, melt butter over low heat.
- Add marshmallows and stir until fully melted.
- Stir in vanilla extract.
- Remove from heat and fold in Rice Krispies cereal and chopped Oreos.
- Press mixture evenly into prepared pan using a greased spatula.
- Let cool completely before cutting into squares.
Notes
- For extra Oreo flavor, sprinkle more chopped Oreos on top before pressing.
- Store in an airtight container for up to 3 days.
- Do not press too hard or treats will be dense.
DID YOU MAKE THIS EASY RECIPE?
If you have, then share it with us by sending a photo. We’re excited to see what you’ve made 🙂Printable Recipe Card
Want just the essential recipe details without scrolling through the article? Get our printable recipe card with just the ingredients and instructions.

