Alright, let’s get one thing straight before we dive in (wait, I’m not allowed to say “dive in”? Oops!): Shamrock Lucky Charms Treats are basically your childhood marshmallow dreams dipped in green magic. These are the kind of treats that make you feel like a leprechaun handed you his dessert stash after a long day of chasing rainbows.
So, whether you’re planning a festive St. Paddy’s Day bash, trying to impress your coworkers with something other than green bagels (again), or just craving something sweet and nostalgic, these bad boys deliver.
And IMO, they’re way more fun than baking an actual cake. Less stress, more sugar. Win-win.
What Are Shamrock Lucky Charms Treats?
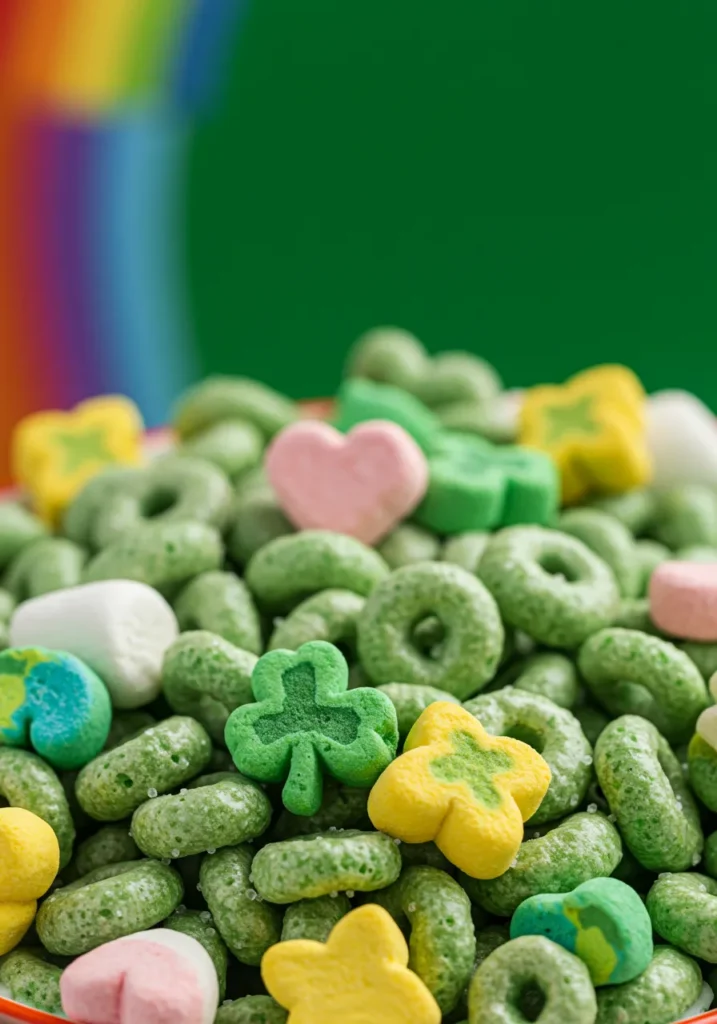
Okay, so picture this: You take the classic Rice Krispie Treat concept, swap out the rice cereal for Lucky Charms, add a generous splash of green food coloring, and boom—you’ve got yourself a tray of gooey, crunchy, marshmallow-packed happiness.
They’re:
- No-bake (read: minimal effort)
- Kid-approved (and adult-devoured)
- Festive AF (for any shamrock-laden occasion)
- And absolutely adorable (especially if you add shamrock sprinkles—yup, those exist)
So yeah, they’re kind of a big deal in the “fun dessert” world.
Ingredients You’ll Need for Shamrock Lucky Charms Treats
Let’s talk ingredients. You only need a handful of pantry staples and a tiny bit of green food coloring to pull these off.
The Essentials:
- 6 cups Lucky Charms cereal (obviously—don’t skimp on the marshmallows!)
- 1 (10 oz) bag mini marshmallows (or about 5 ½ cups, if you’re measuring from the big bag)
- 3 tablespoons unsalted butter
- Green food coloring (gel or liquid—whatever floats your leprechaun boat)
- Cooking spray or butter (for greasing your pan)
- Optional: Shamrock-shaped sprinkles, edible glitter, or white chocolate drizzle—because why not go full glam?
Step-by-Step Recipe (a.k.a. How Not to Screw This Up)
Don’t worry, even if your baking history involves more disasters than wins (looking at you, burnt cookies), you’ve got this. These are nearly impossible to mess up—unless you walk away from the stove. Don’t do that.
Step 1: Prep the Pan
- Grease a 9×13-inch baking pan with butter or spray.
- Want picture-perfect squares? Line the pan with parchment paper. Thank me later.
Step 2: Melt the Butter & Marshmallows
- In a large pot over low heat, melt the butter.
- Toss in the mini marshmallows and stir until smooth and completely melted.
- Add green food coloring a few drops at a time until you reach the right shamrock shade. Go subtle or go neon—no judgment here.
Pro tip: Low and slow is the name of the game. Cranking up the heat just gives you a weird marshmallow paste. Ew.
Step 3: Stir in the Cereal
- Remove the pot from heat and quickly fold in the Lucky Charms.
- Stir until the cereal is evenly coated in marshmallowy goodness.
- Don’t linger. The mixture sets fast, and we don’t want a sticky fossil situation.
Step 4: Press & Decorate
- Transfer the mix to your greased pan and press it down evenly with a buttered spatula (or your fingers, if you’re brave).
- While it’s still warm, sprinkle on the toppings—shamrock sprinkles, glitter, or crushed candy.
Step 5: Cool, Slice & Serve
- Let the treats cool at room temp for at least 30 minutes.
- Cut into squares (or get fancy and use cookie cutters for shamrock shapes).
- Stuff your face. Or share. Your call.
Can I Make These Ahead of Time?
Absolutely. In fact, they’re even better when they’ve had a few hours to set. Just store them in an airtight container at room temp for up to 3 days.
FYI: Putting them in the fridge? Big no-no. They get hard. Like jawbreaker-hard. And we’re not here for that dental drama.
Why You’ll Love These More Than Regular Treats
Let’s be honest for a sec: Rice Krispie Treats are great and all, but Lucky Charms Treats are next-level. Why?
Here’s why they rock:
- Marshmallow-on-marshmallow action. The cereal already has marshmallows. Add melted ones and it’s just… genius.
- Whimsical vibes. I mean, the colors! The shapes! It’s like childhood nostalgia exploded in dessert form.
- No oven needed. Aka, zero chance of burning your house down. Nice.
- Easy cleanup. One pot, one pan. That’s it. (Unless you got aggressive with the green food coloring—then good luck with your countertops.)
Add Your Own Twist 🎨
Wanna get creative? Go for it. These treats are totally customizable.
Fun Variations to Try:
- Add M&M’s or mini chocolate chips for an extra hit of sweet.
- Swap the butter for browned butter if you’re fancy like that—it gives a nutty twist.
- Throw in crushed Oreos. Not traditional, but trust me—it slaps.
- Use cookie cutters to make them heart-shaped, star-shaped, or whatever floats your shamrock.
Heck, you can even drizzle melted white chocolate tinted green across the top for bonus flair. Is it necessary? Nope. Will it make you feel like a kitchen wizard? 100%.
Kid-Friendly or Adult-Approved?
Both. These treats are basically dessert diplomacy.
- Kids go nuts over the colors and cereal marshmallows.
- Adults? We pretend we’re just tasting one… then go back for three more.
Also, they’re an amazing party treat because they’re:
- Handheld (aka no forks, no dishes, no regrets)
- Mess-free-ish (unless you go ham with the sprinkles)
- And ridiculously photogenic (hello, Instagram!)
What If I Want to Make Them Healthier?
First of all, why? 😏
But okay, if you insist:
- Try using a low-sugar cereal (but be warned—no Lucky Charms = less magic).
- Cut the butter by a tablespoon or two (they’ll still stick together, just slightly less gooey).
- Use natural marshmallows with no artificial colors—because we’re classy like that.
Just know: you’ll lose a little of that over-the-top sweetness that makes these bars what they are. Balance, my friend.
Storage Tips (a.k.a. How Not to Ruin Them)
Let’s not make this harder than it needs to be.
- Room Temp: Store in an airtight container for up to 3 days.
- Freezer: Yup, you can freeze them. Just wrap individually and freeze for up to a month. Thaw at room temp when the craving strikes.
- Avoid humidity. These treats and moisture? Not besties. Keep ‘em dry.
Quick warning: if you use cookie cutters, don’t stack them. They stick together like clingy exes. 😬
Related Recipes
- No-Bake Chocolate Chip Cookie Balls Recipe
- Chocolate Fudge Pecan Pie Recipe
- Homemade Pineapple Soft Serve Ice Cream Recipe
Final Thoughts about Shamrock Lucky Charms Treats
Look, you can wear all the green you want and chug shamrock shakes ’til you turn minty fresh, but if these Shamrock Lucky Charms Treats aren’t on the table, you’re kind of missing the point.
They’re fun, festive, insanely easy, and just the right amount of ridiculous. Plus, they’re nostalgic in the best way—like Saturday morning cartoons in edible form.
So go make a batch. Or two. You might not find gold at the end of the rainbow, but you’ll definitely find a pan full of crunchy, gooey happiness.
And hey—if anyone asks for your recipe, just tell them it’s a family secret. 😉

