So, you’ve decided you want a dessert that’s equal parts elegant and ridiculously delicious, but you’re secretly hoping it’s not a total nightmare to make. I feel you. We’ve all been there, scrolling through recipes that require the precision of a brain surgeon and the patience of a saint. Well, take a deep breath and put that anxiety away. This isn’t that recipe. This is your new secret weapon: a creamy, dreamy, no-bake white chocolate raspberry cheesecake that’s so good, it might just make you weep with joy. And the best part? You don’t even have to turn on your oven. Let’s get to it.
Why This Recipe is Awesome
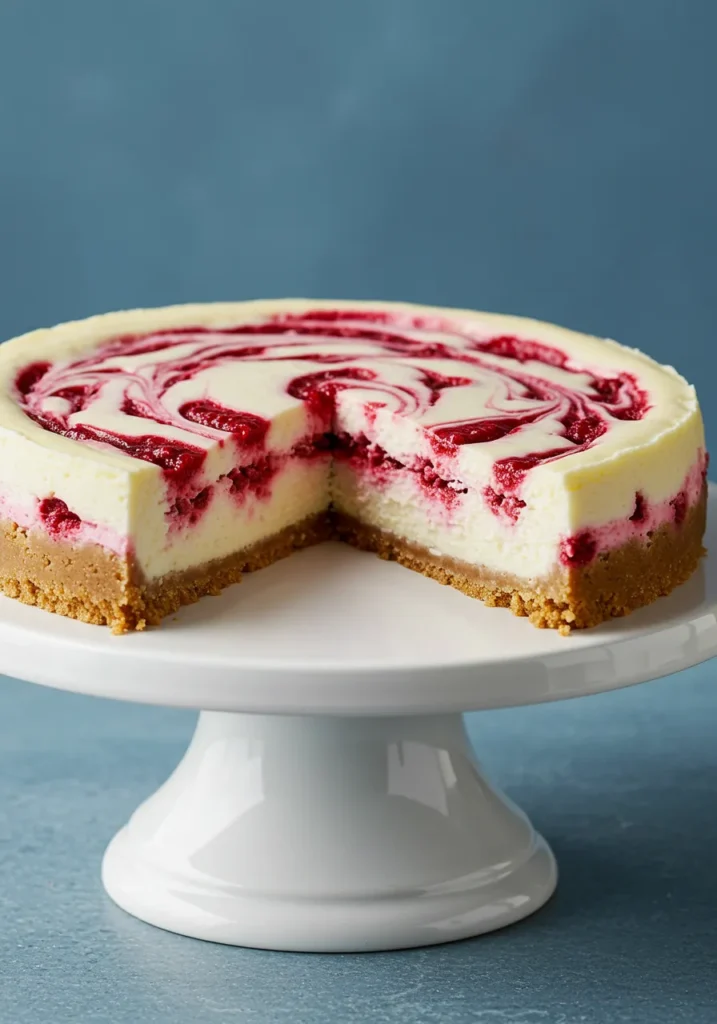
Let’s cut to the chase. This cheesecake is a showstopper. It’s the kind of dessert you bring to a party, and people subtly ask if you bought it from some fancy patisserie. You’ll get to give a casual hair flip and say, “Oh this? I just whipped it up.” It’s idiot-proof, even I didn’t mess it up on the first try. The combination of rich, creamy white chocolate and the sharp, tangy punch of raspberry is a match made in dessert heaven. It’s luxuriously smooth, perfectly set, and that buttery biscuit base? Chef’s kiss. It’s also a no-bake miracle, which means you can achieve cheesecake glory without worrying about water baths, cracking, or your oven’s weird hot spots.
Ingredients You’ll Need
Gather your squad. This is a team effort between you and your fridge. Pro tip: let everything come to room temperature before you start. This is non-negotiable for a silky-smooth filling. Trust me.
For the Crust:
- 200g digestive biscuits (or graham crackers if you’re stateside) – basically, any plain sweet biscuit you can violently smash into crumbs.
- 100g unsalted butter, melted – this is the glue that holds our crunchy dreams together.
- A pinch of salt – to make things interesting.
For the Filling:
- 500g full-fat cream cheese – This is not the time for the low-fat stuff. Go big or go home.
- 200g white chocolate, melted and slightly cooled – Get the good stuff. Your taste buds will thank you.
- 300ml double cream (heavy cream) – The key to that lush, thick texture.
- 100g icing sugar – For that essential sweetness.
- 1 tsp vanilla extract – The flavor booster.
- 150g fresh raspberries, plus extra for decorating – We’re going for a ripple situation. Frozen will work in a pinch, but thaw and drain them first!
For the Topping (Optional but Highly Recommended):
- 150g fresh raspberries
- 3 tbsp raspberry jam – to make it all shiny and pretty.
Step-by-Step Instructions
- Pulverize the Biscuits. Chuck your biscuits into a food processor and blitz them into fine crumbs. No processor? No problem. Seal them in a zip-top bag and go to town with a rolling pin. It’s a great way to work out any aggression.
- Make the Base. Mix your biscuit crumbs with the melted butter and salt until it looks like wet sand. Dump it into a 20cm springform tin and press it down firmly and evenly. Pro tip: use the bottom of a glass to really compact it. This is your foundation—make it strong! Pop it in the fridge to set while you make the magic happen.
- Melt the Chocolate. Break your white chocolate into chunks and melt it gently. You can do this in a bowl over a pan of simmering water (a bain-marie) or in short bursts in the microwave. If using the microwave, stir every 20 seconds to avoid scorching. Let it cool slightly so it doesn’t melt the cream cheese.
- Whip the Cream. In a large bowl, whip the double cream with the icing sugar and vanilla until you have soft peaks. Don’t overdo it! We’re not making butter. Set this aside.
- Combine the Filling. In another massive bowl, beat the room-temperature cream cheese until it’s smooth and lump-free. Slowly beat in the slightly cooled, melted white chocolate until it’s fully incorporated.
- Fold it All Together. Now, gently fold the whipped cream into the cream cheese/chocolate mixture. Be patient and use a figure-eight motion to keep all that lovely air in the mix. This is what gives us that cloud-like texture.
- Create the Raspberry Ripple. Take about two-thirds of your fresh raspberries and gently fold them through the filling. They’ll break up a little and create a beautiful marbled effect.
- Assemble and Chill. Retrieve your tin from the fridge. Spoon the gorgeous pink-and-white-swirled filling onto the biscuit base and smooth the top. Cover it with cling film and chill for at least 6 hours, but ideally overnight. I know, the wait is torture, but it’s 100% necessary for the perfect slice.
Common Mistakes to Avoid
- Using Cold Cream Cheese. I’ve said it before, and I’ll scream it from the rooftops: room temperature ingredients are KEY. Cold cream cheese will leave you with a lumpy filling, and nobody wants that.
- Over-whipping the Cream. You want soft peaks that flop over when you lift the whisk. If you whip it to stiff peaks, your filling will be dense and difficult to fold. Stop while you’re ahead.
- Adding Scorching Hot Chocolate. If you pour molten-hot chocolate into your cream cheese, it’s going to melt it and make a soupy, greasy mess. Let it cool for a few minutes first. Patience, young grasshopper.
- Impatience with the Chill Time. Thinking you can get away with just two hours in the fridge? Rookie mistake. This cheesecake needs time to set properly. Don’t cheat yourself out of the perfect texture.
Alternatives & Substitutions
Allergic to nuts? On a diet? Just can’t find an ingredient? Here’s your cheat sheet.
- Biscuit Base: Digestives not your thing? You can use ginger nuts for a zingy twist, Oreos (without the filling) for a chocolatey base, or even gluten-free biscuits if needed.
- White Chocolate: Not a fan? You can absolutely swap it out for milk or dark chocolate. The raspberry will pair beautifully with either.
- Raspberries: Swap for another berry! Strawberries, blackberries, or a mix would be fabulous. You could even use a fruit puree swirled through the mix.
- Vegetarian: This recipe is already vegetarian-friendly. For a vegan version, it’s trickier but doable. Use vegan cream cheese, plant-based double cream, vegan white chocolate, and a butter alternative. IMO, the texture might be slightly different, but it’ll still be tasty!
FAQS
Can I freeze this cheesecake?
You sure can! Wrap it tightly in cling film and freeze for up to a month. Thaw it overnight in the fridge before you want to serve it.
My filling is a bit runny, what did I do wrong?
This usually happens if the cream was under-whipped or the ingredients were too warm. Pop the whole mixture into the fridge for 20-30 minutes to firm up a bit before you spoon it into the tin.
Can I use frozen raspberries?
Yes, but you MUST thaw them completely and drain all the excess liquid. Otherwise, you’ll add way too much water to the filling and it won’t set properly.
Why did my chocolate seize when I melted it?
White chocolate is a delicate diva and hates water. Make sure your bowl is completely dry when melting it. If even a drop of water gets in, it can cause the chocolate to become grainy and clumpy.
Do I really need a springform tin?
It’s highly, highly recommended. Trying to get a set cheesecake out of a regular tin is a recipe for disaster and tears. If you’re serious about cheesecake, it’s a worthy investment.
Related Recipes
Final Thoughts
And there you have it! Your ticket to dessert superstardom. This white chocolate raspberry cheesecake is seriously impressive but secretly simple. It’s the perfect balance of sweet, tangy, creamy, and crunchy.
Now go forth and impress your friends, your family, or just your wonderful self. You’ve totally earned a giant slice of this heaven. Enjoy every single bite
Printable Recipe Card
Want just the essential recipe details without scrolling through the article? Get our printable recipe card with just the ingredients and instructions.

