Okay, let’s be real — who doesn’t love a good cheese bomb? Gooey cheese wrapped in warm, fluffy bread, baked to golden perfection… I mean, come on. If you’re here, you’re clearly craving a snack that’s easy to make, impossible to resist, and guaranteed to impress even your pickiest friends. Well, good news — I’ve got you covered. 🙂
In this guide, I’ll walk you through my favorite baked stuffed cheese bombs recipe, sprinkled with tips, personal anecdotes, and maybe a little sass. Because why not? Let’s get cheesy!
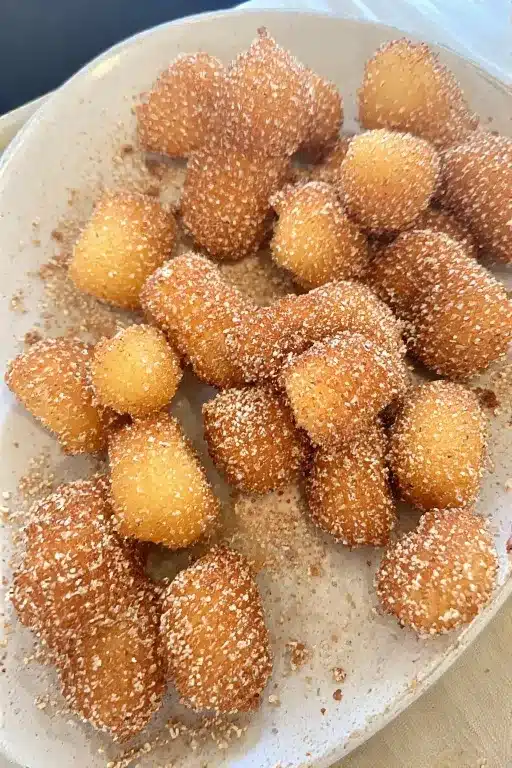
Why Baked Stuffed Cheese Bombs Are The Best Thing Ever
Let’s address the elephant in the room: Why go through the trouble of making these when you could just… eat cheese? Great question. Here’s why:
- They’re portable. Unlike a wheel of brie, you can actually carry these to a party without looking like a weirdo.
- They’re impressive. People will think you spent hours in the kitchen (spoiler: you didn’t).
- They’re customizable. Cheddar, mozzarella, gouda? Bacon? Jalapeños? Sky’s the limit.
Honestly, it’s a win-win-win situation. FYI — once you make these, you’ll suddenly find yourself invited to more gatherings. Coincidence? Doubt it.

Ingredients You’ll Need for Baked Stuffed Cheese Bombs
Before you get all excited and start preheating the oven, let’s make sure you have everything you need. Here’s the lineup:
For The Dough:
- 2 cups all-purpose flour
- 2 teaspoons sugar
- 1 teaspoon salt
- 1 tablespoon instant yeast
- ¾ cup warm water
- 2 tablespoons olive oil
For The Filling:
- Cheese, cheese, and more cheese. (Mozzarella cubes work perfectly, but you can mix in cheddar or pepper jack if you’re feeling wild.)
- Optional: Cooked bacon bits, sautéed mushrooms, or sliced jalapeños for an extra punch
For The Topping:
- 2 tablespoons melted butter
- 1 teaspoon garlic powder
- A sprinkle of dried parsley
- Grated parmesan (because… parmesan)
Sounds simple enough, right? Even your cat could shop for this. Well, maybe not — but you get my point.
Step-By-Step Instructions for Baked Stuffed Cheese Bombs
Alright, roll up your sleeves. Here’s how you transform those humble ingredients into something magical.
Step 1: Make The Dough
Sure, you could use store-bought dough, but where’s the fun in that? Besides, this homemade version is so easy you’ll wonder why you ever bought it.
- In a large mixing bowl, combine warm water, yeast, and sugar. Let it sit for about 5 minutes until it starts foaming.
- Add the flour, salt, and olive oil, and mix until a dough forms.
- Knead the dough on a floured surface for about 8–10 minutes until smooth and elastic.
- Place it back in the bowl, cover with a damp towel, and let it rise in a warm spot for 1 hour.
Pro tip: If you’re impatient (like me), place the bowl near the oven while it preheats. Works every time.
Step 2: Prep The Filling
While the dough rises, cube your cheese into bite-sized chunks. If you’re adding bacon, mushrooms, or jalapeños, now’s the time to get those ready too.
And here’s a rhetorical question for you: Is there such a thing as “too much cheese”? Yeah, didn’t think so.
Step 3: Assemble The Bombs
Now comes the fun part!
- Preheat your oven to 375°F (190°C).
- Once the dough has doubled in size, punch it down (always satisfying, IMO) and divide it into 12 equal pieces.
- Flatten each piece into a small circle, place a chunk of cheese (plus any extras) in the center, and pinch the edges to seal.
- Place each sealed ball seam-side down on a baking sheet lined with parchment paper.
FYI — if you don’t seal them properly, the cheese will ooze out during baking. Not tragic, but a little sad.
Step 4: Bake To Perfection
Before you throw those beauties into the oven:
- Brush each ball with melted butter mixed with garlic powder.
- Sprinkle some dried parsley and grated parmesan on top.
- Bake for 15–20 minutes, or until golden brown.
Optional but recommended: Turn on the broiler for the last minute to get that irresistible golden crust. Watch closely though — unless you like “charcoal chic.”
Variations To Try (Because One Size Doesn’t Fit All)
Not feeling the basic cheese bomb? Cool, let’s jazz things up. Here are some ideas to keep things interesting:
Spicy Jalapeño Bombs
Add a slice of pickled jalapeño along with the cheese for a kick.
Pizza Bombs
Throw in a bit of marinara sauce, pepperoni, and mozzarella. Basically, a pizza that fits in your pocket.
Breakfast Bombs
Stuff with scrambled eggs, cheddar, and cooked sausage. Breakfast on the go? Yes, please.
Bold flavors, endless possibilities. Why settle for boring when you can get creative?
Tips And Tricks You Didn’t Know You Needed
I’ve made these more times than I can count (you’re welcome), so here are a few nuggets of wisdom:
- Chill the cheese slightly before stuffing — it melts slower and stays gooier inside.
- Don’t overfill the dough — or you’ll end up with a hot mess. Literally.
- Use a light hand with flour while kneading to keep the dough soft.
- Always let them cool for a few minutes before biting in — unless you’re into lava tongue. :/
Ever wondered why some people’s bombs look flat and sad? Usually because they didn’t let the dough rise properly. Patience, my friend.
Why Bake Instead Of Fry?
Ah yes, the eternal debate: baked vs fried. Here’s my two cents.
- Healthier. Baking uses less oil, which means you can eat twice as many. (You’re welcome.)
- Cleaner. No splattering oil all over your kitchen. Enough said.
- Easier. Pop them in the oven and relax — no babysitting required.
Sure, fried ones might have that extra crunch, but honestly? The baked version is just as satisfying — and your smoke alarm stays silent.
How To Serve And Store (If You Even Have Leftovers)
Let’s pretend you didn’t inhale all of them in one sitting. Here’s what you do:
Serving:
- Pair with marinara, ranch, or honey mustard for dipping.
- Serve alongside a fresh salad to feel “balanced.”
- Sprinkle extra parmesan right before serving — because you can.
Storing:
- Keep leftovers in an airtight container in the fridge for up to 3 days.
- Reheat in the oven at 350°F for 5–7 minutes to bring back that crispness.
FYI: Microwaving is okay but makes them a little soggy. Still tasty though!
Related Recipes
Final Thoughts about Baked Stuffed Cheese Bombs
So there you have it — the ultimate baked stuffed cheese bombs recipe that’s equal parts easy, delicious, and dare I say… addictive. Whether you’re making them for game night, a party, or just because you deserve a treat (spoiler: you do), these little bundles of joy never disappoint.
Honestly, why settle for store-bought snacks when you can whip these up in under two hours and totally show off your baking chops? Your friends will thank you, your taste buds will thank you, and yes — even your Instagram feed will thank you. 😉
So what are you waiting for? Grab some cheese, roll up your sleeves, and go make some magic happen in that kitchen. And don’t forget to send me a picture when yours come out perfectly golden — or at least edible. LOL.
Happy baking!
Quick Recap:
- Make a simple yeast dough and let it rise.
- Stuff with cheese (and whatever else you like).
- Bake till golden and brush with garlicky butter.
- Devour while warm — preferably without burning your mouth.
Got questions? Comments? Or a funny story about cheese bombs gone wrong? Drop it below. Until next time — stay cheesy! 🧀✨

Baked Stuffed Cheese Bombs Recipe
Ingredients
- 1 can refrigerated biscuit dough
- 12 mozzarella cheese cubes about 1-inch each
- 2 tbsp melted butter
- 1 tsp garlic powder
- 1 tsp Italian seasoning
- 2 tbsp grated Parmesan cheese
Instructions
- Preheat oven to 375°F (190°C) and line a baking sheet with parchment paper.
- Flatten each biscuit dough round and place 1 cheese cube in the center.
- Wrap dough around cheese, pinch edges to seal completely.
- Place bombs seam-side down on baking sheet.
- Brush tops with melted butter, sprinkle with garlic powder, Italian seasoning, and Parmesan.
- Bake 12-15 mins until golden brown and puffed.
- Serve warm for a melty, cheesy bite.
Notes
- You can use cheddar, pepper jack, or a cheese blend for a twist.
- Serve with marinara, ranch, or spicy dipping sauce.
DID YOU MAKE THIS EASY RECIPE?
If you have, then share it with us by sending a photo. We’re excited to see what you’ve made 🙂
Printable Recipe Card
Want just the essential recipe details without scrolling through the article? Get our printable recipe card with just the ingredients and instructions.