So, you’re standing in the kitchen, staring at a box of cereal, and thinking: “Is this all it’s good for? Breakfast?”
Well, friend, let me let you in on a little secret: that humble box of cereal can turn into the most delicious homemade cereal bars you’ve ever sunk your teeth into.
And nope, you don’t need to be some fancy pastry chef to make them happen. (Thank goodness, because who even has a chef hat lying around?)
I’ve been making these bars for years—sometimes as a snack, sometimes as breakfast-on-the-go, and yes, sometimes at 11 PM because life happens. Want in? Let’s roll.
Why Make Your Own Cereal Bars?
Okay, I know what you’re thinking: “But there are a million types at the store already. Why bother?”
Oh, sweet reader… here are a few reasons:
- You control what goes in. No weird, unpronounceable ingredients like “polysorbatethingamajig-80.”
- They taste better. Seriously. Fresh, chewy (or crunchy, if you’re into that), and customizable.
- They’re cheaper. One box of cereal + some pantry staples = a whole batch. Cha-ching.
- They make you look like you’ve got your life together. Even if the rest of your day is held together by duct tape.
IMO, that’s a win-win-win-win. FYI. 😉
What You’ll Need
Let’s get down to the good stuff. You don’t need anything fancy here—just a few basics.
Ingredients:
- 4 cups cereal (Rice Krispies, Cheerios, Cornflakes—whatever tickles your fancy)
- 1/2 cup honey or maple syrup (or agave if you’re feeling trendy)
- 1/2 cup peanut butter (or almond butter, sunflower butter, Nutella… go wild)
- Optional add-ins: chocolate chips, dried fruit, nuts, pretzels, marshmallows
Tools:
-
Large mixing bowl
-
Saucepan
-
Spatula (or let’s be real—your clean hands work too)
-
8×8 or 9×9 pan
-
Parchment paper (unless you enjoy chiseling stuck bars off the pan 😬)
Step-by-Step: How to Make Cereal Bars
Step 1: Prep Your Pan
Line your pan with parchment paper. Leave a bit hanging over the edges so you can lift the bars out easily later. (Pro tip: don’t skip this. I’ve learned the hard way. More than once.)
Step 2: Mix the Wet Stuff
In a saucepan over medium heat, warm the honey and peanut butter. Stir until smooth and combined—about 2-3 minutes. Don’t let it boil, unless you’re aiming for rock-hard bars that could double as self-defense weapons.
Step 3: Combine
Pour your cereal into a big bowl. Add any extras—chocolate chips (if you don’t mind them melting), nuts, sprinkles because why not. Then pour the gooey peanut butter mixture over the cereal and stir like your life depends on it.
Step 4: Press Into Pan
Dump the mixture into the pan and press it down firmly. I mean really press it—use a flat-bottomed cup if you want. (Or just your hands. Don’t burn yourself, tho.)
Step 5: Chill
Pop the pan into the fridge for at least an hour. Go watch an episode of something or scroll TikTok.
Step 6: Cut & Enjoy
Lift the whole slab out using the parchment paper, and cut into bars. Try not to eat three in one sitting. Or do. I’m not here to judge.
Tips & Tricks for Perfect Bars
Here’s where I sprinkle in some wisdom from way too many cereal bar experiments:
- For chewier bars, don’t overcook the peanut butter/honey mix. Just heat it enough to blend.
- For crunchier bars, press them into the pan really firmly.
- For sweeter bars, add a handful of mini marshmallows. (Life’s too short to skimp.)
- To prevent sticking, lightly oil your hands or the spatula before pressing the mixture. You’re welcome.
Best Cereal Choices (IMO)
Not all cereals are created equal when it comes to cereal bars. Here’s a quick ranking, from someone who’s made… a lot:
🥇 Rice Krispies: Classic. Light, crispy, and lets the other flavors shine.
🥈 Cheerios: A little heartier, and those loops hold the syrup like a champ.
🥉 Cornflakes: Great crunch but a little messy—crumb city.
🏅 Granola: Already fancy, but makes super hearty bars.
You can also mix and match cereals. Who’s stopping you? Nobody.
Fun Flavor Combos You Should Try
Why stop at “basic” when you can live your best snack life? Here are a few combos I’ve tested (and eaten way too much of):
- S’mores Bars: Rice Krispies + mini marshmallows + mini chocolate chips + crushed graham crackers.
- Trail Mix Bars: Cheerios + raisins + chopped almonds + a drizzle of dark chocolate.
- Birthday Party Bars: Cornflakes + rainbow sprinkles + white chocolate drizzle.
- PB&J Bars: Cheerios + dried strawberries + extra peanut butter.
Honestly? The sky’s the limit. Or at least your pantry is.
Why Homemade Beats Store-Bought (Again)
Let me just reiterate, because you might be tempted to grab those shiny-wrapped bars at the store:
- Store-bought bars often taste… meh. Like cardboard dipped in sugar.
- They’re packed with preservatives to survive a zombie apocalypse.
- Homemade bars can actually be healthy if you want them to be. Or not. Your call.
- They’re more fun to make. And eat. And brag about on Instagram.
Ever wondered why something so simple costs $3 a bar at the store? Same. 🙃
How to Store Your Bars (If They Even Last That Long)
If you somehow manage not to inhale the whole batch in one sitting, here’s how to keep them fresh:
- Room temp: Store in an airtight container for up to 4 days.
- Fridge: Keeps them firmer and good for about a week.
- Freezer: Yep, you can freeze them! Wrap individually and they’ll last a month.
Pro tip: wrap them in wax paper with a little tape and pretend you’re a Pinterest mom.
FAQS About Cereal Bars
Let me save you a few frantic Google searches:
Can I make them vegan?
Yep! Use maple syrup or agave instead of honey, and a plant-based butter if you’re feeling fancy.
Can I make them nut-free?
For sure. Use sunflower butter or even cookie butter (Biscoff lovers, unite).
Can I cut the sugar?
Absolutely. But, fair warning: less sugar = less sticky = more crumbly. You might need to play around with it.
Why are my bars falling apart?
Ah, the classic tragedy. You probably didn’t press them down hard enough, or the syrup wasn’t warm enough to really bind everything together. Don’t worry—it happens to the best of us.
Related Recipes
Final Thoughts: Go Make Some Already
So there you have it, my fellow snack enthusiast: the ultimate cereal bars recipe.
Simple ingredients, easy steps, and enough room for creativity that you can feel like a culinary genius—without even turning on the oven.
Why settle for store-bought when you can whip up something fresh, delicious, and actually fun? Grab a box of cereal, get a little messy, and thank me later.
Oh, and pro tip: hide a few bars in the back of the fridge. Because once people taste them? Yeah… they’ll “mysteriously” disappear.
So what are you waiting for? Go make some cereal bars. And maybe send me one while you’re at it. 😉
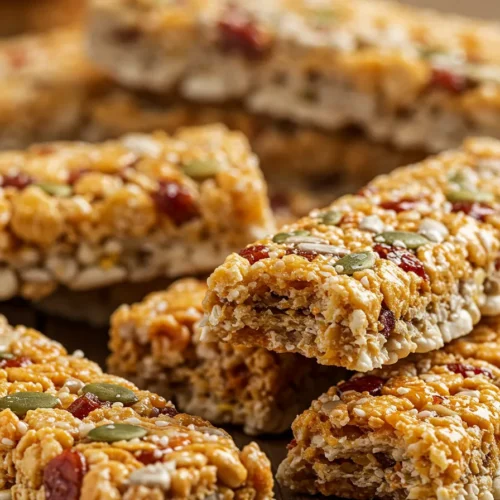
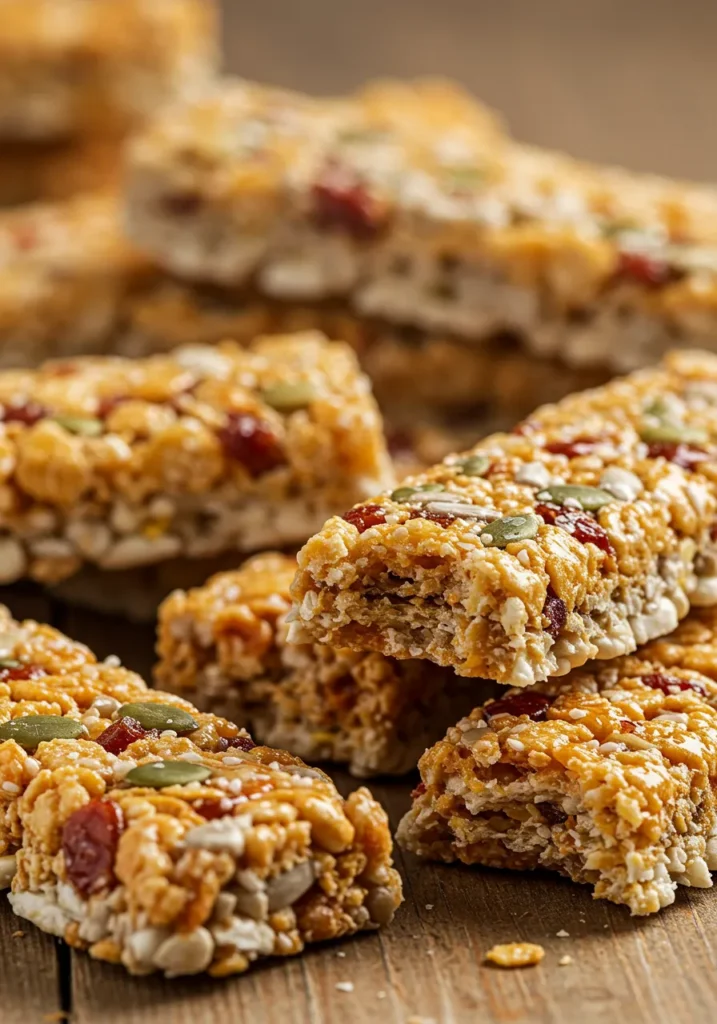
Cereal Bars Recipe — Easy, Delicious, and Addictive
Ingredients
- 4 cups cereal of choice e.g., Rice Krispies, Cheerios
- ½ cup honey or maple syrup
- ½ cup peanut butter or almond butter
- ¼ cup mini chocolate chips optional
Instructions
- In a saucepan, warm honey and peanut butter over low heat until smooth.
- Remove from heat; stir in cereal until evenly coated.
- Press mixture into a parchment-lined baking dish.
- Sprinkle with chocolate chips, pressing lightly so they stick.
- Chill for 30 minutes, then cut into bars.
Notes
• Swap peanut butter for sunflower seed butter for a nut-free option.
• Add dried fruits, seeds, or coconut flakes for variety.
DID YOU MAKE THIS EASY RECIPE?
If you have, then share it with us by sending a photo. We’re excited to see what you’ve made 🙂Printable Recipe Card
Want just the essential recipe details without scrolling through the article? Get our printable recipe card with just the ingredients and instructions.