Let’s get this straight — chocolate and mint is one of the most underrated power couples in the dessert world. Some folks claim it tastes “like toothpaste,” but honestly? Those people probably think boiled chicken is exciting. 😏
I’ve been making chocolate mint creams since I was a teenager pretending to be a fancy pastry chef in my mom’s kitchen. They’re ridiculously easy, look like you put in way more effort than you actually did (score), and taste like something you’d find in a bougie bakery.
If you’re craving a cool, creamy treat wrapped in velvety chocolate — and want to impress your taste buds and your friends without breaking a sweat — this recipe’s your new BFF.
Ready? Let’s get to it!
What Are Chocolate Mint Creams?
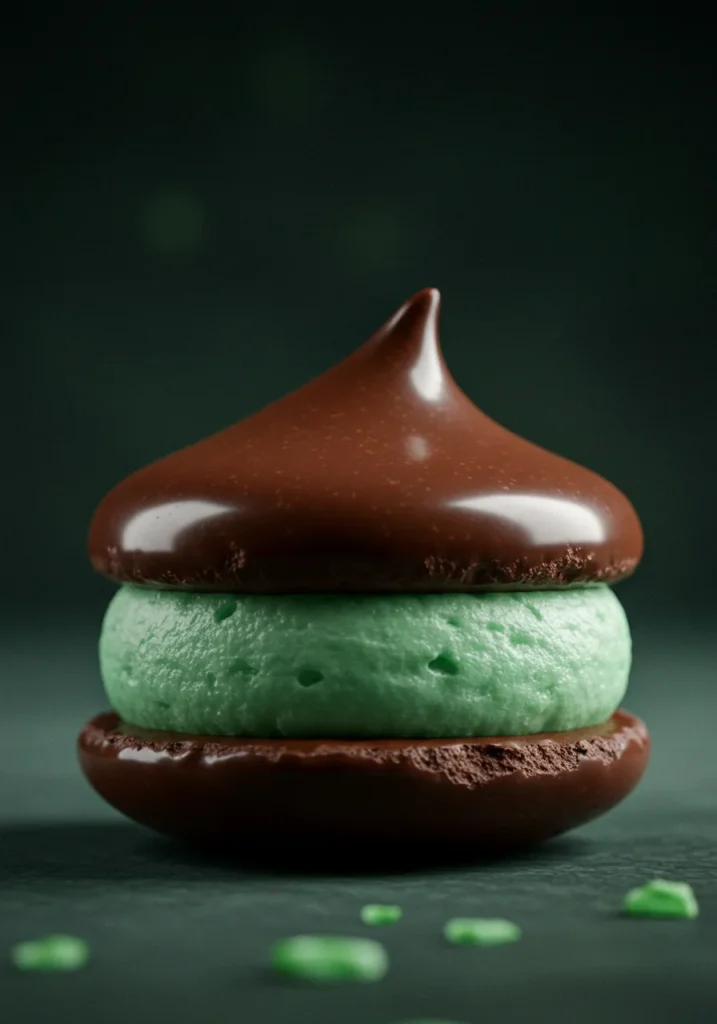
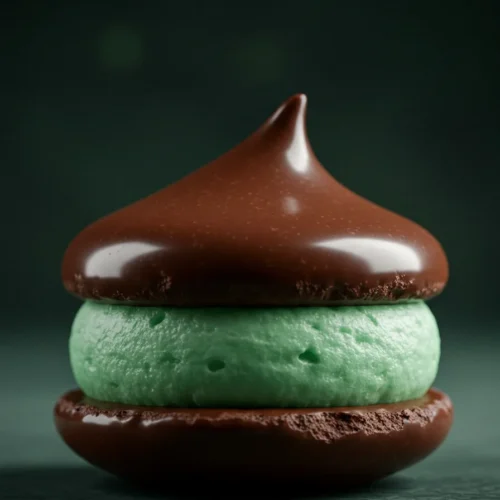
Okay, good question. Chocolate mint creams are soft, creamy candies with a sweet mint filling covered in a smooth chocolate shell. Basically, they’re what would happen if a peppermint patty and a truffle had a baby.
These little guys:
- Have a creamy, melt-in-your-mouth center.
- Deliver the perfect balance of sweet, cool mint and rich chocolate.
- Are super easy to customize (more on that later).
Oh, and did I mention you don’t even need to turn on your oven? Yep — they’re no-bake. You’re welcome.
Ingredients You’ll Need for Chocolate Mint Creams
Let’s not overcomplicate things here. You probably have most of this stuff in your kitchen already (and if not, it’s all at your regular grocery store — no weird trips to specialty shops, I promise).
For the filling:
- 2 cups powdered sugar (a.k.a. confectioner’s sugar)
- 1 tablespoon butter, softened
- 1–2 tablespoons heavy cream or milk
- 1/2 teaspoon peppermint extract (not spearmint unless you want your candies to taste like chewing gum)
- A few drops of green food coloring (optional, but it makes them look super cute)
For the coating:
- 8 ounces semi-sweet chocolate (chips or chopped bars — go wild)
- 1 teaspoon vegetable oil (to keep the chocolate shiny & snappy)
See? Nothing scary.
Step-By-Step: How to Make Chocolate Mint Creams
Here’s where the magic happens. It’s easier than you think — unless you think it’s really easy, in which case… you’re right.
Step 1: Make the Mint Cream Filling
- In a medium bowl, beat together the butter, powdered sugar, and peppermint extract.
- Add heavy cream (start with 1 tablespoon) and mix until you get a thick, dough-like consistency.
- If it’s too dry, add more cream one teaspoon at a time. If it’s too sticky, add more powdered sugar. (Goldilocks would approve.)
- Optional: add a couple drops of food coloring and mix it in until even.
Step 2: Shape the Creams
- Roll the dough into small balls (about 1 inch in diameter).
- Flatten them slightly into disks — unless you like round ones, then hey, you do you.
- Place them on a parchment-lined baking sheet and pop them in the freezer for 20–30 minutes. This makes them easier to coat in chocolate without falling apart.
Step 3: Melt the Chocolate
- Melt the chocolate and vegetable oil together in a microwave-safe bowl (microwave in 20–30 second intervals, stirring in between until smooth).
- You can also do this over a double boiler if you’re feeling fancy (or just hate microwaves).
Step 4: Coat the Creams
- Dip each frozen mint disk into the melted chocolate, letting the excess drip off.
- Place them back on the parchment paper to set.
- Optional: sprinkle with crushed candy canes, flaky sea salt, or drizzle with white chocolate for a little pizzazz.
Step 5: Chill and Serve
- Let them set completely (you can pop them in the fridge to speed things up).
- Once firm, serve them up and wait for the compliments to roll in.
Tips & Tricks (Because Who Doesn’t Like a Shortcut?)
Ever wonder why some chocolate-covered things look flawless while others… don’t? Yeah, been there. Let me save you some headaches:
- Use cold filling: Freezing the mint creams before dipping prevents them from melting or falling apart in the chocolate.
- Work fast: Chocolate waits for no one, so coat quickly before it hardens.
- Thin chocolate if needed: If your chocolate’s too thick, add a tiny bit more vegetable oil to make it smoother.
- Don’t skimp on parchment paper: Unless you enjoy prying stuck candies off a baking sheet and crying into your apron.
Why You’ll Fall in Love With This Recipe
Let me count the ways:
- Quick & easy: You’ll spend more time deciding what Netflix show to watch than making these.
- No oven needed: Ideal when it’s 90°F outside and you don’t want to turn your kitchen into a sauna.
- Impressive AF: People always assume you spent hours making them. Let them believe it. 😉
- Customizable: Use dark chocolate, add crushed nuts, drizzle caramel — go nuts.
FYI, these also make awesome gifts. I once made a batch for my neighbor who then mowed my lawn for a month. Coincidence? I think not.
Variations to Try (Because Basic Is Boring)
Why stick to plain when you can get creative? Here are a few fun spins:
- White Chocolate Mint Creams: Swap dark chocolate for white for a sweeter vibe.
- Double Mint: Add a drop of mint extract to the melted chocolate for extra oomph.
- Nutty Mint Creams: Press a toasted almond into the filling before coating.
- Festive Version: Use red and green food coloring & crushed candy canes for holiday feels.
Common Mistakes & How to Avoid Them
We’ve all been there — what looks perfect on Instagram sometimes ends up… not. Here’s how to avoid rookie mistakes:
- Filling too sticky? Add more powdered sugar, one tablespoon at a time.
- Chocolate too thick? Add a splash of vegetable oil and reheat slightly.
- Creams falling apart? Freeze longer before dipping.
- Chocolate dull and streaky? Make sure your filling is cold and your chocolate isn’t overheated.
How to Store Chocolate Mint Creams
If you’ve managed not to eat the whole batch in one sitting (teach me your ways), here’s how to keep them fresh:
- Store in an airtight container.
- Keep in the fridge if your kitchen’s warm; otherwise, a cool pantry works fine.
- They last about 2 weeks — although mine have never lasted longer than 48 hours.
Why Make These Instead of Buying?
You could just buy a pack of peppermint patties and call it a day. But here’s the thing:
- Homemade tastes better. Fight me.
- You control the ingredients — no weird preservatives or mystery chemicals.
- Cheaper, especially if you already have the basics at home.
- Bragging rights. Duh.
And honestly, don’t you feel a little smug when someone asks, “Did you make these yourself?” and you get to say, “Oh, these? Yeah. NBD.”
Related Recipes
- Vampire Fudge Recipe
- Pioneer Woman’s Apple Dumplings Recipe
- Summer Peach and Blueberry Cobbler Recipe
Final Thoughts about Chocolate Mint Creams
So, there you have it — the perfect chocolate mint creams recipe that’s easy, quick, and absolutely delicious. Whether you’re making them to impress guests, gift to friends, or just eat in your pajamas while binging Netflix (no judgment), these little beauties never disappoint.
Remember:
- Keep the filling cold.
- Work quickly with the chocolate.
- Don’t skimp on the peppermint extract (unless you want sad, bland creams).
Now go make a batch and channel your inner chocolatier. Then maybe save a few for your neighbor so they’ll mow your lawn too. 😉
Got questions? Want to share how yours turned out? Or just want to argue that mint doesn’t belong in desserts? (FYI, you’d be wrong, but okay.) Drop your thoughts below and let’s chat.
Until next time — happy candy-making!
Chocolate Mint Creams Recipe
Ingredients
- 2 cups powdered sugar
- 2 tbsp unsalted butter softened
- 2 tbsp heavy cream
- ½ tsp peppermint extract
- Green food coloring optional
- 1 ½ cups semi-sweet chocolate chips
- 1 tbsp shortening or coconut oil
Instructions
- Mix powdered sugar, butter, cream, peppermint extract, and food coloring until smooth.
- Roll mixture into small balls and flatten into discs.
- Place discs on parchment paper and chill for 30 minutes.
- Melt chocolate chips with shortening until smooth.
- Dip each mint disc into chocolate, coating completely.
- Place back on parchment and let set until firm.
Notes
- You can skip food coloring for a classic white mint center.
- Store in an airtight container in the fridge for up to 2 weeks.
- Use dark or milk chocolate based on preference.
DID YOU MAKE THIS EASY RECIPE?
If you have, then share it with us by sending a photo. We’re excited to see what you’ve made 🙂Printable Recipe Card
Want just the essential recipe details without scrolling through the article? Get our printable recipe card with just the ingredients and instructions.

