Let’s be honest — if you’ve never made homemade caramels, you’re missing out. Big time. Like, walking past a puppy adoption center and not stopping kind of missing out. Making caramels at home seems intimidating (because molten sugar = scary), but I promise, it’s actually pretty straightforward. And sooo worth it.
Over the years, I’ve burned a couple pans, stuck my fingers together (don’t ask), and yet, I keep coming back to this recipe because nothing — and I mean nothing — compares to fresh, buttery, chewy caramels you made yourself.
So, ready to conquer your fear of boiling sugar? Let’s get into it.
Why Make Homemade Caramels?
Because store-bought caramels just don’t cut it. Period.
Ever bit into a packaged caramel and thought, “Wow, this tastes… kinda like sweetened rubber”? Yeah, same. Homemade caramels are:
- Softer & Chewier — No dental work required after eating them.
- Richer Flavor — You actually taste the butter and cream.
- Customizable — Want sea salt? Chocolate drizzle? A little espresso kick? Go nuts.
And let’s be real: nothing impresses your friends and family like handing them a little box of caramels you made yourself. You basically become Willy Wonka, minus the questionable workplace safety.
What You’ll Need: Ingredients for Homemade Caramels
Alright — before we dive into the sweet stuff, let’s talk supplies. Because nothing ruins the vibe faster than realizing halfway through you don’t own a candy thermometer.
Ingredients:
- 1 cup (2 sticks) unsalted butter — Don’t skimp here; use the real stuff.
- 2 1/4 cups light brown sugar — Packed tight, please.
- 1 cup light corn syrup — Yes, corn syrup. No, it’s not the devil.
- 1 can (14 oz) sweetened condensed milk — Liquid gold.
- 1 teaspoon vanilla extract — Or bourbon, if you’re feeling fancy.
- Flaky sea salt (optional but recommended)
Tools:
- Heavy-bottom saucepan (aka: not your flimsy dollar-store pot)
- Candy thermometer (non-negotiable)
- Wooden spoon (metal spoons get hot, trust me)
- Parchment paper
- 8×8 inch baking pan
Pro tip: Butter EVERYTHING before you start — the pan, the parchment, maybe even your hands. Sticky caramel waits for no one.
Step-by-Step: How to Make Homemade Caramels
Ready to roll? Here’s the play-by-play:
Step 1: Prep Like a Pro
- Line your baking pan with parchment paper and butter it like your life depends on it.
- Have your candy thermometer ready to go. Attach it to the pan before the heat is on.
Step 2: Melt the Butter & Sugar
- In your heavy saucepan, melt the butter over medium heat.
- Stir in the brown sugar, corn syrup, and sweetened condensed milk.
- Keep stirring. No, really — don’t stop. This is not the time to check Instagram.
Step 3: Boil, Baby, Boil
- Bring the mixture to a boil, then reduce the heat slightly.
- Cook and stir (constantly!) until the thermometer reads 245°F–250°F.
- This will take about 15–20 minutes. Don’t rush it unless you’re into crunchy caramels.
FYI: This is the “firm ball stage” — sounds weird, tastes awesome.
Step 4: Flavor & Pour
- Remove from heat, stir in the vanilla extract (it will hiss and bubble, don’t freak out).
- Pour the hot caramel into your prepared pan.
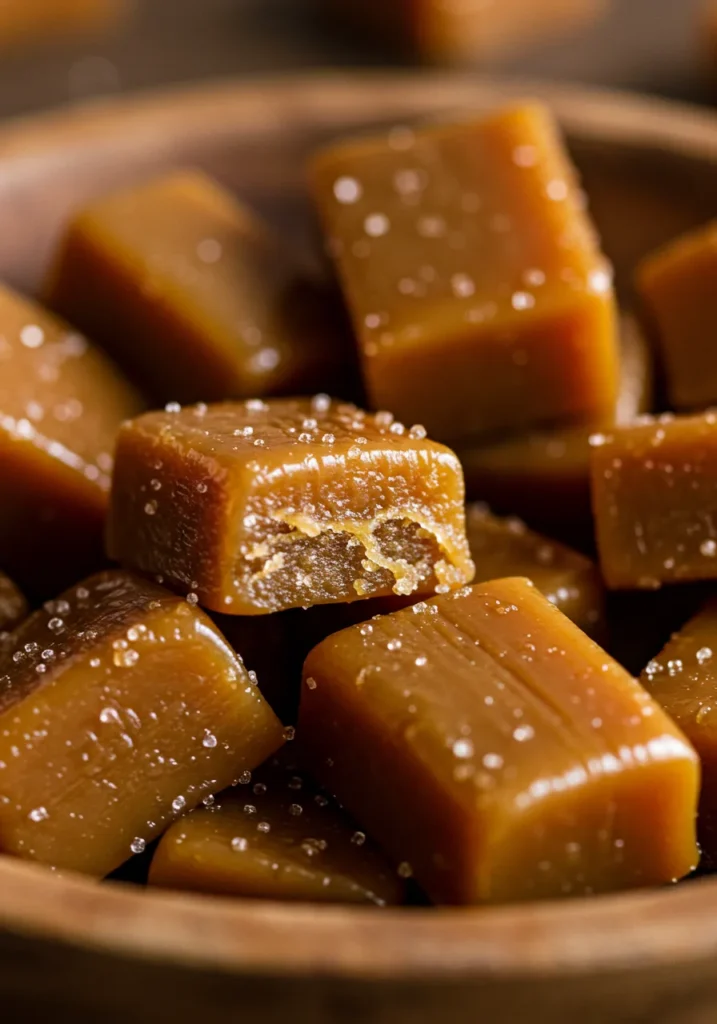
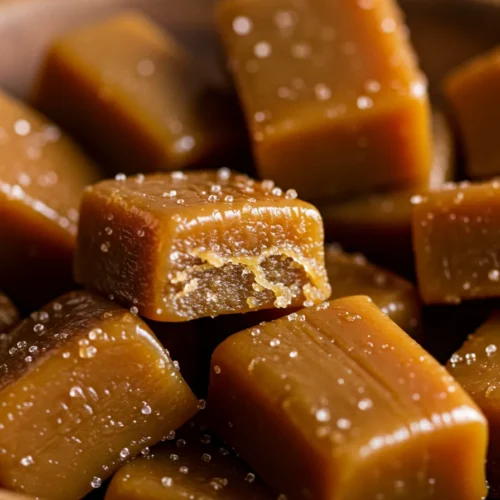
- Sprinkle with flaky sea salt if you’re a salty-sweet kind of person.
Step 5: Cool & Cut
- Let the caramel cool at room temperature for about 2–3 hours.
- Once set, lift it out with the parchment, and cut it into squares with a buttered knife.
Boom. You’re officially a caramel-making rockstar.
Tips & Tricks for Perfect Caramels
Even though this recipe is solid, sugar can still be a diva. Here are some pro tips to help you nail it:
- Stir constantly. Burnt sugar smells like regret.
- Use a real candy thermometer. Eyeballing it is… brave. And also wrong.
- Don’t scrape the sides of the pot. Those bits can crystallize and ruin the texture.
- Work quickly when pouring. Caramel doesn’t wait for anyone, not even you.
- Wrap individually if gifting. Use wax paper squares — your friends don’t want a sticky blob.
And if all else fails? Hey, even if it’s a bit overcooked, you’ve just invented toffee. You’re welcome. 😉
Flavor Variations to Try
Wanna jazz up your caramels? Here are some fun ideas:
- Salted Caramel: Sprinkle flaky sea salt on top (classic and irresistible).
- Chocolate-Dipped: Let caramels cool, then dunk halfway into melted dark chocolate.
- Espresso Caramel: Add a teaspoon of instant espresso powder for a coffee kick.
- Spiced Caramel: Mix in a pinch of cinnamon or cayenne for a warm twist.
IMO, the salted version with a little dark chocolate drizzle is basically perfection. But you do you.
FAQS about Homemade Caramels
Even if you follow the steps perfectly, sometimes caramel has… a mind of its own. Here’s a quick troubleshooting guide:
Why is my caramel too hard?
You cooked it past 250°F. Oops. Use it as a weapon or melt it back down and add a splash of cream.
Why is my caramel too soft?
You didn’t cook it long enough. Next time, aim closer to 245°F–250°F.
Why does it taste burnt?
High heat + no stirring = sad, bitter caramel. Stir gently and stay at medium heat.
Can I make it without a thermometer?
Technically, yes. But unless you’re a candy wizard, don’t. Thermometers save lives. (Okay, maybe just caramels. But still.)
Why Homemade Beats Store-Bought Every Time
Let me just say this loud and clear: homemade caramels win every single time.
Here’s why:
- You control the ingredients. No mystery chemicals.
- Freshness. Store-bought caramels could be older than your nephew.
- Flavor. Buttery, creamy, magical. Enough said.
- Bragging rights. Yes, you do get to post about it on Instagram.
Plus, it’s cheaper in the long run if you’re giving them out as gifts. And who doesn’t love looking like a domestic goddess for less?
How to Store & Gift Your Caramels
So, you’ve made a batch (or three). Now what?
Storing:
- Wrap individually in wax paper.
- Keep in an airtight container at room temp for up to 2 weeks.
- Freeze if needed — they’ll last 2–3 months.
Gifting:
- Box them up with cute ribbon.
- Add a handwritten note.
- Watch people think you’re a culinary genius.
Related Recipes
Final Thoughts about Homemade Caramels
Honestly, if you’re still reading this and haven’t run to your kitchen yet… what are you waiting for? 😉
Homemade caramels are soft, chewy, buttery, and absolutely worth every second of stirring. Plus, you’ll feel like a legit candy maker when you’re done — and that’s a vibe you can’t buy at the store.
So, grab your thermometer, butter your pan, and get ready to wow everyone (including yourself).
Oh, and don’t forget to save a few for yourself — because spoiler alert: they disappear FAST.
Got any caramel-making war stories? Or genius flavor combos? Drop them in the comments below — I’d love to hear your thoughts. (Also, who hasn’t licked the spoon and burned their tongue? Just me? Okay then. 😅)
Now go make something sweet — you deserve it.
If you’d like, I can also help you create a printable recipe card version of this or craft a catchy meta description & SEO title. Just say the word!
Homemade Caramels Recipe
Ingredients
- 1 cup unsalted butter
- 2 ¼ cups packed brown sugar
- 1 cup light corn syrup
- 1 14 oz can sweetened condensed milk
- 1 tsp vanilla extract
- Pinch of sea salt optional
Instructions
- Grease and line a 9x13-inch baking dish with parchment paper.
- In a heavy saucepan, melt butter over medium heat.
- Stir in brown sugar, corn syrup, and condensed milk.
- Bring to a boil, stirring constantly, until mixture reaches 245°F (firm ball stage).
- Remove from heat, stir in vanilla extract (and salt if using).
- Pour into prepared dish and let cool completely.
- Cut into squares and wrap in wax paper.
Notes
- Use a candy thermometer for accuracy.
- Add a sprinkle of sea salt on top before cooling for salted caramels.
- Store in an airtight container at room temperature for up to 2 weeks.
DID YOU MAKE THIS EASY RECIPE?
If you have, then share it with us by sending a photo. We’re excited to see what you’ve made 🙂Printable Recipe Card
Want just the essential recipe details without scrolling through the article? Get our printable recipe card with just the ingredients and instructions.

