Let me just say it straight — baking is overrated. There. I said it. 😎 I mean, who has the patience to preheat an oven, watch the timer like a hawk, and pray the cheesecake doesn’t crack like the desert floor? Not me, and probably not you either.
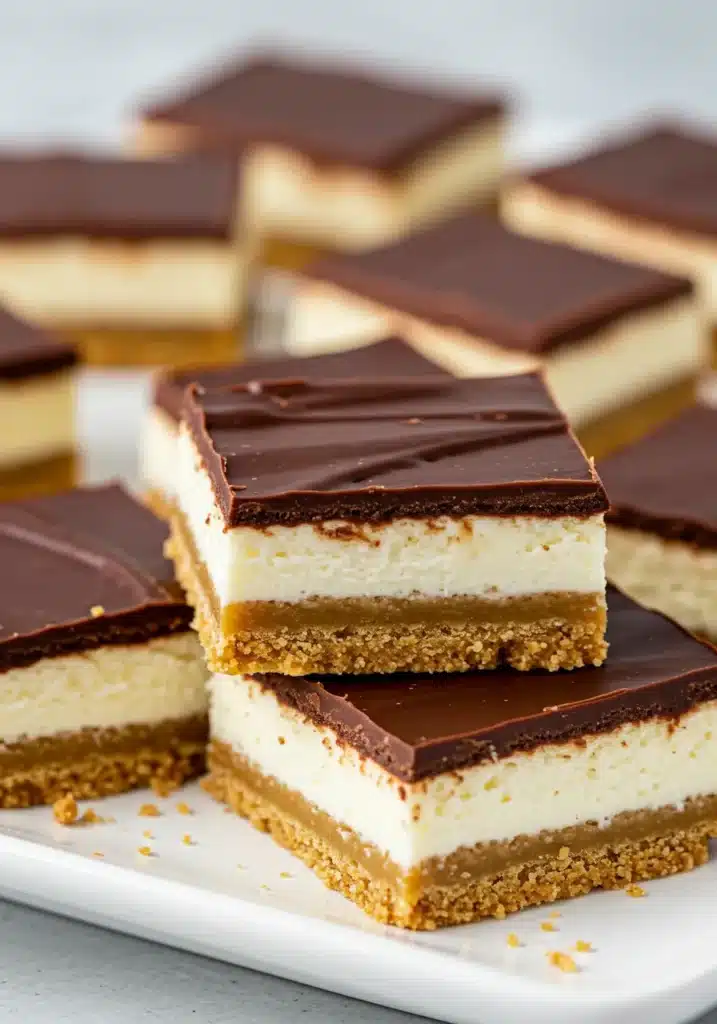
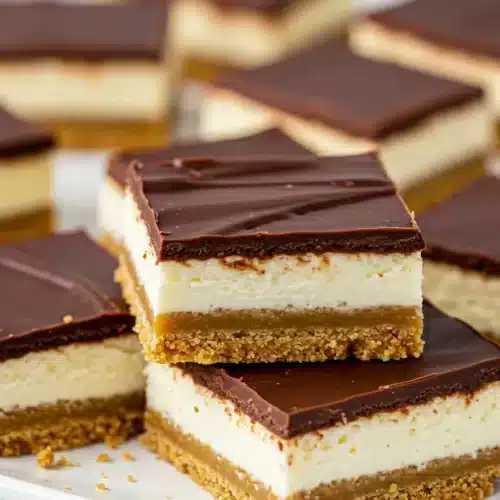
That’s why No Bake Cheesecake Bars are basically my BFFs in the dessert world. They’re creamy, dreamy, and ridiculously easy — no oven, no stress, no “oops I burned it.” If you’ve ever wanted to impress your friends or just treat yourself to something fabulous without breaking a sweat, you’re in the right place.
So grab your spatula, friend, because we’re about to whip up a dessert that even your most judgy relative will approve of.
Why You’ll Love These No Bake Cheesecake Bars
Okay, real talk — why should you ditch the oven and make these instead? Well…
- Super Easy: You don’t need fancy equipment. A bowl and a mixer and you’re basically set.
- Quick Prep: You can throw this together in under 20 minutes (plus chill time — sorry, magic still takes a little patience).
- Perfect Texture: Creamy, smooth, and rich… just like cheesecake should be.
- Customizable: You can top them with literally anything — berries, chocolate drizzle, crushed Oreos. Go wild.
Ever wondered why they’re so foolproof? Because you’re not actually baking anything that could go wrong. 😉
Ingredients You’ll Need for No-Bake Cheesecake Bars
Before you start, make sure you’ve got these on hand:
For the crust:
- 2 cups graham cracker crumbs (or digestive biscuits if you’re fancy)
- ½ cup melted butter
- 2 tablespoons sugar (optional — but recommended for sweetness)
For the filling:
- 16 oz (about 450g) cream cheese, softened
- 1 cup powdered sugar
- 1 teaspoon vanilla extract
- 1½ cups heavy whipping cream
For the topping (optional but highly encouraged):
- Fresh fruit (strawberries, blueberries, etc.)
- Chocolate sauce or caramel drizzle
- Crushed cookies or nuts
See? Nothing here requires a trip to a specialty store or sacrificing your firstborn.
Step-by-Step Instructions
Here’s the fun part — putting it all together.
Step 1: Make the Crust
- Crush those graham crackers into fine crumbs (pro tip: put them in a zip-top bag and smash with a rolling pin — very therapeutic).
- Mix the crumbs with melted butter and sugar until everything’s coated and crumbly.
- Press the mixture into a lined 8×8 inch pan. Really pack it down so it stays together. Chill in the fridge while you make the filling.
Step 2: Whip the Filling
- Beat the softened cream cheese until it’s smooth and lump-free.
- Add the powdered sugar and vanilla and keep mixing until combined.
- In another bowl, whip the heavy cream until stiff peaks form (you know it’s ready when you can hold the bowl over your head without wearing it — no, don’t actually try that… or do, at your own risk 😂).
- Gently fold the whipped cream into the cream cheese mixture until smooth and fluffy.
Step 3: Assemble
- Pour the filling over the chilled crust and spread it evenly.
- Cover the pan with plastic wrap and chill for at least 4 hours (overnight is even better if you can resist).
Step 4: Add Toppings & Serve
- Once set, cut into squares or bars.
- Top with your favorite goodies — fruit, sauce, crushed cookies, whatever makes you happy.
- Eat and bask in the glory of your creation.
Tips & Tricks for Perfect Bars
Wanna level up? Here are my go-to tips:
- Use room temperature cream cheese: Unless you enjoy lumps in your filling, just trust me on this.
- Chill thoroughly: If you cut it too soon, it won’t hold its shape. Patience, grasshopper.
- Line your pan: Use parchment paper so you can lift out the whole slab easily and cut nice, clean bars.
- Play with flavors: Add lemon zest to the filling for a zing, or mix cocoa powder into the crust for chocolate vibes.
Ever tried mixing Nutella into the filling? OMG. Do it. You’re welcome.
No-Bake vs. Baked Cheesecake: The Showdown
So you’re probably wondering — how do these bars compare to the classic baked version? IMO, here’s the deal:
| Feature | No-Bake Cheesecake Bars | Baked Cheesecake |
| Ease of Preparation | Easiest thing ever | Requires skill & patience |
| Time | Quick (just chill) | Slow (bake + cool) |
| Texture | Light & creamy | Dense & custardy |
| Risk of Cracks? | Nope 🙂 | Yup 😬 |
So unless you’re trying to impress Paul Hollywood himself, no bake is the obvious winner.
Fun Variations You Should Totally Try
If you’re feeling creative, here are some spins on the classic recipe:
Fruity Bliss
- Swirl some raspberry jam into the filling before chilling.
- Top with fresh mango or pineapple for tropical vibes.
Chocolate Overload
- Mix cocoa powder into the crust or even the filling.
- Drizzle with dark chocolate ganache and sprinkle with chocolate chips.
Cookie Madness
- Use crushed Oreos instead of graham crackers for the crust.
- Sprinkle extra cookie crumbs on top.
See how versatile it is? Honestly, the hardest part is choosing which version to make first.
Common Mistakes and How to Avoid Them
Let me save you from some rookie mistakes:
- Over-whipping the cream: It turns into butter real fast if you overdo it. Stop as soon as stiff peaks form.
- Under-chilling: It really needs those hours to firm up, so plan ahead.
- Cutting with a dull knife: Use a sharp knife and wipe it clean between cuts for those Instagram-worthy bars.
Ever tried cutting cheesecake bars with a butter knife? Yeah… don’t. Learn from my pain.
Why These Bars Are Perfect for Any Occasion
Seriously — these cheesecake bars are the ultimate crowd-pleaser. Here’s why:
- Parties: Bite-sized portions make them easy to serve.
- Potlucks: They travel well and don’t require reheating.
- Self-care: Who needs an excuse to treat yourself?
Plus, let’s be real — everyone loves cheesecake. If someone says they don’t, they’re either lying or not worth your time. 😉
FAQs: about No-Bake Cheesecake Bars
Can I freeze no-bake cheesecake bars?
You sure can. Wrap them tightly and freeze for up to a month. Thaw in the fridge before serving.
Can I make them dairy-free?
Yup. Use plant-based cream cheese and whipped coconut cream. Tastes amazing, too.
How long do they last in the fridge?
About 3–4 days… if they even last that long before you eat them all.
Related Recipes
- Banana Pudding Crunch Cheesecake Recipe
- Caramel Apple Cheesecake Cups Recipe
- Skinny Coconut Cheesecake Bars Recipe
Final Thoughts about No-Bake Cheesecake Bars
So there you have it — my go-to, no-stress, no bake cheesecake bars recipe. They’re easy, versatile, and pretty much impossible to mess up (unless you forget to chill them, in which case… good luck).
Next time you’re craving something sweet but can’t deal with your oven judging you, whip these up. Trust me, you’ll feel like a dessert rock star without even breaking a sweat.
Now, go ahead — impress your friends, feed your family, or just eat them all yourself while binge-watching Netflix. I won’t tell. 😉
If you make these, let me know how they turned out — and what toppings you chose. Personally, I’m team raspberry swirl forever. ❤️
FYI: If you don’t make these soon, you’re really missing out. Just sayin’.
Ready to ditch the oven and embrace the chill? Go grab your ingredients and get started. You deserve this. 🙂
No-Bake Cheesecake Bars Recipe
Ingredients
- 2 cups graham cracker crumbs
- ½ cup unsalted butter melted
- 2 cups cream cheese softened
- 1 cup powdered sugar
- 1 tsp vanilla extract
- 1 cup heavy whipping cream whipped
- Optional: fruit topping chocolate drizzle, or crushed cookies
Instructions
- Mix graham cracker crumbs with melted butter until well combined.
- Press the mixture evenly into the bottom of a lined 9x9-inch pan. Chill for 15 mins.
- In a bowl, beat cream cheese, powdered sugar, and vanilla until smooth.
- Fold in whipped cream gently until fully combined.
- Spread cheesecake mixture over the chilled crust evenly.
- Cover and refrigerate for at least 4 hours or overnight.
- Slice into bars and top with desired toppings before serving.
Notes
- For a firmer texture, chill overnight.
- For added flavor, mix some lemon juice or zest into the cheesecake filling.
DID YOU MAKE THIS EASY RECIPE?
If you have, then share it with us by sending a photo. We’re excited to see what you’ve made 🙂Printable Recipe Card
Want just the essential recipe details without scrolling through the article? Get our printable recipe card with just the ingredients and instructions.

