So, you want all the cozy, spiced-up glory of a pumpkin pie but without the high-stakes drama of blind-baking a crust and the inevitable panic of a soggy bottom? Same. You’re not trying to win a baking championship on national television; you’re just trying to win over your own taste buds (and maybe impress your mother-in-law). These pumpkin pie bars are your new secret weapon. They’re the lazy genius’s path to dessert nirvana.
Why This Recipe is Awesome
Let’s cut to the chase. This recipe is basically idiot-proof, which is why I love it so much. It requires zero fancy pastry skills. You just press the crust into the pan—no rolling pin, no swearing, no flour all over your floor. The filling is a simple dump-and-stir situation. It’s the dessert equivalent of your comfiest sweatpants: reliable, forgiving, and always makes you feel good. Plus, it makes a whole tray, meaning you can feed a crowd or, you know, just have an excellent excuse to eat pumpkin pie for breakfast for a week. No judgment here.
Ingredients You’ll Need
Gather your squad. This is everything you’ll need for your journey to autumnal bliss.
For the Shortbread Crust:
- 1 cup (2 sticks) unsalted butter, melted: The glorious, fatty foundation of our operation.
- ½ cup granulated sugar: For a little sweetness in the base.
- 2 teaspoons vanilla extract: The flavor booster.
- ½ teaspoon salt: To make all the other flavors pop.
- 2 cups all-purpose flour: The trusty workhorse that brings it all together.
For the Pumpkin Pie Filling:
- 1 (15 oz) can of pure pumpkin purée: NOT pumpkin pie filling. That stuff is already pre-seasoned and will throw our whole operation into chaos.
- 3 large eggs: They’re the binding agents that hold our dreams together.
- 1 (12 oz) can of evaporated milk: This is the secret to that luxuriously creamy, rich texture.
- ¾ cup granulated sugar: Sweetness level: optimal.
- ¼ cup packed light brown sugar: For a hint of molasses-y depth.
- 2 teaspoons pumpkin pie spice: The MVP of the spice world.
- ½ teaspoon salt: Again, it’s all about balancing the sweet.
For the Garnish (Optional but Highly Recommended):
- Whipped cream: The fluffy cloud on top.
- A little extra sprinkle of pumpkin pie spice: For that ~chef’s kiss~ finish.
Step-by-Step Instructions
- Preheat and Prep. Crank your oven to 350°F (175°C). Take a 9×13 inch baking pan and line it with parchment paper, leaving some overhang on the sides. This isn’t just for neatness; it’s your golden ticket to lifting the entire slab of bars out later for easy, crumb-free slicing. If you hate parchment, just grease the pan really well.
- Make the Press-In Crust. In a medium bowl, mix the melted butter, sugar, vanilla, and salt. Stir in the flour until just combined. It will look like a thick, delicious cookie dough. Dump this mixture into your prepared pan and press it into an even layer on the bottom. A flat-bottomed measuring cup helps you press it down firmly without getting your fingers all sticky.
- Par-Bake That Crust. Pop the crust into your preheated oven for 15 minutes. This gives it a head start so it doesn’t end up a soggy mess under the weight of all that filling. It should be just barely starting to golden at the edges.
- Whisk Together the Filling. While the crust is baking, grab a large bowl. Whisk the pumpkin purée and eggs together until smooth. Then, whisk in the evaporated milk, both sugars, pumpkin pie spice, and salt. Keep whisking until it’s silky smooth and beautifully orange. No need for a mixer here; some good old-fashioned elbow grease will do.
- Assemble and Bake. Once the crust is out of the oven (let it cool for a minute if you’re paranoid), slowly pour the filling over the warm crust. Gently slide the pan back into the oven and bake for 35-45 minutes. The edges should look set, but the center should still have a slight jiggle to it—like a bowl of Jell-O, not a waterbed.
- Cool Completely (The Hardest Part). This is a test of your willpower. You MUST let the bars cool completely on a wire rack. I’m talking several hours. Then, for the ultimate clean slice, cover them and refrigerate for at least 4 hours, or ideally overnight. This sets the filling perfectly.
- Slice and Serve. Use the parchment paper to lift the entire block of bars onto a cutting board. Slice into squares, top with a mountain of whipped cream, and devour.
Common Mistakes to Avoid
- Using Pumpkin Pie Filling: I’m gonna say it again: PURE pumpkin purée. The can should have one ingredient: pumpkin. Using the pre-spiced filling will result in a weirdly spiced, overly sweet disaster.
- Skipping the Crust Par-Bake: Thinking you can just pour the filling on raw dough and call it a day? Rookie mistake. That’s a one-way ticket to Soggy Bottom City. Par-baking is non-negotiable.
- Overbaking the Filling: That jiggle is your friend. If you bake it until the center is completely rock solid, you’ll have dry, cracked pumpkin bars. Pull it when the center still jiggles slightly—it will set as it cools.
- Impatient Slicing: Cutting into these while they’re warm is a mess. It’s a delicious, pumpkin-y mess, but a mess nonetheless. Let them cool and set. Your patience will be rewarded.
Alternatives & Substitutions
- Gluten-Free? No problem! Swap the all-purpose flour in the crust for a 1:1 gluten-free baking blend. The filling is naturally gluten-free.
- Dairy-Free? Use your favorite plant-based butter in the crust. For the evaporated milk, you can substitute canned coconut milk (full-fat, please) for a subtly tropical twist.
- Out of Pumpkin Pie Spice? Make your own! Whisk together 1 tablespoon cinnamon, 2 teaspoons ginger, 1 teaspoon nutmeg, ½ teaspoon allspice, and ½ teaspoon cloves. Use 2 teaspoons of this mix for the recipe.
- Want a Nutty Crunch? Add ½ cup of chopped pecans or walnuts to the crust mixture before pressing it in.
FAQ
Can I freeze these pumpkin pie bars?
Absolutely! They freeze like a dream. Once cooled and sliced, place them in a single layer on a baking sheet to freeze solid, then transfer to a freezer bag or container. They’ll keep for up to 3 months. Thaw in the fridge overnight.
My filling puffed up and cracked! What did I do wrong?
You probably over-baked it a tad or cooled it too quickly. It happens to the best of us! It will still taste incredible. A dollop of whipped cream is great at hiding any cosmetic imperfections.
Can I use fresh pumpkin instead of canned?
Technically, yes. But you’ll need to cook and purée it until it’s very thick and dry (canned pumpkin is cooked down significantly). If your fresh purée is too watery, you’ll have a sad, soupy filling. Canned is just so much easier and more reliable.
Why evaporated milk? Can I use regular milk or heavy cream?
Evaporated milk is concentrated and has less water, which gives the filling its classic, rich, and creamy texture without being too heavy. Using regular milk might make the bars a bit watery. Heavy cream would make them very rich, almost like a custard. I’d stick with the evap!
How long will these last in the fridge
Happily, they’ll stay delicious for about 4-5 days when stored in an airtight container. If they last that long.
This response is AI-generated, for reference only.
Related Recipes;
- Pumpkin Spice Muffins Recipes
- Easy Pecan Pie Recipe
- Irresistible Churros Recipe
- Best-Ever Turkey Oreo Balls Recipe
🎃 Final Thoughts
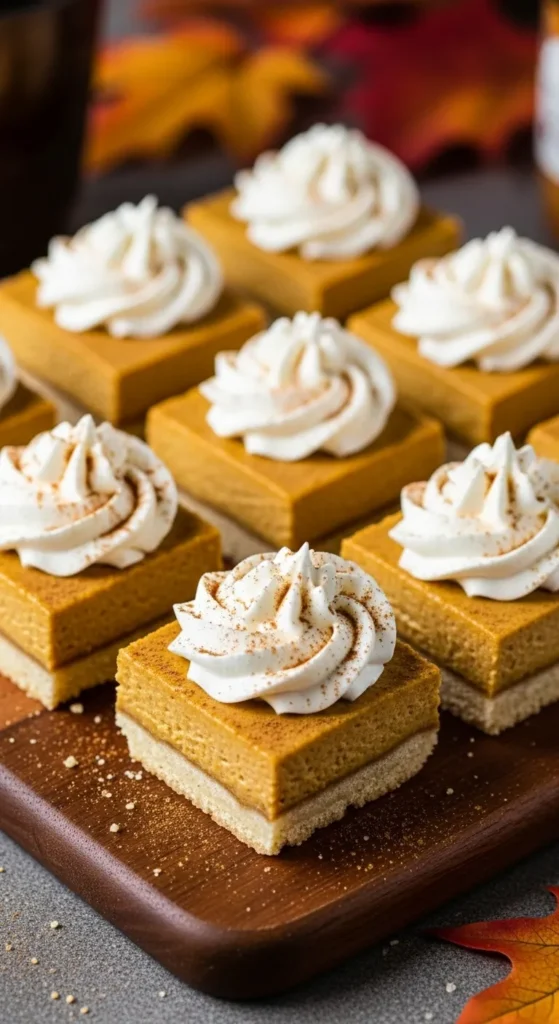
Pumpkin Pie Bars are everything we love about the classic holiday dessert—warm spices, creamy pumpkin filling, and a buttery crust—all in a convenient, sliceable form. They’re easier to make than a traditional pie but just as flavorful, making them perfect for both gatherings and casual fall cravings.
Whether served chilled or slightly warm with a dollop of whipped cream, these bars are a crowd-pleasing favorite that brings the essence of autumn to every bite.
Simple, satisfying, and unmistakably seasonal—these bars are fall baking at its best.
Tip: Store in the fridge for up to 5 days, or freeze for a ready-made treat anytime.
Printable Recipe Card
Want just the essential recipe details without scrolling through the article? Get our printable recipe card with just the ingredients and instructions.

