So you’re staring into the pantry, craving something warm, buttery, and just sweet enough to feel like a hug from the inside, but you’re also deeply committed to not spending your entire afternoon on it. Same, friend, same. Let’s skip the fuss and get straight to the good stuff: impossibly easy, melt-in-your-mouth raisin scones that will make you feel like a baking champion without the stress.
Why This Recipe is Awesome
Let’s be real, some scone recipes are more high-maintenance than a reality TV star. Not this one. This recipe is gloriously idiot-proof. It requires zero fancy equipment (your hands are your best tools here) and comes together faster than you can binge a new Netflix episode. The result? A batch of scones that are perfectly crumbly on the outside, soft and fluffy on the inside, and studded with sweet, plump raisins. They’re your secret weapon for impressing guests, treating yourself on a lazy Sunday, or bribing your way back into someone’s good graces. They’re basically edible magic.
Ingredients You’ll Need
Gather your squad. This is the dream team that’s about to make your kitchen smell like a cozy British bakery.
- All-purpose flour: The trusty foundation of our scone empire.
- Granulated sugar: Just enough for a hint of sweetness, not a sugar rush.
- Baking powder: The little chemical miracle that makes them puff up beautifully.
- Salt: The wingman that makes all the other flavors pop. Don’t you dare skip it.
- Cold unsalted butter: This is NON-NEGOTIABLE. Cold = flaky, glorious layers. If you use warm butter, we can’t be friends.
- Heavy cream: For that rich, tender crumb. Plus a little extra for brushing on top to get that gorgeous golden finish.
- An egg: The binder that holds our happy little family together.
- Vanilla extract: The flavor fairy that makes everything taste homemade and wonderful.
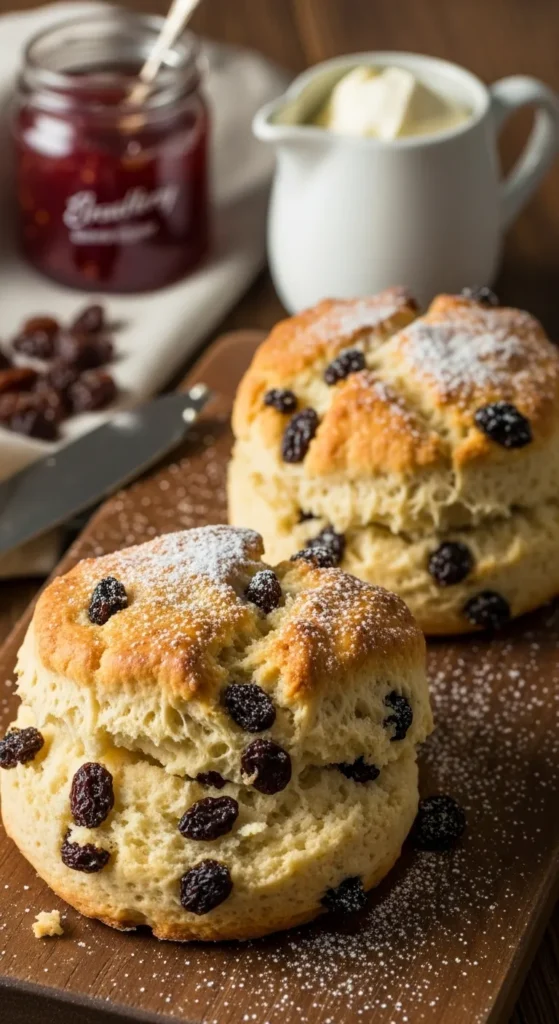
- Raisins: The classic, chewy, sweet surprise in every bite. Don’t like ‘em? Keep scrolling for alternatives!
Step-by-Step Instructions
- Prep Your Stage. Preheat your oven to 400°F (200°C). Line a baking sheet with parchment paper. This is your scone’s red carpet. Don’t make them walk on a dirty, ungreased pan.
- Mix the Dry Crew. In a large bowl, whisk together 2 cups of flour, 1/4 cup of sugar, 1 tablespoon of baking powder, and 1/2 teaspoon of salt. Give it a good whisk to make sure the baking powder isn’t clumping in one spot.
- Butter Up. Grab your cold butter and cut it into small cubes. Toss them into the flour mixture. Now, get in there with your fingertips! Rub the butter into the flour until the mixture looks like rough, sandy breadcrumbs with a few larger pea-sized bits of butter remaining. This is the secret to flakiness. You can use a pastry cutter, but squishing it with your hands is way more therapeutic.
- Combine the Wet Team. In a separate jug or bowl, whisk together 1/2 cup of heavy cream, 1 large egg, and 1 teaspoon of vanilla extract until smooth.
- Bring It All Together. Pour the wet ingredients and your raisins into the flour-butter bowl. Gently mix with a fork until a shaggy, slightly sticky dough forms. It might look a bit rough—that’s perfect! Over-mixing is the enemy of tender scones.
- Shape & Cut. Dump the dough onto a lightly floured surface. Gently pat it into a circle about 1-inch thick. Use a sharp knife or a floured glass to cut it into 8 wedges or circles. Pro tip: Press straight down—don’t twist! Twisting seals the edges and prevents a good rise.
- The Golden Touch. Place the scones on your prepared baking sheet. Brush the tops with a little extra heavy cream. This is what gives them that professional, glossy, golden-brown top.
- Bake to Perfection. Pop them in the oven for 12-15 minutes, or until they’re beautifully puffed and golden on top. Your house will now smell incredible. You’re welcome.
- Cool (If You Can). Let them cool on the pan for a few minutes before transferring them to a wire rack. They are best served warm, slathered with more butter, clotted cream, or jam.
Common Mistakes to Avoid
- Using Warm Butter: I see you, thinking you can soften it just a liiiittle bit. Resist! Cold butter creates steam pockets as it melts in the oven, which is what gives you those flaky layers. Warm butter = greasy, flat pucks.
- Overworking the Dough: You are not kneading bread. You are just gently bringing the dough together. The more you handle it, the more you develop the gluten, leading to tough, dense scones. Mix until it just comes together, then walk away.
- Skipping the Cream Brush: It takes 10 seconds and makes a world of difference in appearance and texture. Don’t be lazy. Do it for the ‘Gram.
- Not Preheating the Oven: Thinking, “Eh, it’ll heat up while I work.” Rookie mistake. A properly hot oven is crucial for that initial burst of rise. Preheat it. Always.
Alternatives & Substitutions
Not a raisin fan? Or out of an ingredient? No panic.
- Raisins: Swap them for an equal amount of dried cranberries, chopped apricots, or chocolate chips. Want a citrus zing? Add the zest of an orange to the dough.
- Heavy Cream: You can use whole milk in a pinch, but the scones won’t be quite as rich. Buttermilk is also a fantastic sub—it adds a lovely tang.
- Vegan? Use a plant-based butter (keep it cold!) and a thick, unsweetened plant-based milk like oat or soy milk mixed with a tablespoon of lemon juice to mimic buttermilk. A flax egg (1 tbsp ground flax + 3 tbsp water) can work for the egg.
- Gluten-Free? A good 1:1 gluten-free flour blend works wonders here. Just be extra gentle when mixing.
FAQ
Can I make the dough ahead of time?
Absolutely! You can mix the dry and wet ingredients separately the night before. In the morning, combine them, shape, and bake. You can also freeze the unbaked, cut scones on a tray and then toss them in a bag. Bake from frozen, adding a few extra minutes.
Why are my scones as hard as hockey pucks?
You probably overmixed the dough or used warm butter. Remember: a light touch is a loving touch.
Can I use margarine instead of butter?
Well, technically yes, but why hurt your soul like that? Butter provides the best flavor and texture. If you must, use a very high-quality, cold margarine.
My scones didn’t rise! What happened?
Your baking powder might be old and tired (check the expiration date!), you overworked the dough, or you didn’t preheat the oven. Give your baking powder a quick test: drop a bit in hot water. If it doesn’t fizz vigorously, it’s time for a new can.
What’s the best way to store these beauties?
They are best eaten the day they are made. But if you must, keep them in an airtight container at room temp for a day. To revive them, pop them in the toaster oven for a minute.
Clotted cream or jam first?
Ah, the great debate that has divided nations. The Cornish way is jam first, then cream. The Devonshire way is cream first, then jam. I say, do whatever brings you the most joy. It’s your scone, your rules.
Related Recipes:
- Pumpkin Spice Muffins Recipes
- Easy Pecan Pie Recipe
- Irresistible Churros Recipe
- Best-Ever Turkey Oreo Balls Recipe
Final Thoughts on Raisin Scones
Raisin scones are a timeless classic — subtly sweet, buttery, and perfectly crumbly with pops of juicy raisins in every bite. They’re simple to make, yet feel elegant and nostalgic, whether served at a cozy breakfast table or during a refined afternoon tea.
These scones offer:
-
Delicate texture — tender inside with a golden, crisp top
-
Sweet bursts of raisin — perfectly balanced, not overpowering
-
Buttery richness — without being heavy or greasy
-
Versatility — easy to customize with spices, citrus zest, or different dried fruits
Serve them warm with a generous pat of butter, clotted cream, or a dollop of jam, and you’ve got comfort in its purest form.
Whether you’re baking for guests or enjoying a quiet moment with tea or coffee, raisin scones bring a sense of warmth and simplicity that’s hard to beat.
Printable Recipe Card
Want just the essential recipe details without scrolling through the article? Get our printable recipe card with just the ingredients and instructions.

