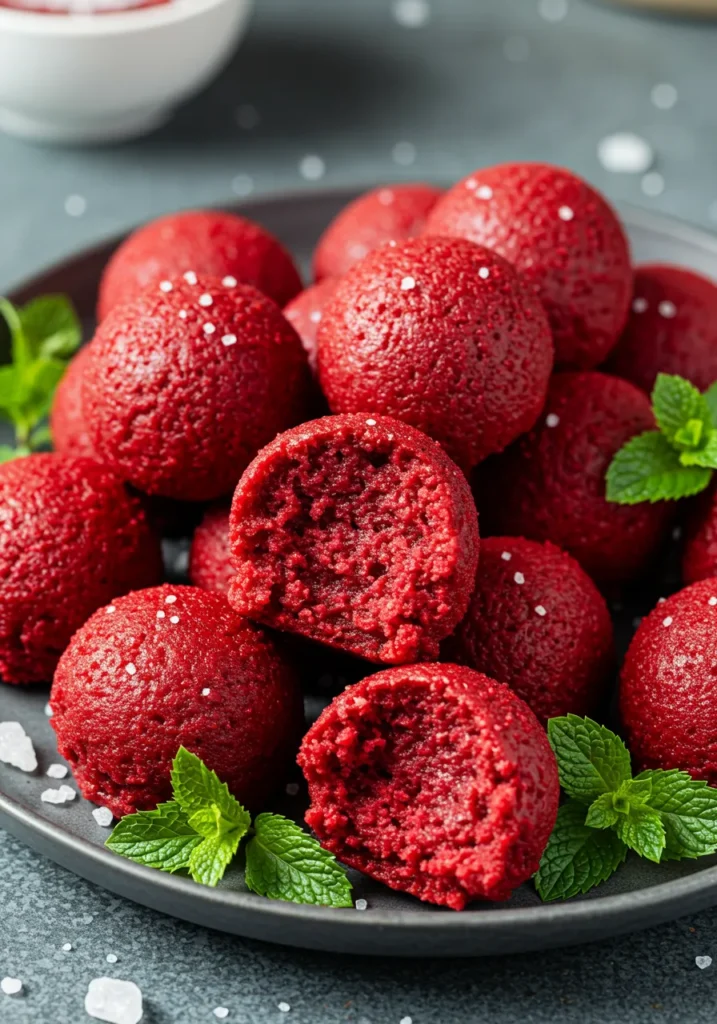
Alright, let’s be real here — who hasn’t stared at a tray of red velvet cake balls and thought, “Do I really need to share these?” (Spoiler: You don’t. 😏)
If you’re looking for a foolproof, ridiculously delicious, and Instagram-worthy treat, these red velvet cake balls are your answer. Whether you want to impress your friends, treat yourself, or just pretend you’re on a baking show for the day, I’ve got you.
And yes — I’ve made these more times than I care to admit. Let me walk you through it like a friend would, minus the judgment about how many you eat straight from the fridge.
Why Red Velvet Cake Balls?
Honestly, why not? They’re the perfect mix of moist cake, creamy frosting, and a smooth chocolate shell. Plus, they’re portable and don’t require forks, plates, or even dignity.
Here’s why you’ll love them:
- They’re cute AF and look fancy without much effort.
- You can make them ahead of time — perfect for parties or lazy Sundays.
- They freeze well, so you can have a stash ready when the cravings hit (trust me, they will hit).
Ever wondered why everyone loses their minds over red velvet? It’s that rich, cocoa-kissed flavor combined with tangy cream cheese frosting. And when you roll that goodness into a bite-sized ball and coat it in chocolate? Game over.
Ingredients You’ll Need for Red Velvet Cake Balls
Don’t worry — you don’t need a culinary degree or a shopping cart full of obscure ingredients. If you can stir and roll, you’re golden.
Here’s the grocery list:
- 1 box red velvet cake mix (or bake one from scratch if you’re feeling ambitious)
- Ingredients called for on the cake mix box (usually eggs, oil, water)
- 1 (8 oz) package cream cheese (softened)
- ½ cup butter (softened)
- 4 cups powdered sugar
- 2 cups white chocolate chips or candy melts
- Optional: sprinkles, crushed nuts, or edible glitter for extra flair
FYI: If you’re one of those overachievers who insists on baking everything from scratch — go for it. But IMO, a boxed mix works perfectly here and saves you time.
Step-by-Step Guide: From Batter to Bliss
Step 1: Bake That Cake
Prepare your red velvet cake according to the box instructions. Once it’s baked, let it cool completely. And I mean completely — otherwise, you’ll end up with a sticky, steamy mess.
Step 2: Crumble Like a Pro
Once your cake is cooled, use your hands (or a fork if you’re fancy) to crumble it into fine crumbs in a large bowl. Yes, this feels weirdly satisfying.
Step 3: Make the Frosting
In another bowl, beat together the softened cream cheese, butter, and powdered sugar until smooth and creamy. Don’t skimp on this step — this frosting is the glue that holds your cake balls together.
Step 4: Mix & Roll
Add the frosting to the cake crumbs and mix thoroughly. Once everything’s combined, roll the mixture into balls — about the size of a ping pong ball. Place them on a baking sheet lined with parchment paper.
Step 5: Chill Out
Pop the tray of cake balls into the fridge for at least an hour. This makes them easier to dip without falling apart (and gives you time to question your life choices).
Step 6: Coat & Decorate
Melt your white chocolate chips or candy melts in the microwave (30-second intervals, stirring in between). Dip each chilled cake ball into the melted chocolate, let the excess drip off, and place them back on the parchment paper. While the coating is still wet, add sprinkles or any toppings you like.
Pro Tips for Perfect Cake Balls
Because I’ve definitely learned these the hard way:
- Don’t rush the chilling process. Warm cake balls + melted chocolate = disaster.
- Use a fork or toothpick for dipping. Your fingers will just make things messy.
- If the chocolate starts to harden while you’re working, just pop it back in the microwave for a few seconds.
- Want to make them ahead? These babies stay good in the fridge for about a week, or in the freezer for up to 3 months.
Ever wonder how bakeries get their cake balls looking so perfect? They probably have more patience than I do. But seriously — a second coat of chocolate and some practice goes a long way.
Fun Variations to Try
Because plain red velvet cake balls are awesome, but sometimes you want to mix things up:
- Dark chocolate coating instead of white chocolate for a richer flavor.
- Add mini chocolate chips to the cake/frosting mixture for extra texture.
- Use colored candy melts to match a party theme — pastel for baby showers, spooky colors for Halloween, etc.
- Roll finished cake balls in crushed Oreos, coconut flakes, or edible glitter for some ✨ pizzazz ✨.
Ever thought about adding a surprise filling? You can even hide a nut or a piece of caramel inside each ball. Just don’t tell your guests and watch their faces when they bite in. 😉
When to Serve These Beauties?
Basically, anytime you need to impress people without actually trying too hard.
- Birthday parties (kids and adults both go nuts for them)
- Holiday gatherings (they look amazing on a cookie platter)
- Office potlucks (and yes, you will become everyone’s favorite coworker)
- Netflix marathons on your couch when you don’t feel like sharing (been there)
Seriously though — they’re perfect for anything. Even if the only person you’re trying to impress is yourself.
Why You Should Make These (Like, Now)
Let me break it down:
- They’re easy. You don’t need to be a professional baker.
- They’re impressive. Everyone assumes you slaved for hours (you didn’t).
- They’re delicious. Enough said.
Ever had that moment at a party where you bring something, and people keep coming up to you saying, “Oh my gosh, did you make these?!” Yeah — this recipe does that. Every time.
And honestly — they’re just plain fun to make. You can even get the kids involved, although fair warning: there will be red crumbs everywhere.
Related Recipes
- Brownie Milkshake Recipe
- Chewy Coconut Bars Recipe
- Cannoli Cupcakes Recipe
- Chewy Coconut Bars Recipe
Final Thoughts about Red Velvet Cake Balls
So, what are you waiting for? Get your hands a little messy and whip up a batch of these red velvet cake balls. Whether you’re making them for a crowd or hoarding them for yourself (no judgment), they’re guaranteed to deliver.
And hey — if anyone asks for the recipe? You can totally pretend it’s a secret family heirloom. 😉
So go ahead, grab that cake mix and start rolling. And remember: calories don’t count when the dessert is this cute.
Red Velvet Cake Balls Recipe
Ingredients
- 1 box red velvet cake mix plus ingredients listed on box
- 1 cup cream cheese frosting
- 12 oz semi-sweet chocolate or candy melts
- Sprinkles or crushed nuts for decoration optional
Instructions
- Bake red velvet cake according to package directions; let it cool completely.
- Crumble cooled cake into a large bowl.
- Mix in cream cheese frosting until fully combined.
- Roll mixture into 1-inch balls and place on a lined baking sheet.
- Chill balls in the freezer for 20–30 minutes.
- Melt chocolate or candy melts in a microwave-safe bowl.
- Dip each chilled cake ball into melted chocolate, coating evenly.
- Place on parchment paper and add sprinkles or nuts if desired.
- Let chocolate set before serving or storing.
Notes
- Use a fork or dipping tool to coat balls smoothly.
- White chocolate works great for a colorful contrast.
- Store in an airtight container for up to a week or freeze for longer.
DID YOU MAKE THIS EASY RECIPE?
If you have, then share it with us by sending a photo. We’re excited to see what you’ve made 🙂Printable Recipe Card
Want just the essential recipe details without scrolling through the article? Get our printable recipe card with just the ingredients and instructions.

