So, let me guess: you’re standing in your kitchen, staring at a sad, shiny foil packet of store-bought Pop-Tarts and thinking, “There has to be a better way.” Well, spoiler alert: there is. And you just found it.
I’ve been making homemade Strawberry Pop-Tarts for years, and honestly? They ruin the store-bought ones for you (in the best way possible). If you want flaky pastry, gooey filling, and frosting that doesn’t taste like plastic, stick with me. I’ll walk you through it step by step. Oh, and there may or may not be sprinkles involved. (There are. Of course.)
Ready? Let’s do this.
Why Make Strawberry Pop-Tarts at Home?
You might be thinking, “Why bother when I can just buy a box for $3?” Great question — here’s why:
- They taste 1000x better. Like, no contest. The crust is buttery and actually flaky.
- You control the sweetness. Not everyone wants a sugar bomb first thing in the morning (but no judgment if you do).
- No weird ingredients. Seriously… what even is “red 40”?
- Bragging rights. Because nothing says “I’ve got my life together” like whipping up homemade Pop-Tarts.
FYI, they’re also ridiculously fun to make. And your kitchen will smell like a bakery. Just saying.
What You’ll Need for the Perfect Strawberry Pop-Tarts
Here’s the beauty of this recipe — you don’t need any fancy gadgets or mystical ingredients. Just good ol’ pantry staples and a sense of adventure.
Ingredients:
- For the pastry:
- 2 ½ cups all-purpose flour
- 1 tablespoon sugar
- 1 teaspoon salt
- 1 cup (2 sticks) unsalted butter, cold & cubed
- 4–6 tablespoons ice water
- For the filling:
- ¾ cup strawberry jam (the real kind, not the “jelly with questionable fruit bits” kind)
- 1 tablespoon cornstarch
- 1 tablespoon water
- For the icing:
- 1 cup powdered sugar
- 2–3 tablespoons milk
- ½ teaspoon vanilla extract
- Sprinkles (obviously — what are we, monsters?)
See? Nothing scary. You probably have most of this already.
Step-by-Step: Making Strawberry Pop-Tarts Like a Pro
Okay, now we’re getting to the good part. Follow these steps and you’ll never look at those boxed imposters the same way again.
Step 1: Make the pastry
In a large bowl, whisk together the flour, sugar, and salt. Then, using a pastry cutter (or your hands, if you don’t mind getting a little messy), cut in the cold butter until the mixture looks like coarse crumbs.
Add ice water, one tablespoon at a time, until the dough holds together when you press it. Form it into a disk, wrap it in plastic wrap, and chill for at least 30 minutes.
(Pro tip: Don’t skip chilling. Warm dough = sad, sticky mess. Nobody wants that.)
Step 2: Prepare the filling
Mix the strawberry jam, cornstarch, and water in a small saucepan. Cook over medium heat for a couple minutes until it thickens slightly. Then set it aside to cool.
Why cornstarch? It helps the filling stay put instead of oozing out like lava. Ever wondered why those store ones always have just a sad smear of filling? Yeah, this fixes that.
Step 3: Roll and cut the dough
After the dough has chilled, roll it out on a lightly floured surface into a big rectangle, about ⅛ inch thick.
Cut out rectangles about 3 inches by 4 inches. You’ll need pairs of them, so aim for even numbers.
(BTW, if your rectangles look more like weird parallelograms… who cares? They’ll still taste amazing.)
Step 4: Assemble the Pop-Tarts
Place half of the rectangles on a baking sheet lined with parchment paper. Spoon about a tablespoon of filling in the center of each.
Top each with another rectangle of dough. Use a fork to crimp the edges and seal them shut. Then poke a couple holes on top with a toothpick so steam can escape.
Chill the assembled Pop-Tarts in the fridge for 20–30 minutes. This helps them hold their shape in the oven.
Step 5: Bake
Bake at 350°F (175°C) for about 25–30 minutes, or until golden brown. Then let them cool completely before icing. (I know it’s hard to wait. But unless you enjoy frosting melting into a sad puddle, patience is key. 🙂
Step 6: Frost & Sprinkle
Mix the powdered sugar, milk, and vanilla until smooth. Spread the icing over the cooled Pop-Tarts and hit them with sprinkles before it sets.
Congrats! You just made Strawberry Pop-Tarts better than anything that ever came out of a toaster.
Tips and Tricks (Because You Deserve Success)
Here are a few extra pointers to make sure you’re winning at life and at baking:
- Keep the butter cold. This is what makes the crust flaky instead of chewy.
- Don’t overfill. Unless you’re into strawberry lava eruptions (no judgment).
- Let them cool. Hot jam burns. Like… a lot.
- Get creative. Not into strawberries? Use raspberry jam. Or Nutella. Or peanut butter & jelly. You do you.
Why Homemade Always Wins (IMO)
I’ve tested more strawberry Pop-Tarts than I care to admit (you’re welcome), and homemade ones just hit different.
For starters:
- You can actually taste the butter in the crust.
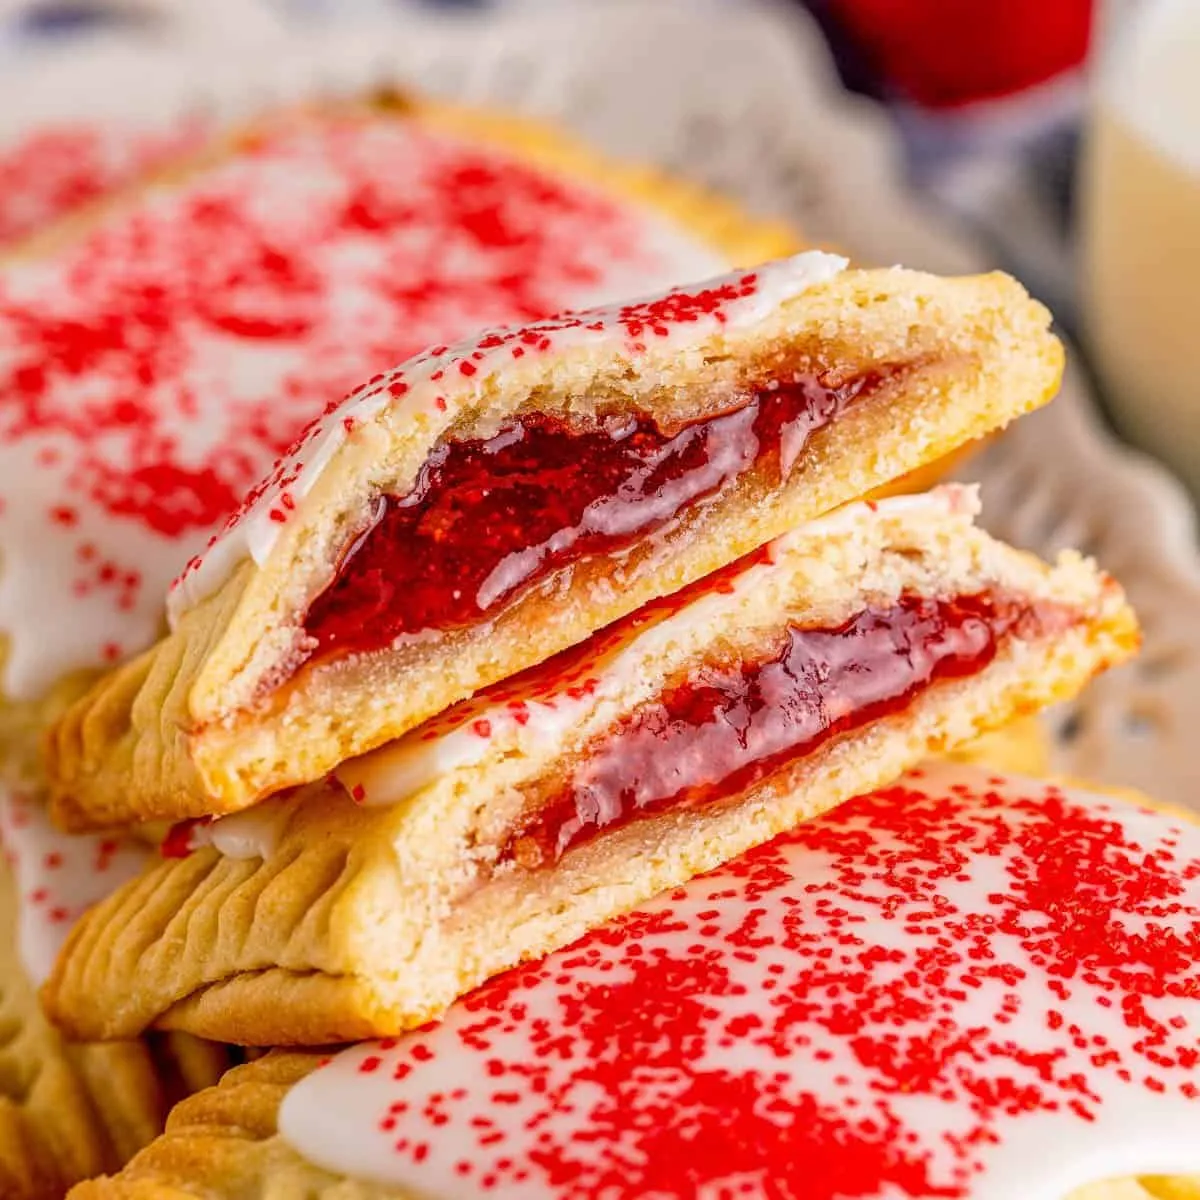
- The filling is generous, fruity, and not that weird chemical pink.
- The frosting isn’t some chalky mess — it’s soft, sweet, and perfect.
And let’s not forget: You made them. That alone makes them taste better, doesn’t it?
So, tell me — why settle for mediocrity when greatness is just an oven away?
Can You Freeze Homemade Pop-Tarts?
Oh heck yes. That’s one of the best things about these. Bake them, let them cool (without frosting), then freeze in an airtight bag.
When you’re ready, just pop them in a toaster or oven for a few minutes. Boom — instant happiness.
(FYI: They stay good for about 2 months in the freezer. Not that they ever last that long at my house. Just saying.)
Common Mistakes to Avoid
Even the best of us have Pop-Tart fails. Don’t be that person. Here’s what to watch out for:
- Dough too warm? You’ll end up with melty, sticky rectangles that won’t cooperate. Chill it.
- Overfilling? Yeah, I’ve already warned you — don’t go rogue here.
- Skipping the steam holes? Your Pop-Tarts will balloon like sad little pillows. Poke the holes.
See? Easy fixes.
Related Recipes
Final Thoughts about The Only Strawberry Pop-Tarts
Look — making homemade Strawberry Pop-Tarts isn’t the fastest thing you’ll ever do in your kitchen. But is it worth it?
Absolutely.
You’ll bite into that first flaky, fruity, frosted pastry and wonder why you ever settled for the store-bought ones in the first place. Your kitchen will smell amazing, your friends and family will think you’re a wizard, and you’ll get to say, “Oh, those? Yeah, I made them. No big deal.”
And let’s be real: if you’re going to eat dessert-for-breakfast, you may as well do it right.
So, what are you waiting for? Grab your flour, roll up your sleeves, and make some magic happen.
TL;DR (Because I Know You’re Skimming)
- Homemade Pop-Tarts > store-bought. Always.
- Flaky, buttery pastry + real strawberry filling + icing & sprinkles = happiness.
- Chill your dough. Don’t overfill. Poke the steam holes.
- You can freeze them for later (but good luck not eating them all immediately).
Alright, my friend — time for you to go forth and bake. Don’t forget to share your creations (or not… I won’t judge if you hoard them all for yourself 😉).
If you have any questions, shoot me a message or leave a comment. Or better yet, invite me over so I can taste-test them for you.
Happy baking!

The Only Strawberry Pop-Tarts Recipe
Ingredients
- 2 sheets refrigerated pie crust or homemade
- ½ cup strawberry jam
- 1 egg beaten (for egg wash)
- 1 cup powdered sugar
- 2 –3 tbsp milk
- ½ tsp vanilla extract
- Sprinkles optional
Instructions
- Preheat oven to 375°F (190°C) and line a baking sheet with parchment paper.
- Roll out pie crust and cut into equal rectangles (about 3x4 inches).
- Place 1 tbsp strawberry jam in the center of half the rectangles.
- Brush edges with egg wash, top with another rectangle, and press edges with a fork.
- Transfer to baking sheet, brush tops with egg wash.
- Bake 20–25 mins until golden brown, then cool slightly.
- Mix powdered sugar, milk, and vanilla for glaze. Spread over cooled pop-tarts.
- Add sprinkles if desired, let glaze set before serving.
Notes
- For a crispier texture, chill assembled pop-tarts for 15 mins before baking.
- You can swap strawberry jam with any fruit jam or Nutella.
DID YOU MAKE THIS EASY RECIPE?
If you have, then share it with us by sending a photo. We’re excited to see what you’ve made 🙂
Printable Recipe Card
Want just the essential recipe details without scrolling through the article? Get our printable recipe card with just the ingredients and instructions.

