Hey, friend! Ever pick up a head of cauliflower and think, “Okay, but how do I make you exciting?” Well, buckle up, because baked cauliflower is about to become your new obsession with its crispy edges and bold flavors. I made this for a weeknight dinner a while back, and my family fought over the last floret like it was the last slice of pizza! Ready to turn that humble veggie into a crispy, savory masterpiece? Let’s get roasting!
Why Baked Cauliflower is a Total Winner
So, what’s the hype about this dish? It’s not just a vegetable—it’s a crispy, flavor-packed side that can hold its own against any main course. I mean, who knew cauliflower could be this good? Here’s why this recipe rocks:
- Super Quick: Done in 35 minutes, perfect for busy nights or last-minute dinner plans.
- Crazy Versatile: Season it any way you like—it’s a blank canvas for bold flavors.
- Healthy and Tasty: Low-carb, gluten-free, and still tastes like a treat. No guilt here!
- Crowd-Pleaser: Even veggie-haters gobble this up. It’s like magic for picky eaters.
Ever wonder why roasted veggies always hit different? It’s that golden, crispy texture that makes every bite pure joy.
The Magic of Simple Seasoning
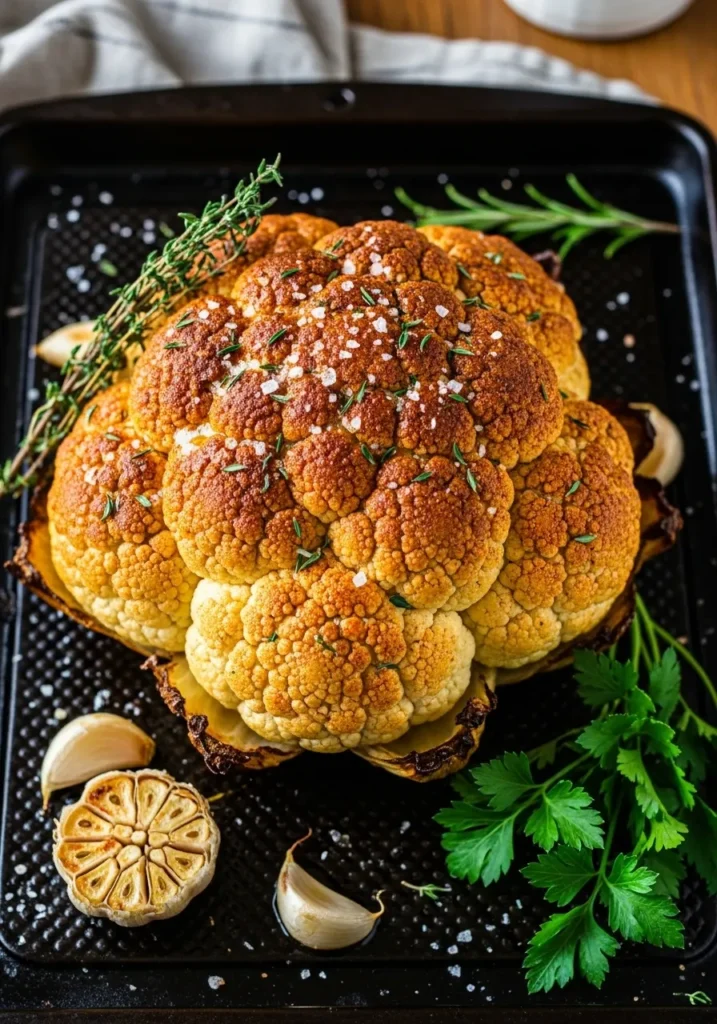
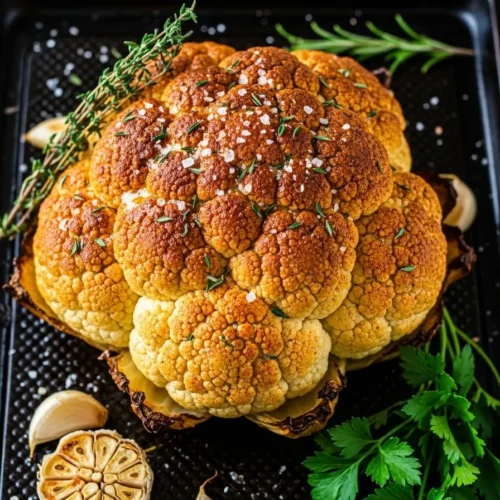
The star here is cauliflower, but the real magic comes from a simple mix of olive oil and spices that turn it into a crispy delight. I learned the hard way that drying the cauliflower is key—wet florets just steam and stay soggy. It’s like giving your cauliflower a quick pep talk before it hits the oven!
Ingredients You’ll Need
Alright, let’s talk ingredients. This recipe is all about keeping it simple with stuff you probably already have. Here’s what you’ll grab:
- 1 large head of cauliflower, cut into bite-sized florets
- 3 tbsp olive oil
- 1 tsp smoked paprika
- 1 tsp garlic powder
- ½ tsp onion powder
- ½ tsp salt
- ¼ tsp black pepper
- Optional: ¼ tsp red pepper flakes for a spicy kick
- Optional: 2 tbsp grated parmesan or fresh parsley for garnish 🙂
Substitutions That Work
No cauliflower? Try broccoli or Brussels sprouts for a similar crispy vibe. Out of smoked paprika? Swap it for regular paprika or a pinch of chili powder for some heat. Want it vegan? Skip the parmesan and stick with herbs or nutritional yeast for a cheesy flavor. The key is that crispy, seasoned coating, so don’t skimp on the oil or spices!
Step-by-Step: How to Make Baked Cauliflower
Ready to cook? This is so easy, you’ll wonder why you ever boiled cauliflower. Here’s how to nail it:
Step 1: Prep the Cauliflower
- Preheat your oven to 425°F (220°C). Line a baking sheet with parchment paper or lightly grease it.
- Wash and cut the cauliflower into bite-sized florets. Pat them dry with a paper towel to ensure crispiness.
- Make sure the florets are roughly the same size for even roasting.
Step 2: Season the Florets
- Toss the cauliflower florets with olive oil, smoked paprika, garlic powder, onion powder, salt, pepper, and red pepper flakes (if using) in a large bowl.
- Mix until every floret is evenly coated. Get in there with your hands—it’s messy but fun!
Step 3: Roast to Perfection
- Spread the florets in a single layer on the baking sheet. Don’t crowd them—they need space to get crispy.
- Roast for 25-30 minutes, flipping halfway through, until the edges are golden and slightly charred.
- If using parmesan, sprinkle it over the cauliflower for the last 5 minutes of roasting.
Step 4: Serve It Up
- Transfer the cauliflower to a serving dish and garnish with fresh parsley or a sprinkle of parmesan for extra flair.
- Serve hot as a side, appetizer, or even a snack—no judgment here!
- Pair it with a dipping sauce like ranch or aioli for extra fun.
Pro tip: I once skipped drying the cauliflower, and it turned into a steamed mess. Pat those florets dry to get that crispy, golden edge!
Tips for Nailing Baked Cauliflower
Wanna make this dish next-level? Here are my go-to tricks:
- Dry Thoroughly: Pat the cauliflower dry to avoid steaming. Wet florets are the enemy of crispiness. :/
- Use Enough Oil: Olive oil helps the spices stick and ensures that golden crust. Don’t be shy, but don’t drown it.
- Space Them Out: Spread the florets in a single layer to roast properly. Crowding leads to soggy results.
- Flip Halfway: Flip the cauliflower halfway through roasting for even browning on all sides.
- Taste the Seasoning: Adjust the spices before roasting. A pinch of extra paprika can make it pop, IMO.
Ever wonder why roasted cauliflower tastes so much better than steamed? It’s that caramelized, crispy texture that turns a bland veggie into a star.
Variations to Mix It Up
Bored of the classic? Try these twists to keep things fresh:
Spicy Sriracha Cauliflower
Add 1 tsp sriracha or extra red pepper flakes to the seasoning mix for a fiery kick that wakes up your taste buds.
Parmesan Garlic Cauliflower
Sprinkle ¼ cup grated parmesan and an extra ½ tsp garlic powder before roasting for a cheesy, garlicky upgrade.
Lemon Herb Cauliflower
Mix in 1 tsp lemon zest and 1 tsp dried oregano for a bright, Mediterranean-inspired flavor.
Buffalo Cauliflower Bites
Toss with 2 tbsp buffalo sauce instead of paprika for a spicy, game-day-ready twist. Serve with blue cheese dip!
Storing and Reheating Like a Pro
Got leftovers? You’re in luck! Here’s how to keep that cauliflower tasting fresh:
- Storing: Store in an airtight container in the fridge for up to 3 days. It’ll lose some crispiness but still tastes great.
- Freezing: Freeze roasted cauliflower for up to 1 month. Spread on a tray to freeze individually, then transfer to a freezer bag.
- Reheating: Reheat in the oven at 400°F (200°C) for 10-12 minutes to revive the crispiness. Microwave works, but it softens the texture.
I’ve reheated these as a quick snack, and they’re still so good. The oven method brings back that crispy edge like nobody’s business!
FAQs About Baked Cauliflower
Got questions? I’ve got you covered. Here’s what folks usually ask:
Can I use frozen cauliflower?
Yup! Frozen cauliflower works fine—just thaw and pat dry to avoid extra water ruining the crisp.
Why isn’t my cauliflower crispy?
You might’ve skipped drying the florets or overcrowded the pan. Dry them well and give them space to roast.
Can I make this ahead of time?
Totally! Prep the seasoned cauliflower, cover, and refrigerate for up to 24 hours before roasting. Add 5 minutes to the cook time.
Is this recipe gluten-free?
Yes, it’s naturally gluten-free! Just check your spices or parmesan for any additives.
What’s a good main dish to pair with this?
This cauliflower pairs perfectly with grilled chicken, steak, or a quinoa salad. I love it with a juicy burger for a fun meal.
Relared Recipes:
- Easy Cream Cheese Chicken – Quick & Creamy Dinner Recipe
- Quick & Easy Stovetop Chili Recipe for Busy Nights
- Quick Delicious Japanese Omurice Recipe
Final Thoughts
So, there you have it—baked cauliflower, the ultimate veggie side dish that’s crispy, flavorful, and oh-so-easy. It’s like cauliflower got a major glow-up, ready to steal the spotlight at any meal. Whether you’re serving it with a fancy dinner or munching it as a snack, this dish delivers big on taste with minimal effort. Grab your cauliflower, fire up the oven, and get ready for a side that’ll have everyone asking for seconds. What’s stopping you from making this tonight? 🙂
Baked Cauliflower: Easy, Crispy, Flavorful Recipe
Ingredients
- 1 medium head cauliflower cut into florets
- 2 tbsp olive oil
- ½ tsp garlic powder
- ½ tsp paprika
- Salt to taste
- Black pepper to taste
- 2 tbsp grated Parmesan cheese optional
Instructions
- Preheat oven to 425°F (220°C).
- Line a baking sheet with parchment paper.
- In a bowl, toss cauliflower with olive oil and seasonings until well coated.
- Spread cauliflower in a single layer on the prepared sheet.
- Bake for 25–30 minutes, turning halfway, until golden and tender.
- Sprinkle with Parmesan (if using) and serve hot.
Notes
For a spicier version, toss with red chili flakes before baking.
Try adding curry powder or turmeric for a fun twist.
DID YOU MAKE THIS EASY RECIPE?
If you have, then share it with us by sending a photo. We’re excited to see what you’ve made:Printable Recipe Card
Want just the essential recipe details without scrolling through the article? Get our printable recipe card with just the ingredients and instructions.