Ever bit into a smooth, decadent chocolate truffle and thought, “Wow, this is way too fancy for me to ever make at home”? Yeah… me too. That is, until I actually tried it and realized — surprise! — it’s not only doable, it’s stupidly easy. And let me tell you: once you make your own, you’ll never look at store-bought truffles the same way again.
In this article, I’ll walk you through how to make your own chocolate truffles, share some of my oops-but-it-worked tips, and throw in a few flavor ideas to make you look like a total pro (even if you’re wearing pajamas and have chocolate all over your face. No judgment here).
Ready? Let’s roll — literally.
Why Make Your Own Chocolate Truffles?
Store-Bought vs. Homemade: A Showdown
Here’s the thing: store-bought truffles are fine. I mean, if “fine” means overpriced, overly sweet, and suspiciously waxy.
When you make them yourself, you get:
- Better quality chocolate — because you choose it.
- Fresher flavors — nothing sits on a shelf for months.
- Customizable magic — want a hint of sea salt and chili? Go wild.
And FYI: you don’t even need fancy equipment. If you’ve got a bowl, a spoon, and a fridge, you’re good to go.
What You’ll Need to Make Chocolate Truffles
Alright, let’s talk ingredients. Don’t worry — no unicorn tears required.
Here’s your grocery list:
- Good quality chocolate (at least 60% cacao — trust me, it matters)
- Heavy cream
- Butter (optional, but adds creaminess)
- A pinch of salt (because life without salt is just sad)
- Cocoa powder, nuts, coconut flakes, or sprinkles (for coating)
That’s it. Seriously. You can also add flavorings if you’re feeling fancy — like vanilla extract, espresso powder, or even a splash of liqueur. But more on that later.
Step-by-Step: How to Make Chocolate Truffles
So how does this magic happen? I’ll break it down step by step. You might even feel like a chocolatier by the end of it. Or at least you’ll have some wicked good truffles.
Step 1: Chop the Chocolate
Grab your chocolate bar and a knife. Chop it into small, even pieces. Why? Because smaller pieces melt faster and more evenly. Ever wondered why your chocolate sometimes clumps? Big chunks + impatience = sad chocolate.
Step 2: Heat the Cream
In a small saucepan, heat your heavy cream until it just starts to simmer. Don’t let it boil — unless you enjoy cleaning burnt cream off your stovetop.
Step 3: Make the Ganache
Pour the hot cream over your chopped chocolate. Let it sit for a minute (no poking, promise it’s working). Then stir until smooth and glossy. Add butter and a pinch of salt if you like. At this point, you can also add any flavorings.
Step 4: Chill Out
Cover the ganache and let it chill in the fridge for at least 2 hours. Overnight is even better, IMO. The goal? A firm-but-scoopable texture.
Step 5: Roll With It
Once the ganache is firm, use a spoon or melon baller to scoop out small amounts. Roll them into balls between your hands. Pro tip: wear gloves if you don’t want to look like you wrestled a chocolate fountain.
Step 6: Coat the Truffles
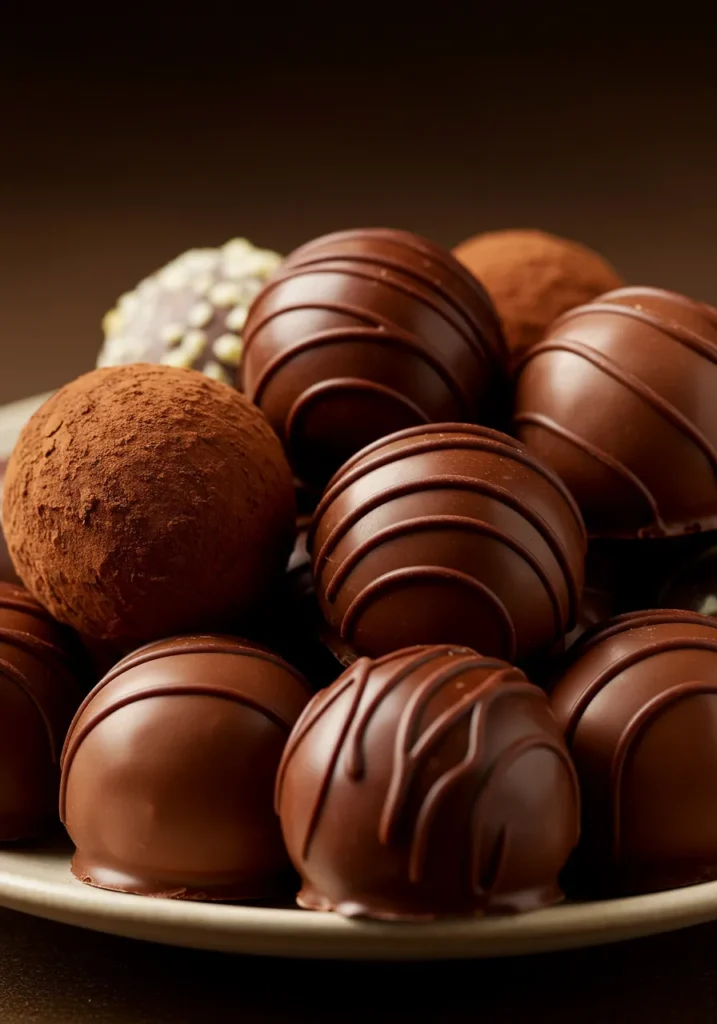
Roll your truffles in cocoa powder, finely chopped nuts, shredded coconut, or even crushed cookies. Go crazy — no one’s judging.
And boom: you’ve got homemade chocolate truffles.
Flavor Ideas That’ll Make Everyone Think You’re Fancy
Plain chocolate truffles? Delicious. But why stop there? Here are some ideas to spice things up:
- Espresso Truffles: Stir in a teaspoon of instant espresso powder.
- Sea Salt Caramel Truffles: Add a drizzle of caramel in the center and sprinkle with flaky sea salt.
- Boozy Truffles: Add a tablespoon of rum, brandy, or Bailey’s. (Pro tip: don’t overdo it or they won’t set.)
- Chili Chocolate Truffles: Add a pinch of cayenne or chili powder for a kick.
Ever wondered why professional truffles taste so layered? That’s why — the little flavor twists make them unforgettable.
Common Mistakes to Avoid (Because I’ve Made Them All)
Look, I’m not perfect. You’re probably not perfect. And ganache is definitely not perfect if you mess with it too much. Here are a few things I learned the hard way:
- Don’t let your cream boil. It can scorch and ruin the flavor.
- Don’t skimp on the chocolate quality. Bad chocolate = bad truffles. End of story.
- Don’t over-handle the ganache when rolling. It’ll melt faster than your willpower at a dessert buffet.
- Don’t store them at room temperature if it’s hot. They’ll melt into sad puddles of regret.
How to Store and Serve Your Truffles
You’ve made these little chocolate gems — now what?
- Store them in an airtight container in the fridge. They’ll keep for about 1–2 weeks.
- Bring them to room temperature before serving so the texture is creamy and smooth.
- Want to impress guests? Arrange them in cute little mini-cupcake liners.
Ever tried hiding them from your family? Yeah, good luck with that.
Why Homemade Truffles Make the Best Gifts
Let’s be real: nothing screams “I care about you” like a box of homemade chocolate truffles. IMO, they’re way better than another scented candle or generic gift card.
- They’re personal.
- They look fancy, but are actually easy.
- You can customize flavors for each person.
Wrap them in a cute box, tie a ribbon, and boom — you’re officially everyone’s favorite person. 🙂
A Few Pro Tips to Elevate Your Truffle Game
Because you’re clearly about to become a truffle master, here are a few more tips to take it up a notch:
- Use gloves when rolling to avoid fingerprints.
- Chill your hands with an ice pack beforehand (sounds weird, works wonders).
- Use a fork or toothpick to help coat truffles in melted chocolate for a pro finish.
- Experiment with white or milk chocolate ganache if dark chocolate isn’t your vibe.
Ever wondered how chocolatiers get their truffles so uniform? They use a small scoop and weigh each one. But let’s be honest — who’s got time for that?
Related Recipes
Final Thoughts: Are You Ready to Roll?
So there you have it — everything you need to know to whip up a batch of irresistible, melt-in-your-mouth chocolate truffles. It’s easier than it looks, cheaper than buying them, and way more fun than pretending you like that store-bought box from your aunt.
Why settle for mediocre when you can make magic in your own kitchen?
Next time you’re craving something indulgent, or you want to impress someone (even if it’s just yourself — because you’re worth it), grab some good chocolate and roll up your sleeves. FYI: wearing an apron is optional, but highly recommended if you’re as clumsy as I am.
Now go forth and make some chocolatey happiness. And hey — save me one, okay? 😉
TL;DR (Because Sometimes We Just Want the Highlights)
- Homemade truffles > store-bought — better taste, fresher, customizable.
- All you need: chocolate, cream, butter (optional), and a pinch of salt.
- Heat cream, pour over chopped chocolate, chill, roll, coat, devour.
- Get creative with flavors and coatings.
- Store them in the fridge, and enjoy within a week or two (if they even last that long).
So, what do you say? Ready to turn your kitchen into a tiny truffle factory? If you try this recipe, don’t forget to brag about it — send me a pic, tag your friends, and watch them drool. After all, sharing is caring… unless it’s the last truffle. Then all bets are off. 😉
If you’d like, I can also draft you a printable recipe card version of this recipe — just say the word!

Chocolate Truffles Recipe
Ingredients
- 8 oz 225g semi-sweet chocolate, finely chopped
- ½ cup 120ml heavy cream
- 1 tsp vanilla extract
- Cocoa powder sprinkles, or chopped nuts (for coating)
Instructions
- Place chopped chocolate in a heatproof bowl.
- Heat cream in a saucepan until it just begins to simmer.
- Pour hot cream over chocolate and let sit 2 minutes.
- Stir until smooth, then mix in vanilla extract.
- Cover and refrigerate until firm, about 2 hours.
- Scoop small portions and roll into balls with your hands.
- Roll each truffle in cocoa powder, sprinkles, or nuts.
Notes
- Use good-quality chocolate for the best flavor.
- You can add a splash of liqueur for an adult twist.
- Store in the fridge for up to 2 weeks.
DID YOU MAKE THIS EASY RECIPE?
If you have, then share it with us by sending a photo. We’re excited to see what you’ve made 🙂Printable Recipe Card
Want just the essential recipe details without scrolling through the article? Get our printable recipe card with just the ingredients and instructions.

